
That's it. Your child is now old enough to be able to use an iPhone or iPad independently. However, this autonomy should not turn into total freedom and it is desirable that you keep an eye on their activities and their daily usage time.
How then to supervise this use without interfering in their privacy. To manage this rather delicate situation, Apple has set up a parental control system that is quite simple to configure. Thanks to it, you can easily keep an eye on your children's use of their iPhone or iPad, without you having to interfere with their device.
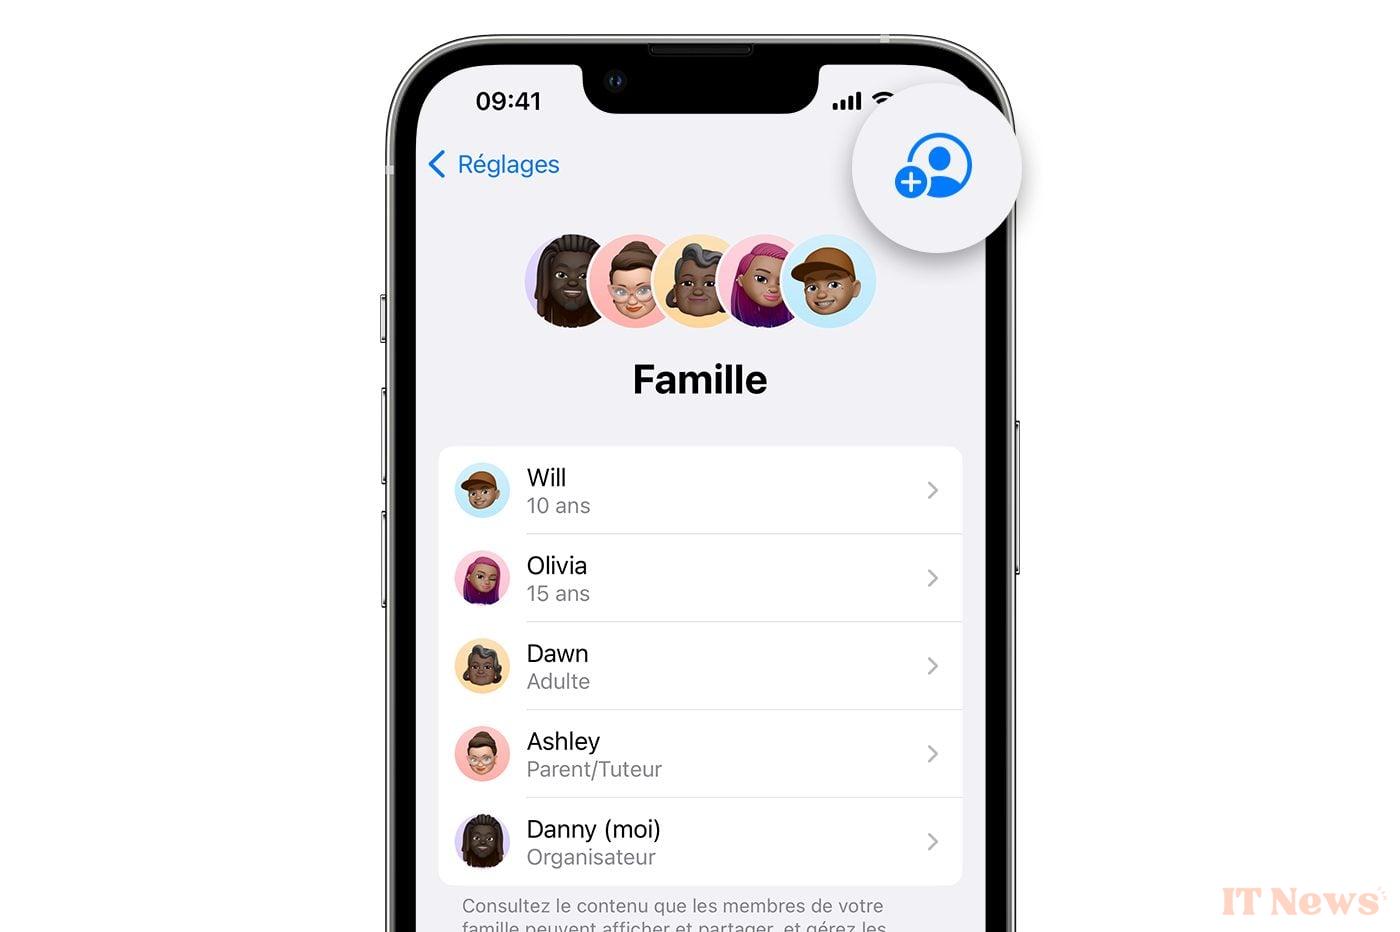
To configure parental controls on an Apple device, you will first need to configure family sharing. This feature, which allows you to create a group of up to six people, makes it easy to share all content and subscriptions to services on Apple's various platforms (music, movies, series, iCloud), as well as your respective locations with all family group users. Similarly, each member of the family group can make purchases that will then be paid for by the group Organizer.
By extension, family sharing also allows you to set up an Apple ID for a child. You can then remotely define authorizations on your child's devices, but also configure their screen time or validate their purchases. Family sharing will allow you to supervise your children's use of their Apple device from your iPhone (or iPad).
1. Create a family group
If you haven't already done so, start by creating your family group. To do this, open the iOS Settings, tap on your name (your Apple ID), and enter the Family Sharing menu. Now tap Set up your family and follow the on-screen instructions to invite the different members of your family.
For example, you can invite your spouse, who you can then set as an Adult authorized to supervise a child's device. As for your child, if they already have an Apple ID, you can invite them directly to join the family group you just created. Otherwise, you will need to create their own Apple ID.
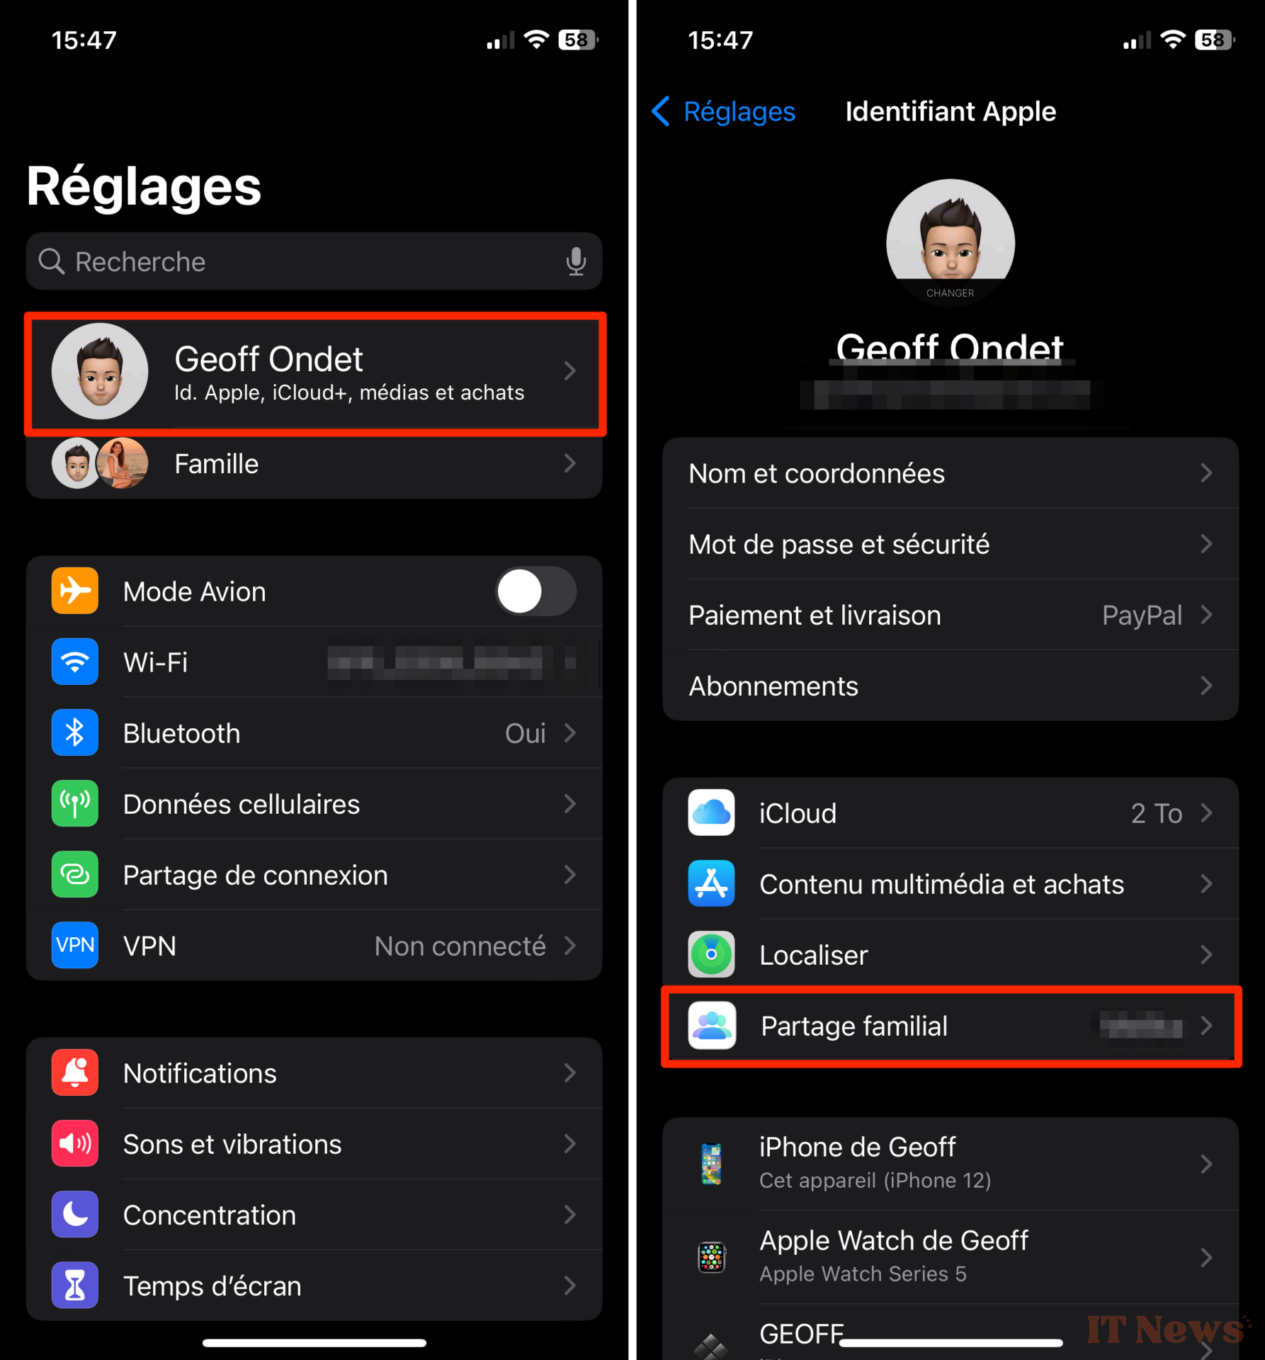
2. Create an Apple ID for your child
To create your child's Apple ID, still in the Settings > Your name > Family Sharing, press the + button at the top right of the screen, then in the window that appears, choose to Create a child account.

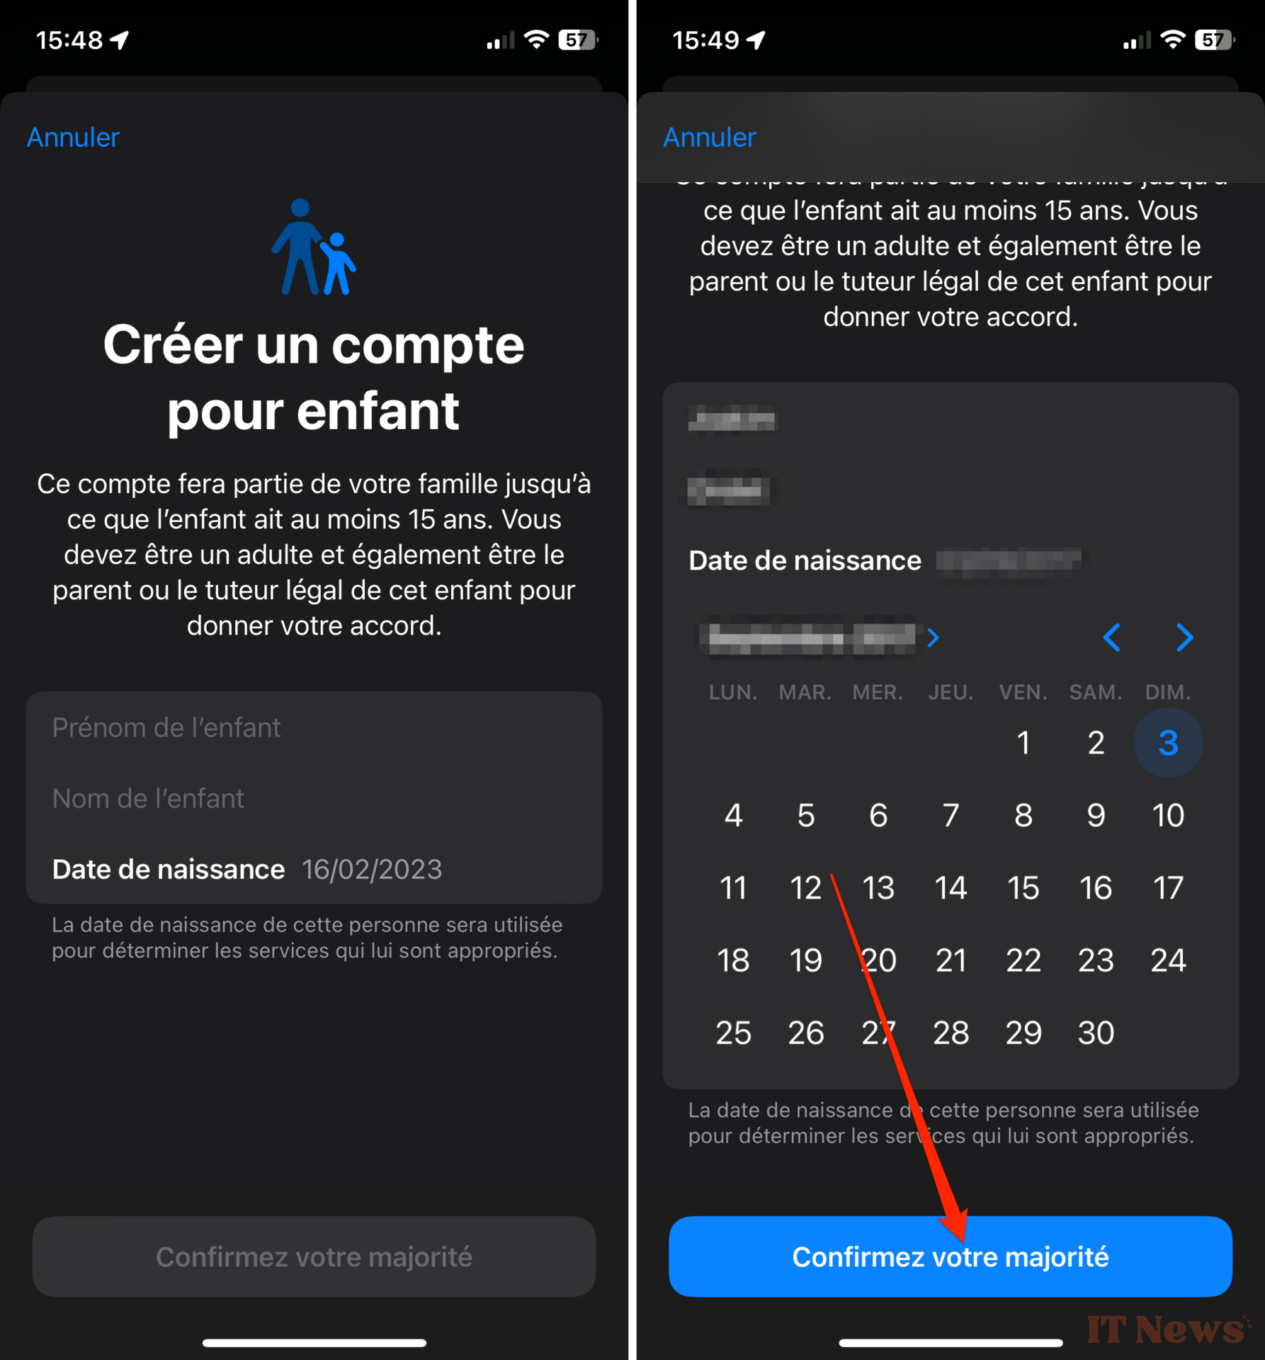
Now enter the child's first and last name, as well as their date of birth, and press the button Confirm your majority.
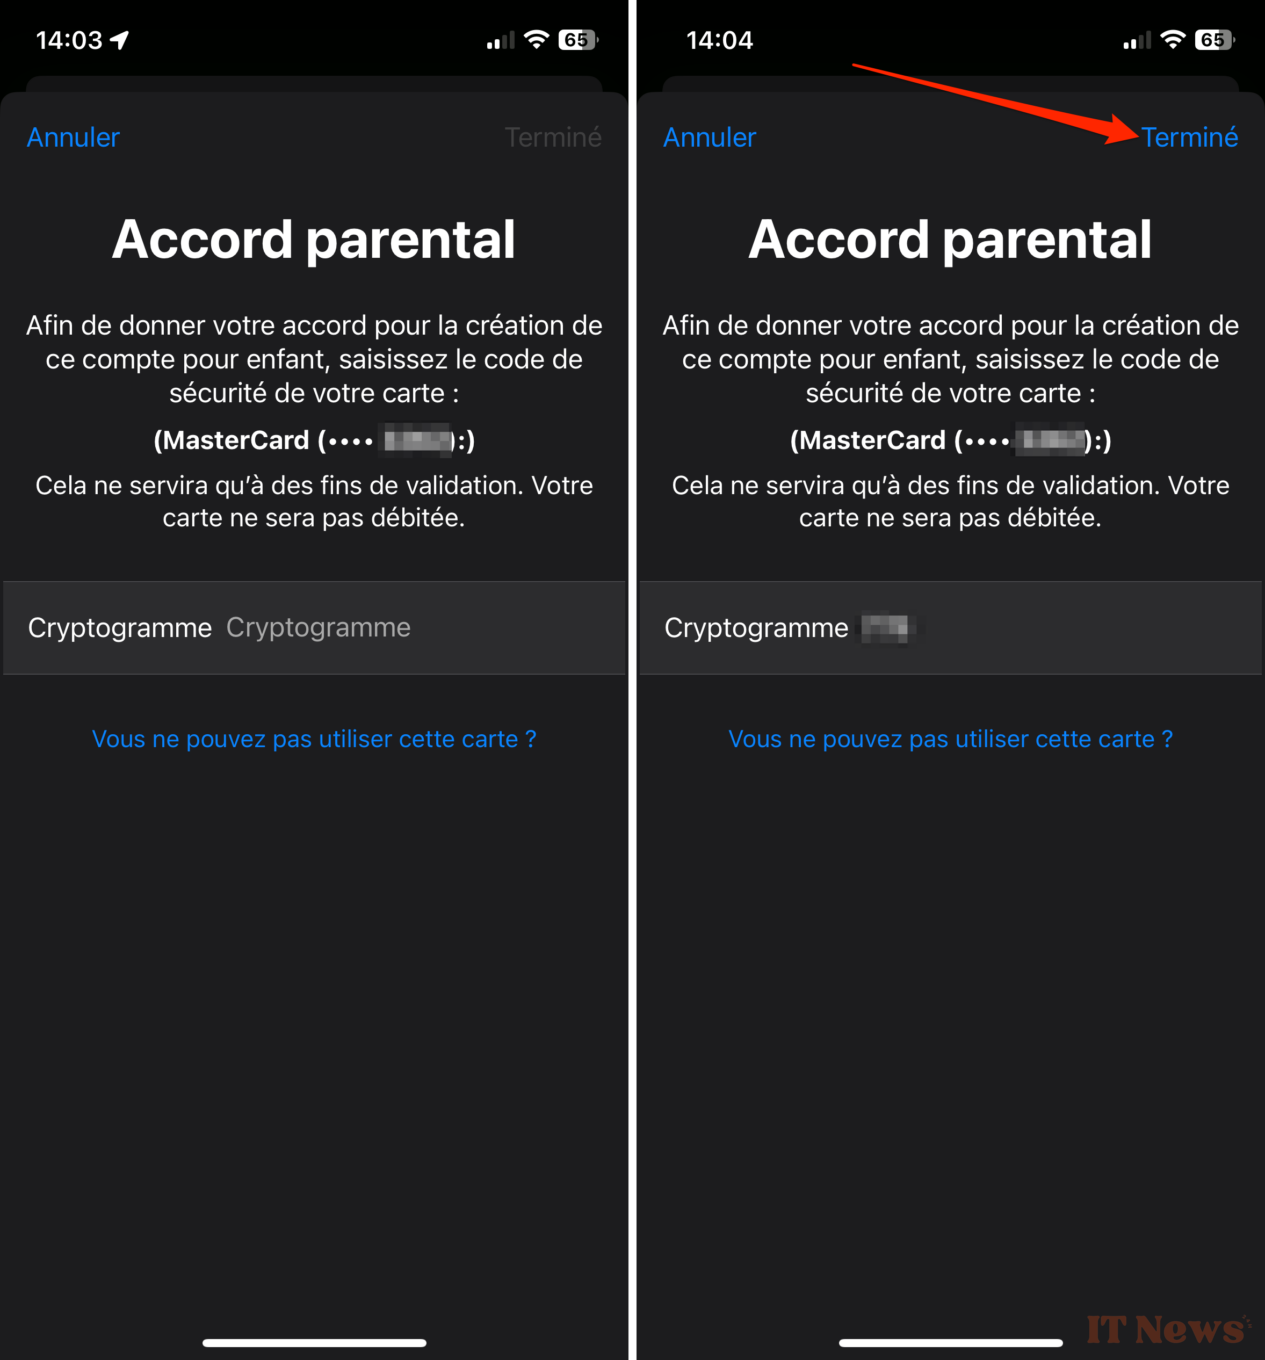
The next window asks you to validate the Parental Agreement. To do this, depending on the payment method used on your account, you will receive a code by SMS, or you will have to enter the cryptogram of your bank card. Then press Done at the top right.
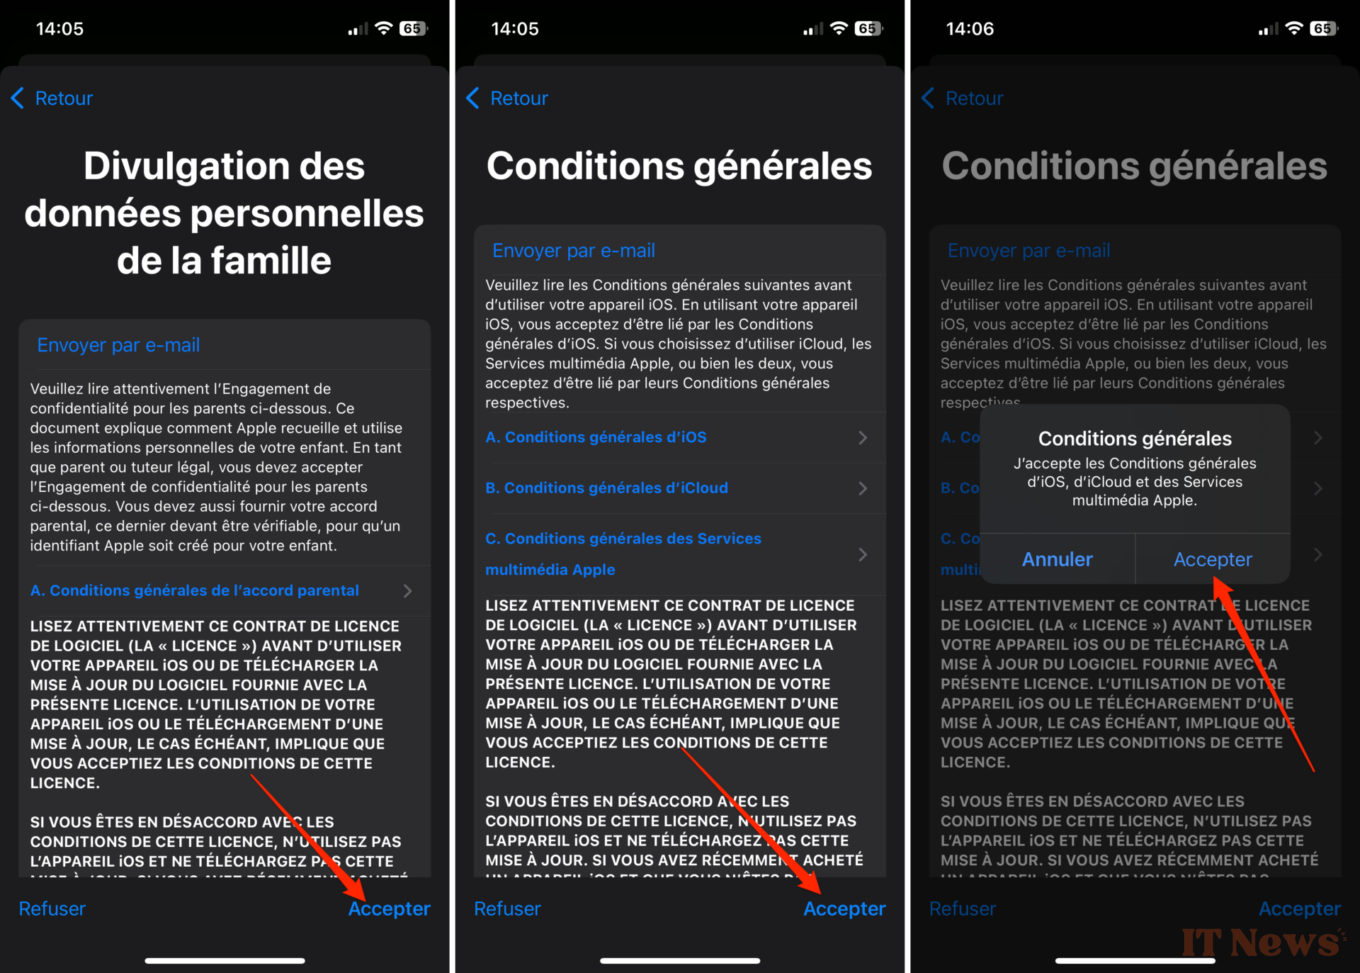
You will then need to Accept the Family Personal Data Disclosure terms and conditions as well as Apple's Terms of Service. A confirmation pop-up will ask you one last time to Accept to validate your decision firmly and definitively.
Now it's time to customize the email address associated with your child's Apple ID. Tap Continue once you're happy with the email address prefix, then in the pop-up that unfolds from the bottom of the screen, tap Create Email Address. You will then be prompted to create and confirm your child’s Apple account login password.

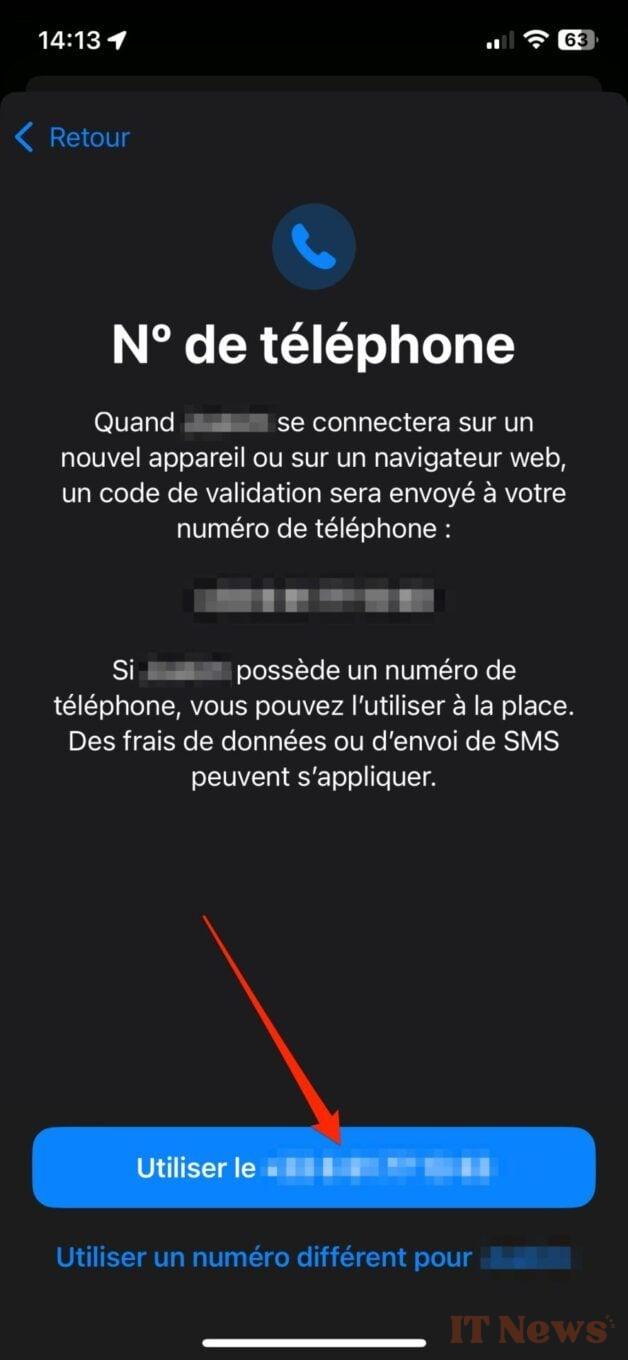
Apple will now ask you to confirm the phone number that will be used to send verification codes when your child logs in on a new device or web browser. By default, your phone number is selected. If you are happy with this, tap Use [YourNumber]. However, if your child has a number, you can choose to use their number.
3. Configure parental control options
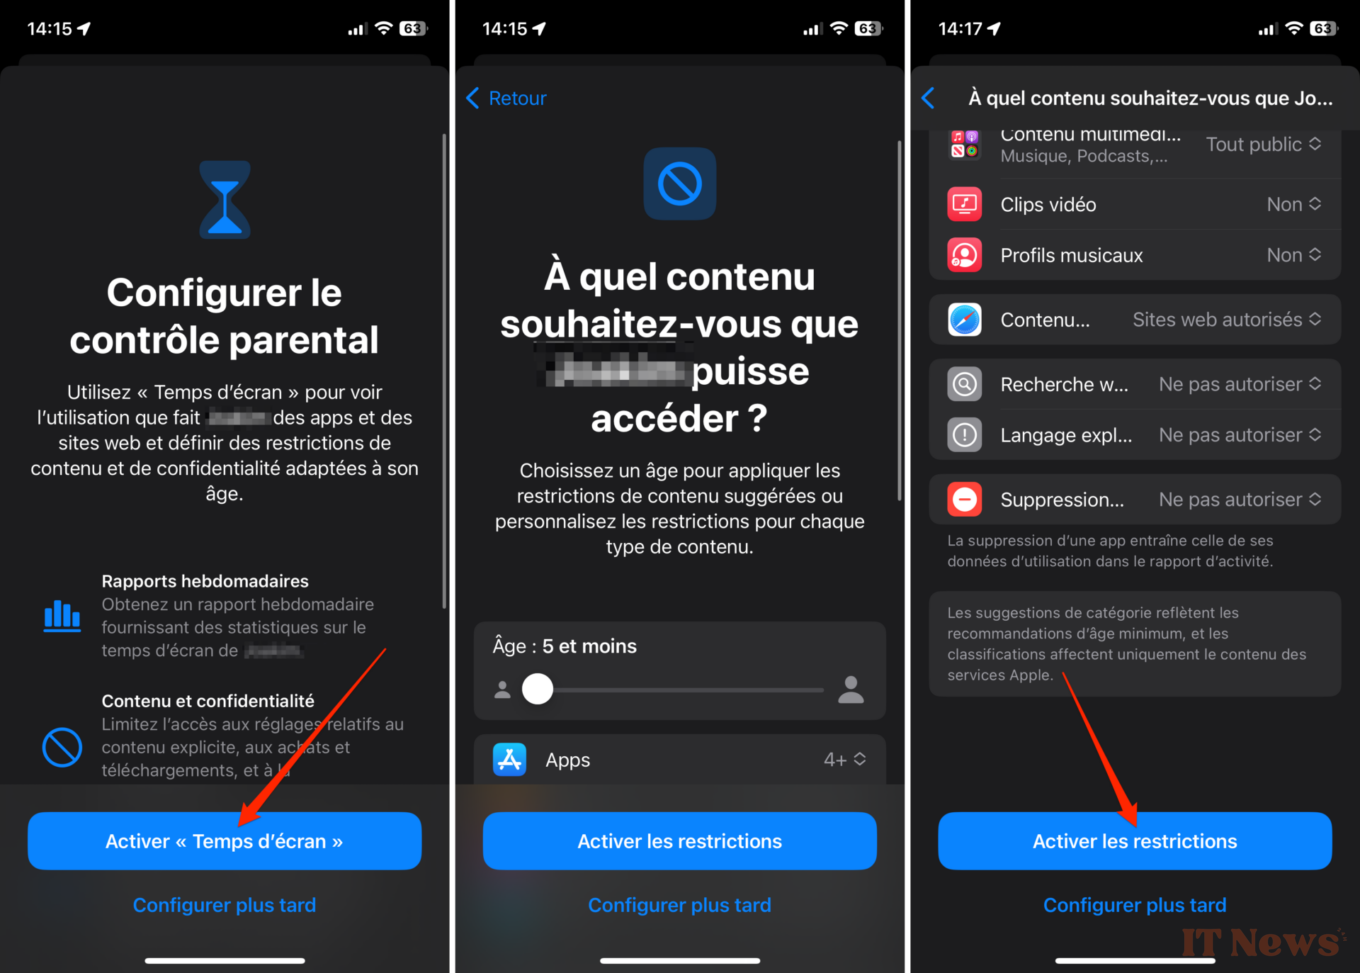
You must now Configure parental control that will apply to your child's iPhone or iPad. The procedure is simple and is automatically offered to you after creating your child's Apple account. Then tap Activate "Screen Time". Review the restrictions selected by default by Apple, and customize it according to your requirements. Then validate them by pressing Activate restrictions.
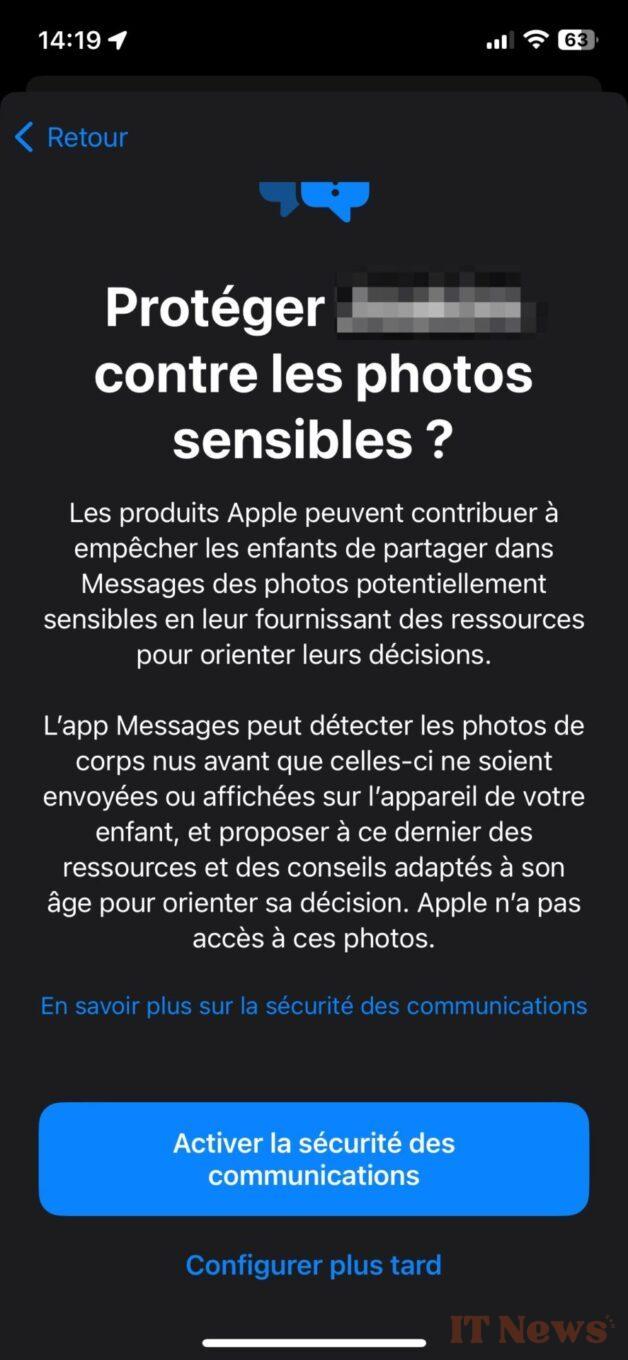
Apple will then ask you whether or not you want to Activate communication security. This safeguard is intended to prevent your offspring from sharing potentially sensitive photos in the Messages application. Indeed, Apple's messaging app is able to automatically detect photos of naked bodies before they are sent or displayed on the screen.
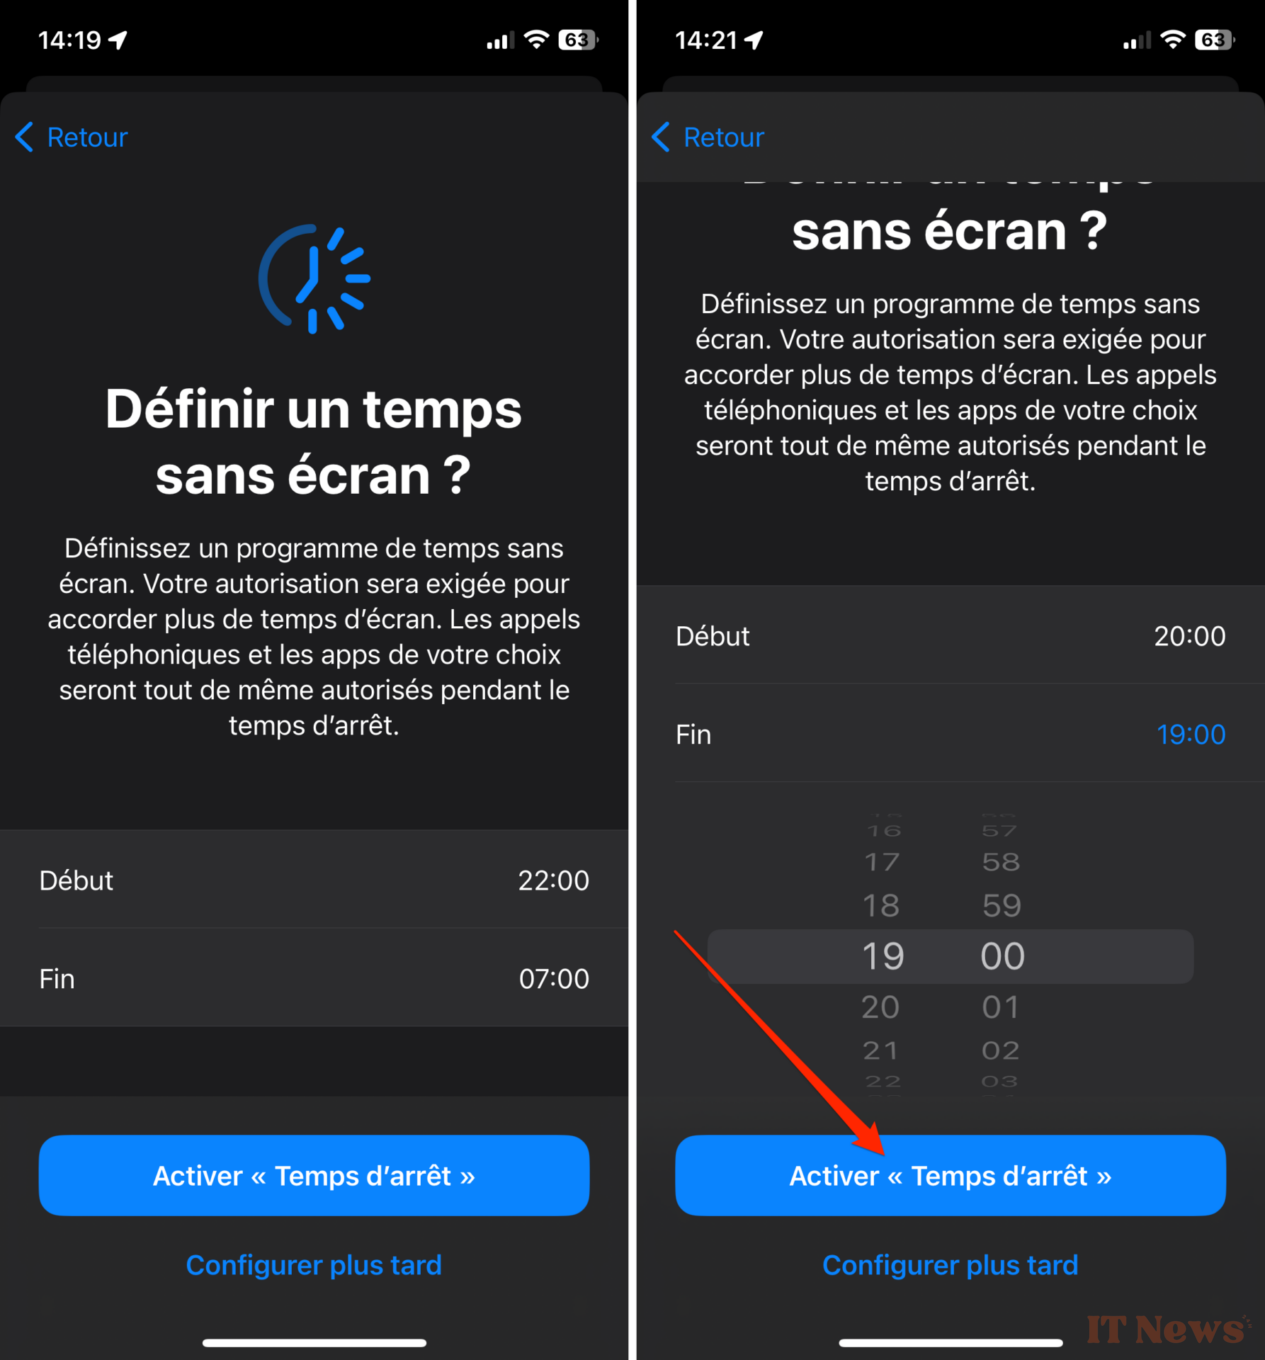
You will also need to Set a screen-free time. This will allow you to determine a time slot during which your child will not be able to use their iPhone or iPad without your permission. You can, however, choose to allow certain applications or features during this downtime. Once the time slot is set, tap Enable “Downtime”.
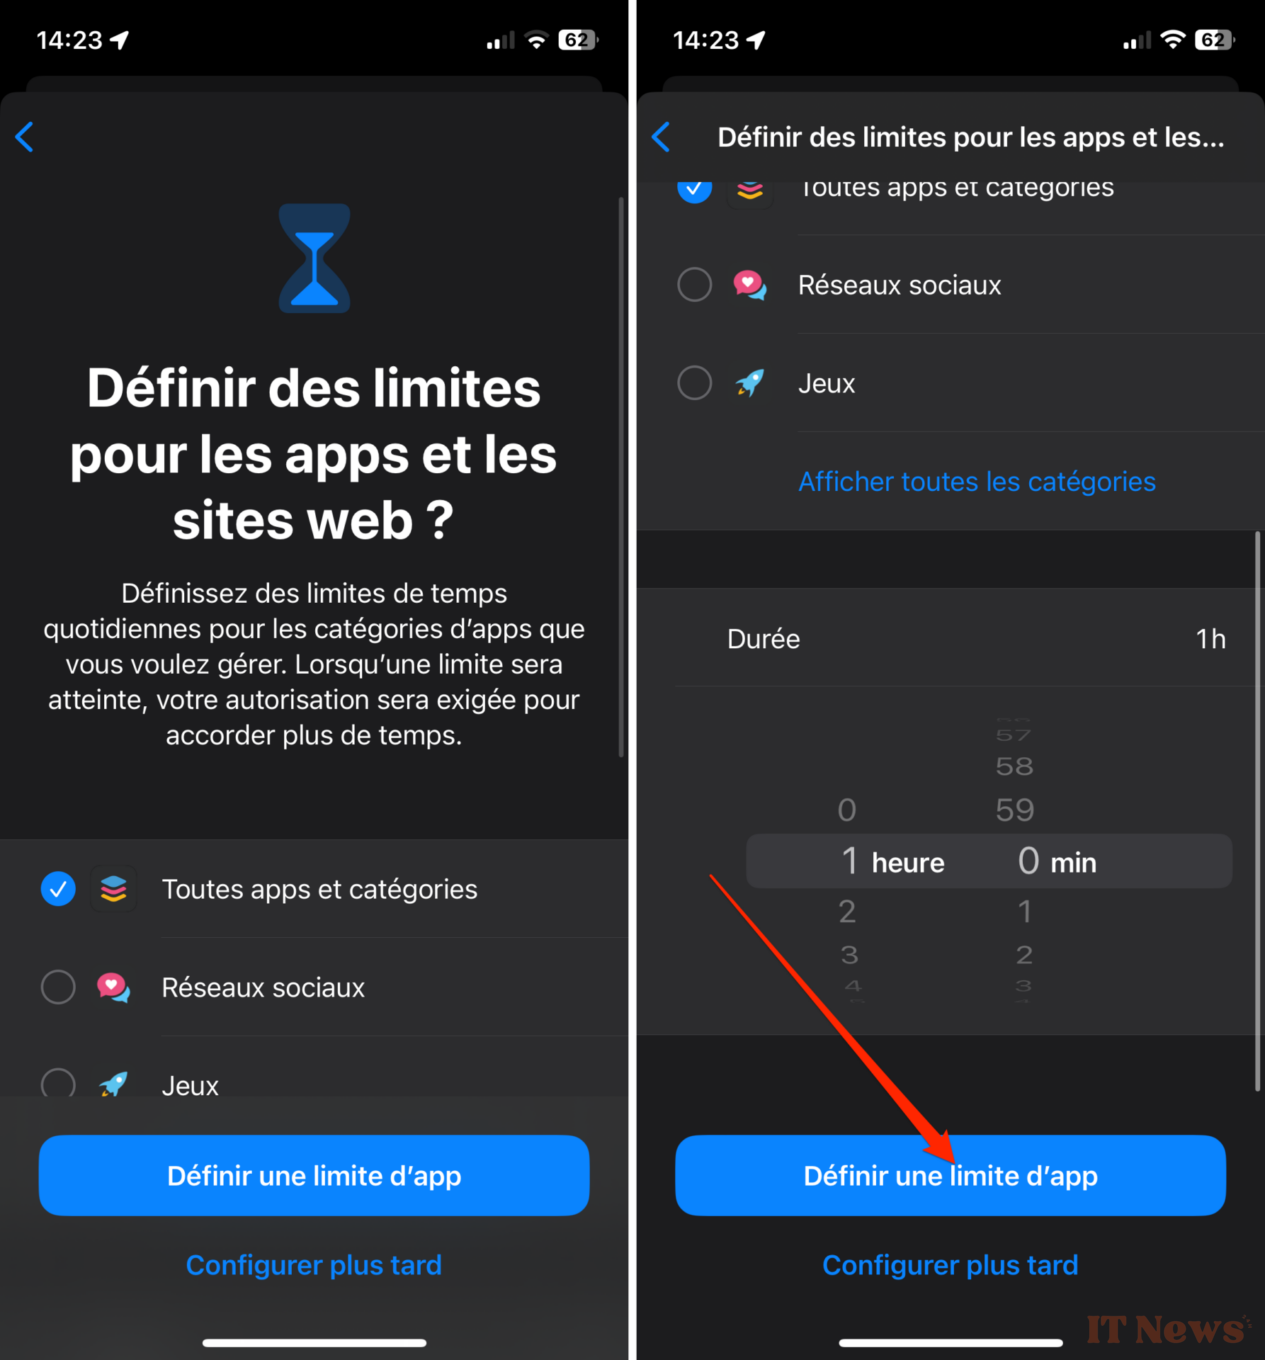
Apple will ask you to Set limits for apps and websites. This option allows you to set daily time limits after which your child will no longer be able to use certain categories of apps. Once you have set this duration, tap Set an app limit.
Finally, you will need to create a “Screen Time” Code. Once your child has exceeded the time limits you have set in Screen Time, their device screen will be locked and they will need to enter this four-digit code to unlock the device.

Also, remember to review all of the other settings offered in Screen Time to properly set all of your limits. For example, you can limit communications by restricting their exchanges with certain authorized contacts.
4. Set up your child's iPhone
The parental controls associated with your child's Apple account are now set up. You can now set up their iPhone or iPad (which you will have previously reset), with their account. Launch the device setup as you normally would, and choose to Set it up for a child in the family. You will then be prompted to connect the Apple account of a parent or guardian (in other words, your Apple account) before selecting the account of the child who will use the device.
You will then need to Create a passcode for this iPhone that you and your child will use to unlock the device. The rest of the setup is similar to that which you would have to set up the device for your use. Finally, you will only have to press the Continue button when iOS displays that the device is Ready for [your child's name].
5. Adjust your child's permissions
Theoretically, you do not need to access your child's device to adjust the parental control settings. Everything can be done directly from your iPhone. So, when your child asks for your permission for additional screen time, or to validate the download or purchase of a new application, you can do it directly from your iPhone.
To do this, simply go to iOS Settings, select Family, then access the menu dedicated to your child's device. You will then be able to have an overview of their usage, such as their screen time, and will be able to adjust certain settings, or respond to the permission requests they have sent you.


0 Comments