

Cleaning up your computer's hard drive is never easy. In addition to not really knowing where to start, having a clear idea of the items that are taking up the most storage space isn't always easy.
Fortunately, macOS includes a storage manager. However, the utility that was previously integrated since macOS Sierra has been modified somewhat in macOS Sequoia. Previously, the tool displayed several suggestions for easily recovering storage space, for example by storing in iCloud, or by automatically emptying the trash.
These recommendations having been removed in Sequoia, you now have to manually explore each category in the storage manager to clean it up. However, you can still easily identify the items that are taking up the most space on your machine's storage. Here's how to free up space on your Mac's storage.
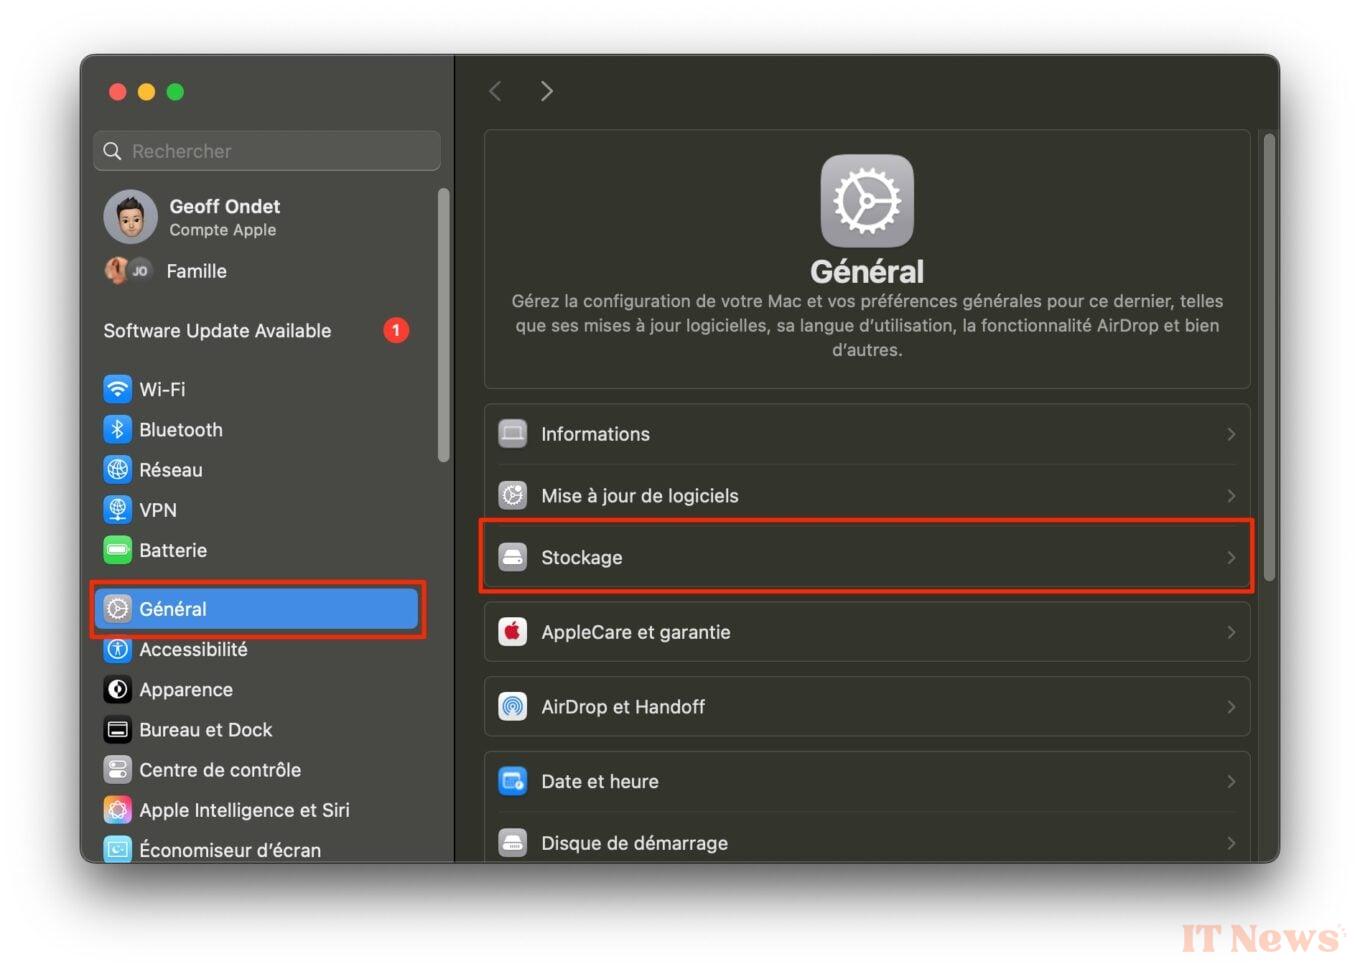
1. Open Storage Manager
Start by opening System Settings in macOS. Select General in the left column, then enter the Storage menu. Wait a few moments while macOS calculates the space occupied on your Mac for each category of files.
2. Identify large unused applications
In the iOS storage manager window, click on the [i] button in the Applications line. macOS will then list all the applications installed on your Mac, sorting them by size. This is often the position that takes up the most storage on your Mac.
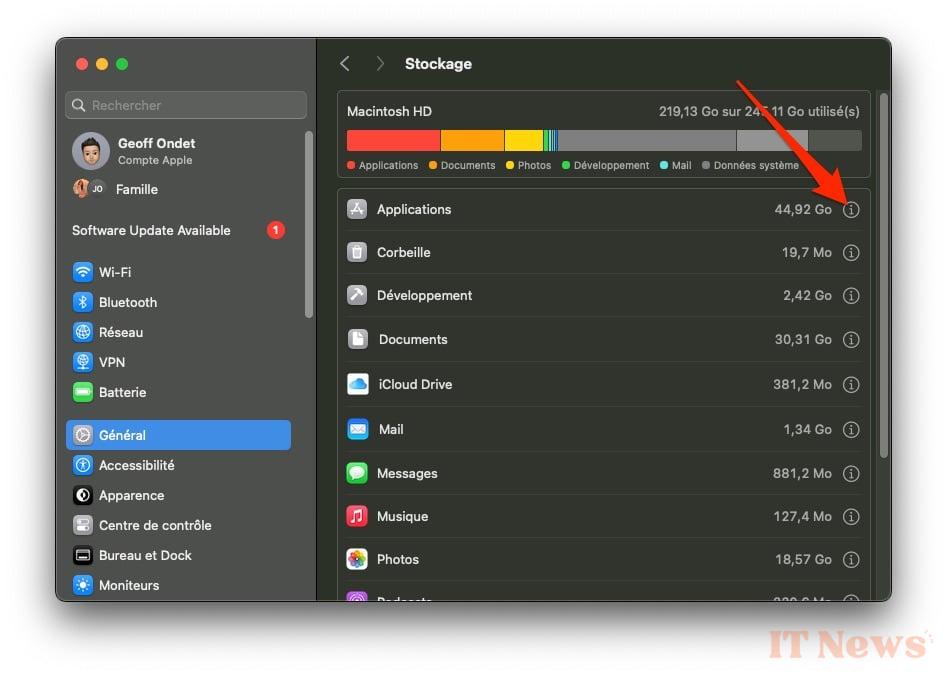
Identify all the largest applications that you no longer use and that can be deleted. Select one and click the Delete button, then in the pop-up that appears, click Delete to confirm the deletion of the application. Repeat the operation as many times as necessary to delete all unused applications. Click Finish once the cleaning of the applications is finished.
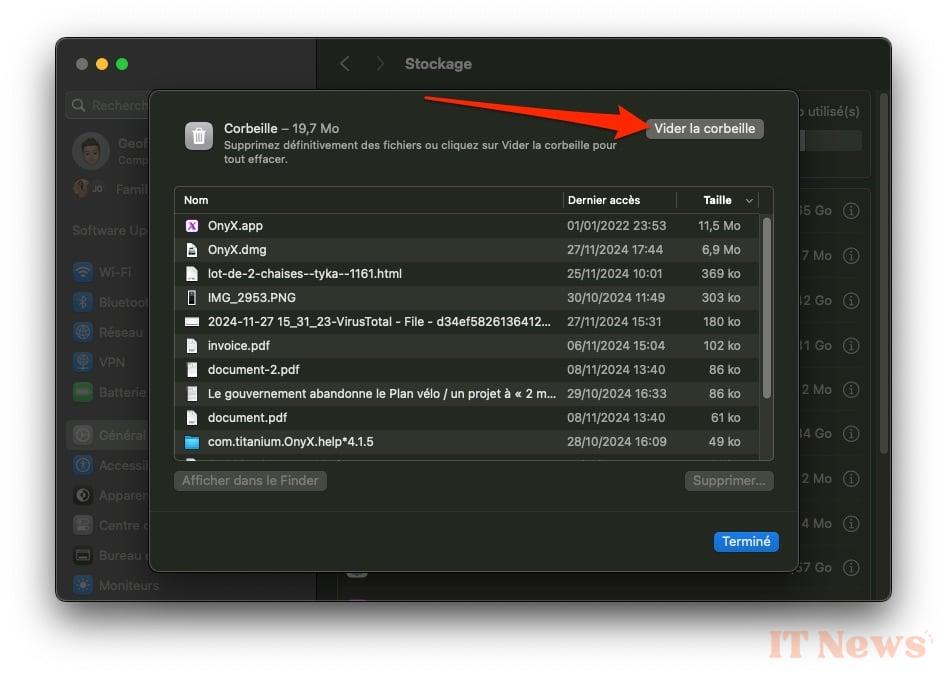
3. Empty the Recycle Bin
While this may seem obvious, it often happens that we forget to empty the Recycle Bin after deleting files. Now click on the [i] button associated with the Recycle Bin line. Review the items there (in case you change your mind about something) and then click Empty Trash, then click the same button again in the pop-up that opens on the screen, to get rid of these files permanently.
4. Clean up Documents, Messages, and Music
Repeat the same process for Documents, as well as for Messages. For each, locate the largest files that you no longer need from the iOS storage manager and click Delete to get rid of them.
Note that for Documents, you can explore the items based on the largest or those stored in the Downloads directory. You can even get a more global overview by selecting the File Browser tab to identify the largest folders.
5. Delete podcasts
If you subscribe to podcasts, it’s likely that you have a number of them downloaded locally on your Mac. Open the Podcasts app, and go to the Downloaded section. Then right-click on a podcast episode, or a group of podcasts, and select Delete Downloads. Then confirm the deletion by clicking the appropriate button in the pop-up that appears.
6. Move your data to iCloud
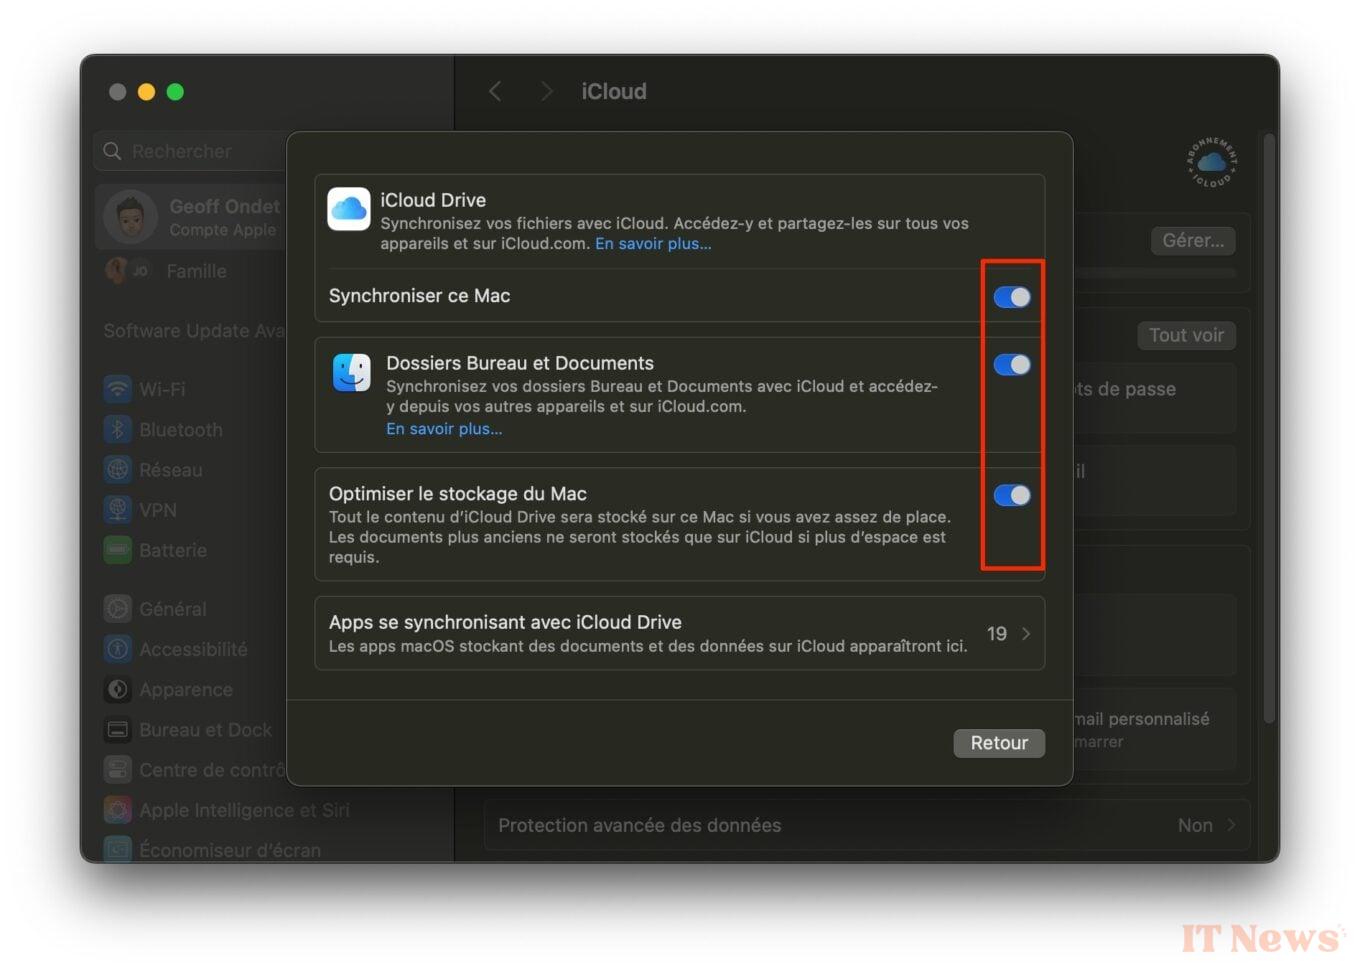
To save even more space, you can move some data to iCloud, provided, of course, that you subscribe to a paid subscription. If you choose to do so, you can go to System Settings > Apple Account > iCloud and click on See All in the Saved to iCloud section to check that all potentially space-consuming data, such as Photos, is synchronized.
Take the opportunity to go to the iCloud Drive section at the same time to check that your Mac is synchronized, that your Desktop and Documents folders are also synchronized, and that the Optimize Mac Storage option is enabled. This is how the oldest files will be automatically transferred to iCloud.
7. Optimize your Mac storage
If you have a large photo library and have a backup of it on iCloud, you can save a little more space. To do this, open Photos, and go to the Settings of the application, using the keyboard shortcut [Command +,] or from the Photos > Settings menu. Then select the iCloud tab, and make sure that the Optimize Mac Storage option is selected.
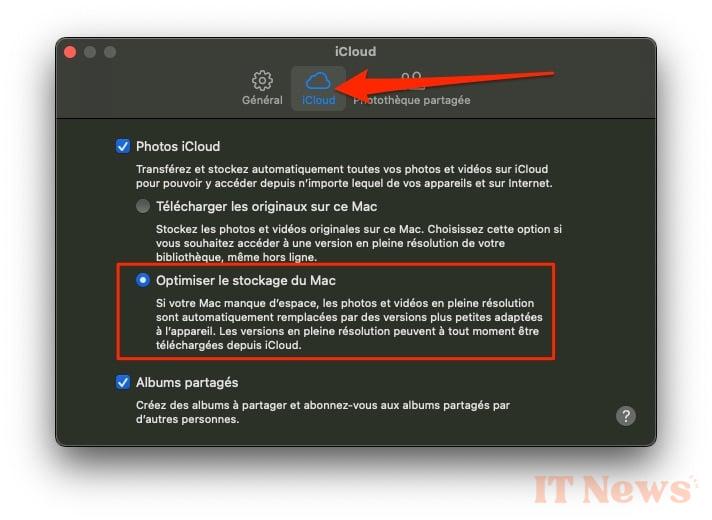
If your Mac is running low on storage space, full-resolution photos and videos will remain stored on iCloud, and will be replaced by a smaller version on your Mac's internal storage.
8. Set the Trash to empty automatically
To never forget to empty the Trash manually again, you can set it to automatically delete items after thirty days. To do this, open the Finder, and go to the Settings, either using the keyboard shortcut [Command + ,], or by clicking on the Finder > Settings menu.
Then go to the Advanced Options tab, and make sure that the Delete items from the Trash after 30 days option is selected.


0 Comments