
If you are used to installing Windows 11 with the official Microsoft ISO, you will have noticed that a number of applications that you do not need are installed by default on your PC. And unfortunately, Microsoft offers no other solution than to uninstall them, after the fact, from your PC if you want to get rid of them.
In addition to the waste of time, the operation can be quite frustrating if you are the type to frequently reinstall a fresh version of Microsoft's operating system on your PC. However, there is a very handy little script that, when used, can generate a version of Windows 11 stripped of its unnecessary applications. Tiny11, that's the name of this script (download here https://github.com/ntdevlabs/tiny11builder/releases), is based directly on the Windows 11 ISO installation disk image that you will have previously downloaded from the Microsoft website.
In total, a little over twenty applications that are normally installed natively are removed from this lightweight installation image. You will get rid of, among others, Clipchamp, Weather, Xbox, Maps, Connected Mobile, Internet Explorer, Edge, and One Drive.
Once this lightweight Windows 11 installation image is created, you will only have to create a bootable installation USB key to reinstall Windows 11 properly on your PC. Here's how to do it.
1. Open PowerShell in Administrator mode
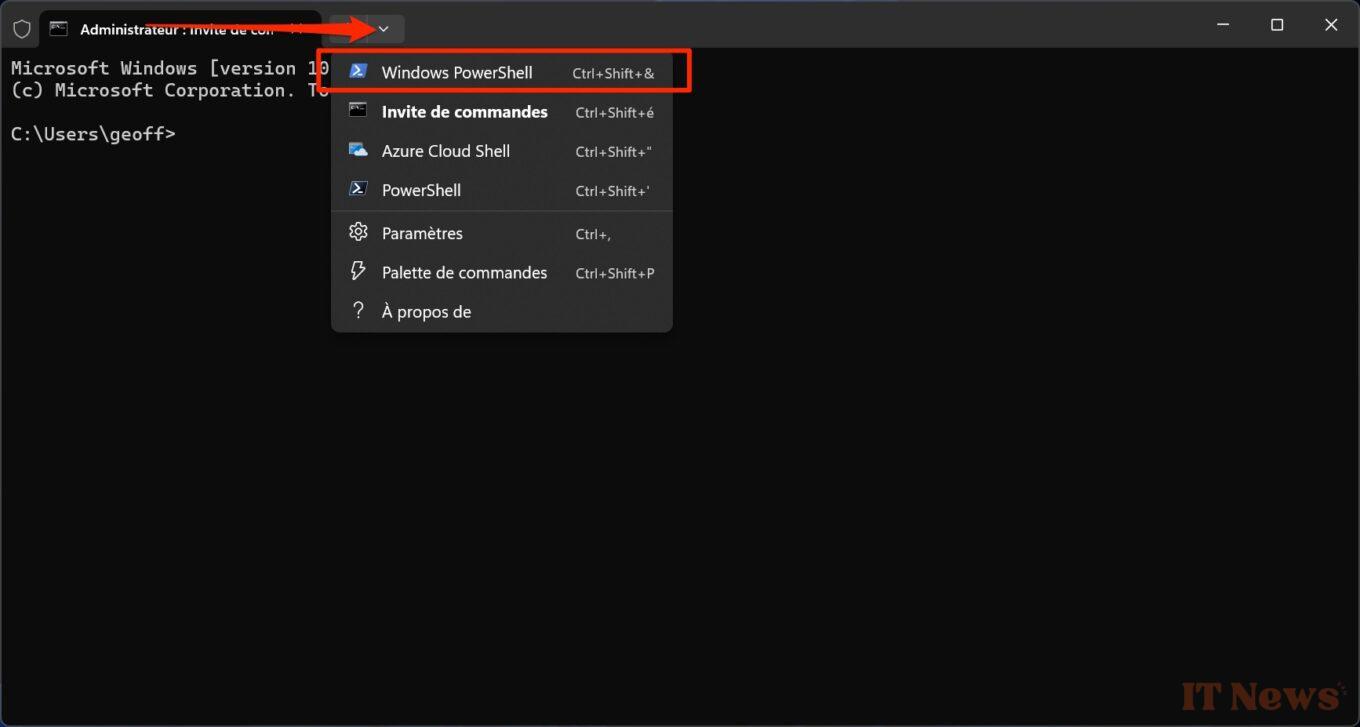
This script is executed in PowerShell. You will therefore first need to open PowerShell in administrator mode. To do this, right-click on the start menu and select Terminal (administrator).

Windows will likely open a Command Prompt window by default. To access PowerShell, click on the drop-down menu grafted into the menu bar next to the + button, and choose PowerShell. You can also directly use the keyboard shortcut Ctrl + Shift + &.
2. Allow PowerShell scripts
Before you can run the script This script is executed in PowerShell. To make it work, you must first allow script execution in PowerShell.
To do this, enter the command Set-ExecutionPolicy unrestricted and validate by pressing the Enter key on the keyboard.

3. Mount the Windows 11 disk image
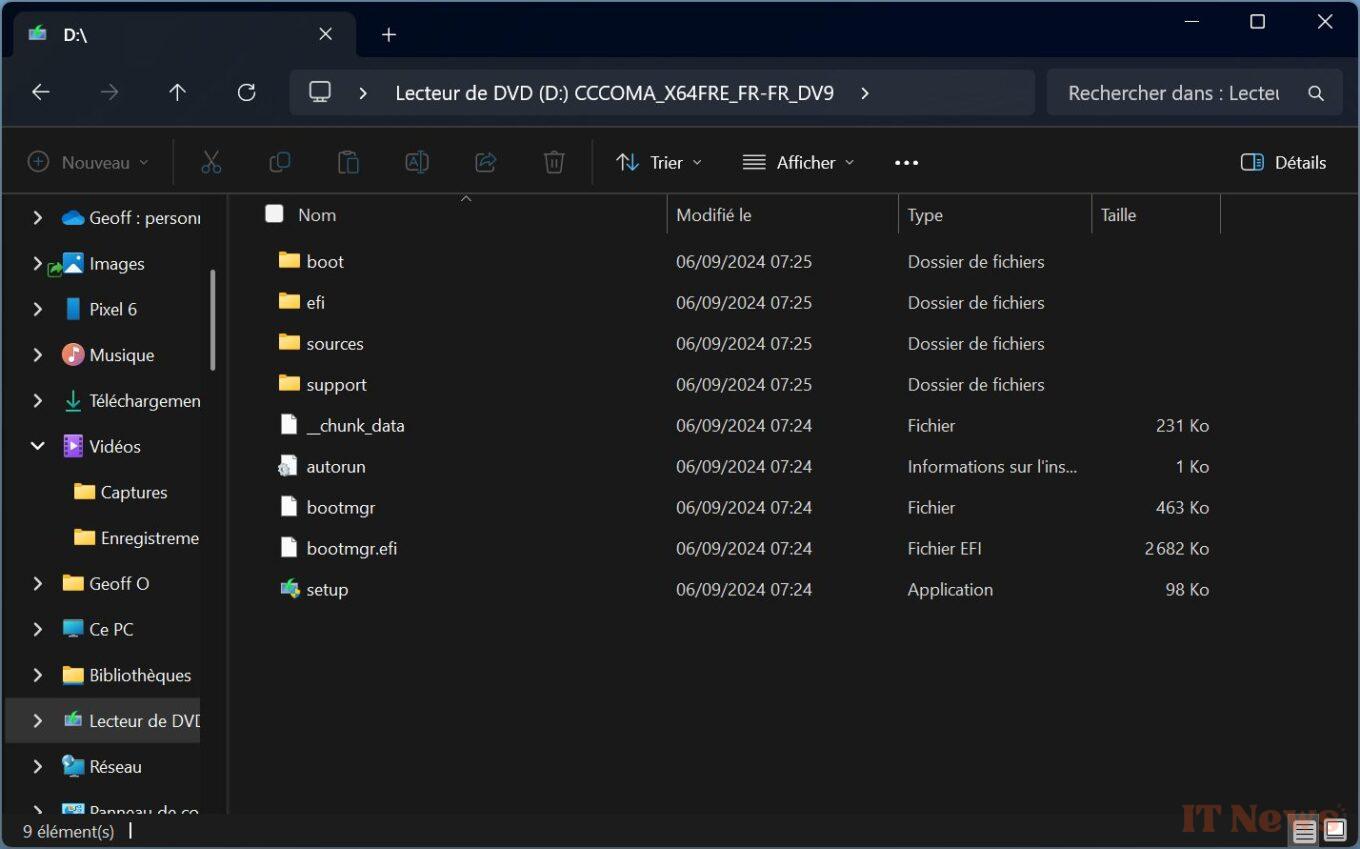
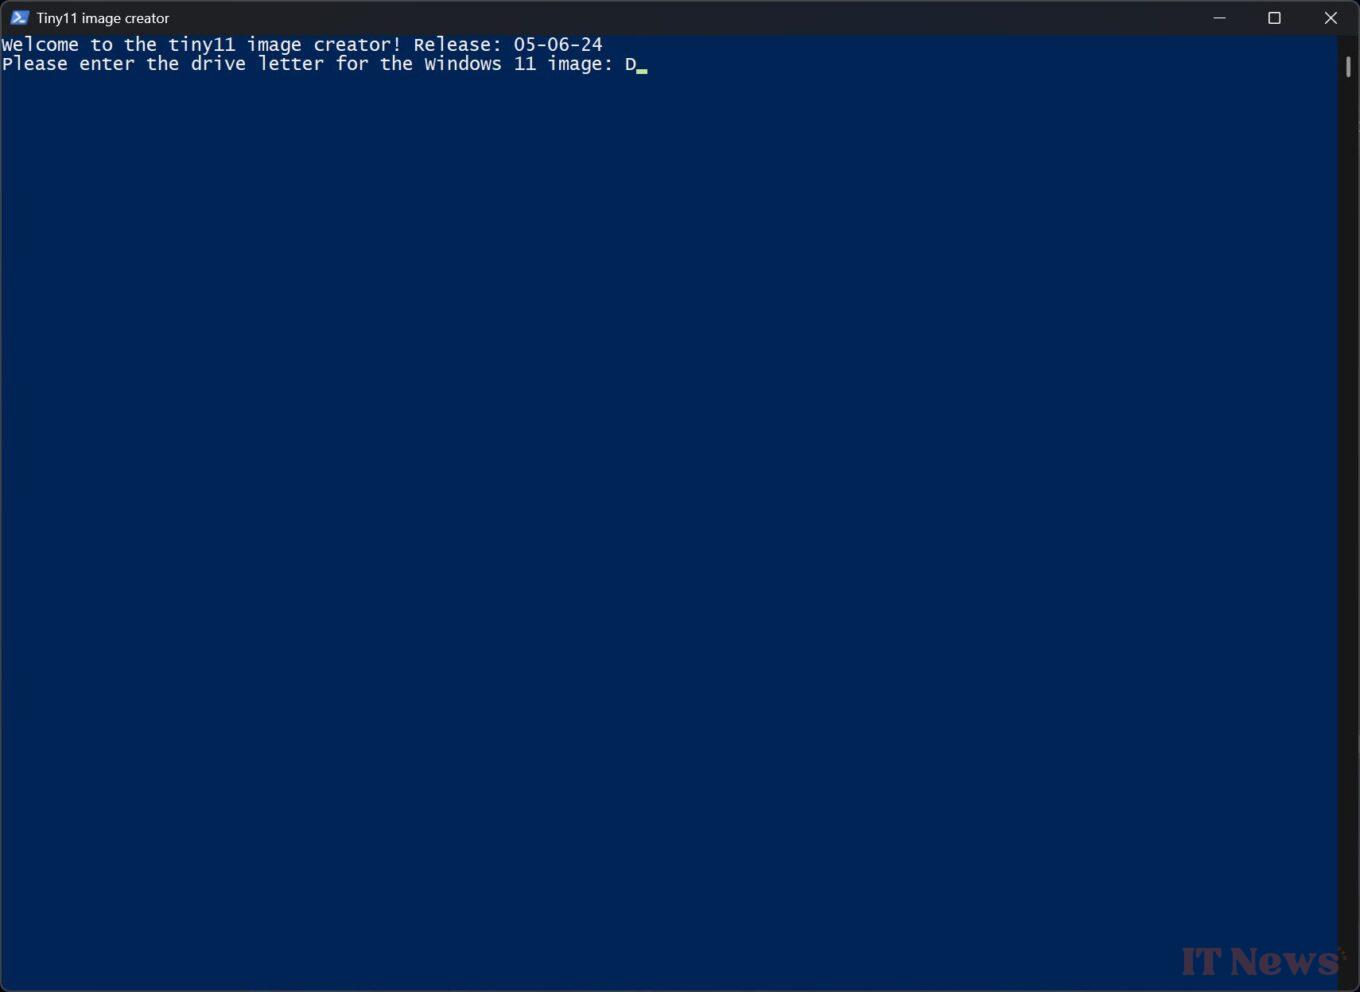
Now open a File Explorer window and navigate to the directory where the Windows 11 installation disk image in ISO format is stored. Double-click on the file, then in the pop-up that appears, select Open to mount the disk image like a DVD drive. Remember the letter corresponding to the Windows 11 disk image drive (D in our case).
4. Run the Tiny11 script
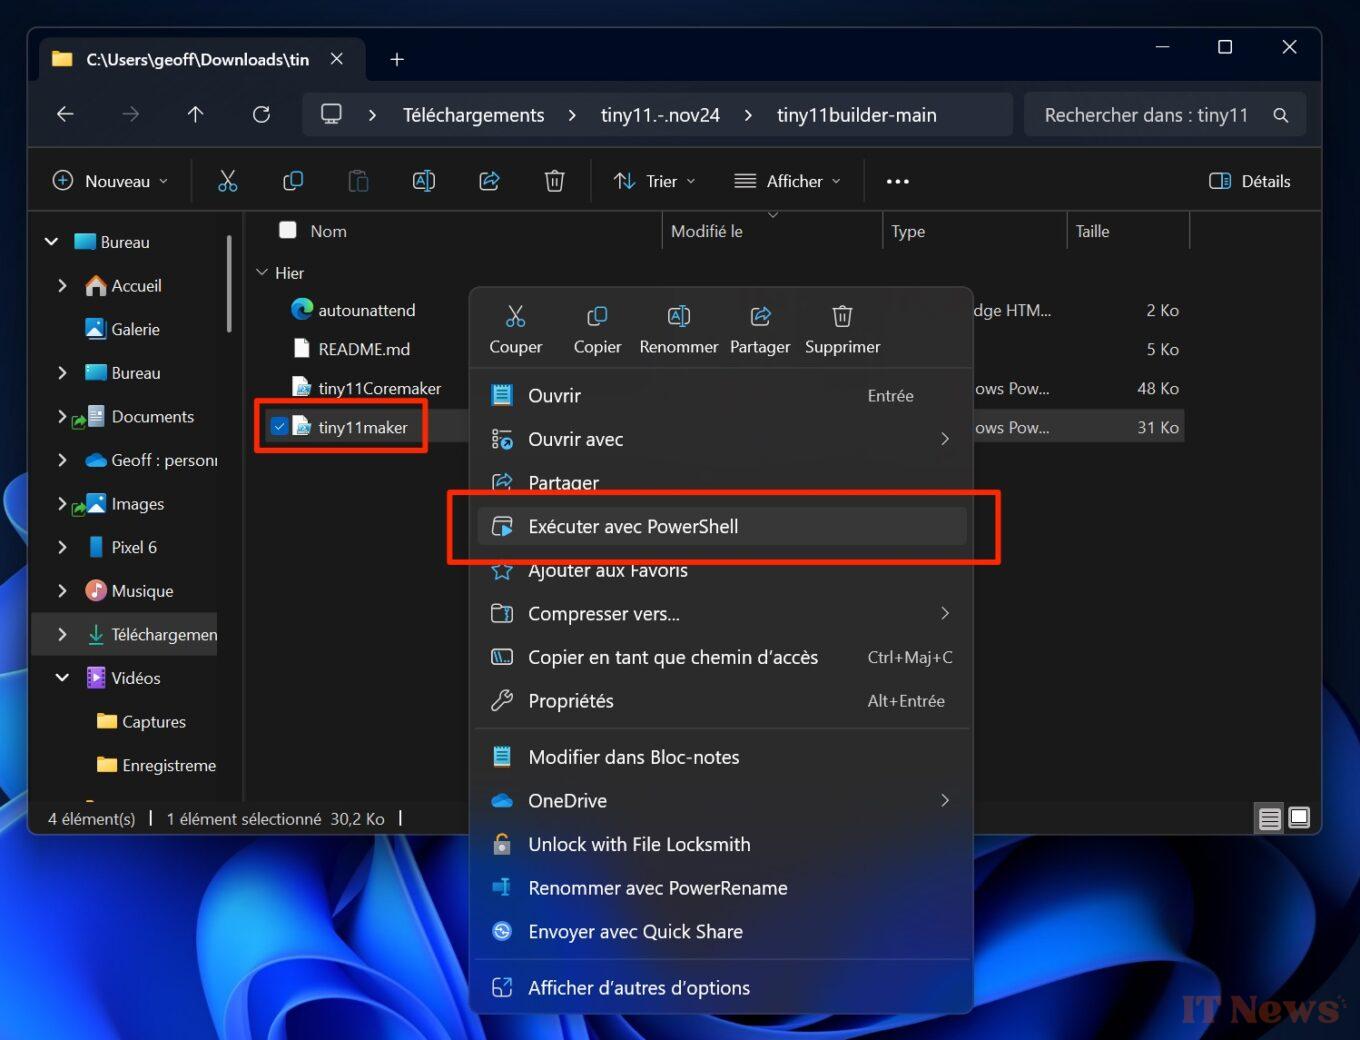
Now open the directory where you previously downloaded Tiny11 and unzip the archive. Then enter the Tiny11 folder, then the tiny11builder subfolder. Then right-click on the tiny11maker file, and choose to Run with PowerShell.
In the security warning pop-up that appears, click Open. Now, a Tiny11 image creator window should open in PowerShell and say “Please enter the drive letter for the Windows 11 image”. Then enter the drive letter corresponding to the mounted Windows 11 disk image (D, in our case), and press the Enter key on the keyboard to validate.
5. Choose your version of Windows 11
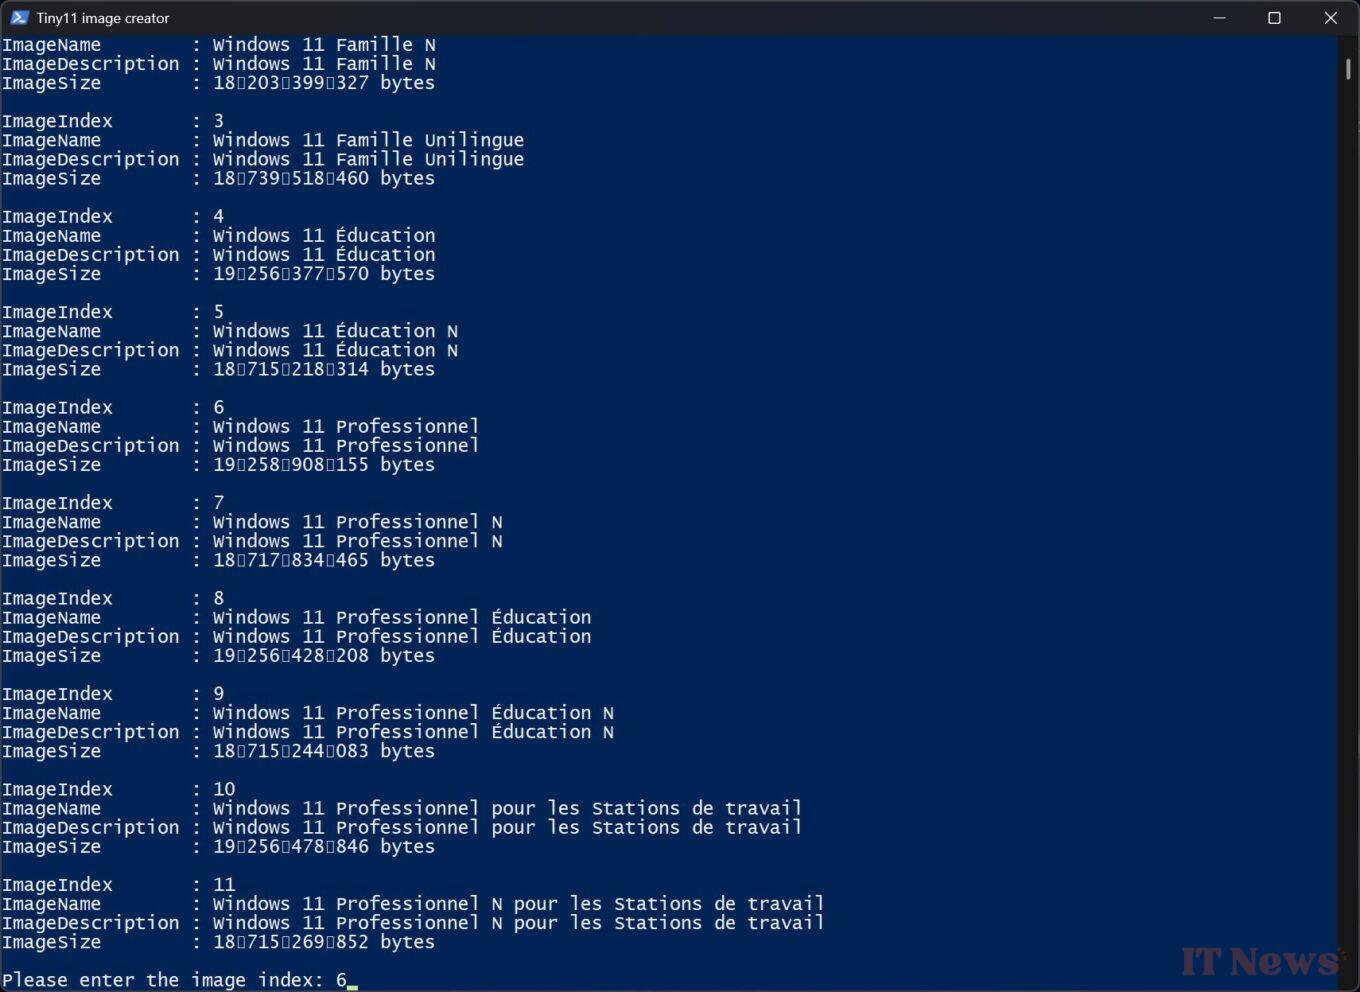
You will now need to select the version of Windows 11 Lite that you want to create. Tiny Image Creator usually displays the full list of Windows 11 versions that you can use by numbering them (ImageIndex line).
At the very bottom of the window, on the Please enter the image index line, enter the ImageIndex number corresponding to the version of Windows that you want to lighten, and press Enter to validate.
Then wait a few minutes for Tiny11 image creator to generate the disk image in ISO format of your Windows 11 lite version. The process ends when the message "Done. Creation completed" is displayed.
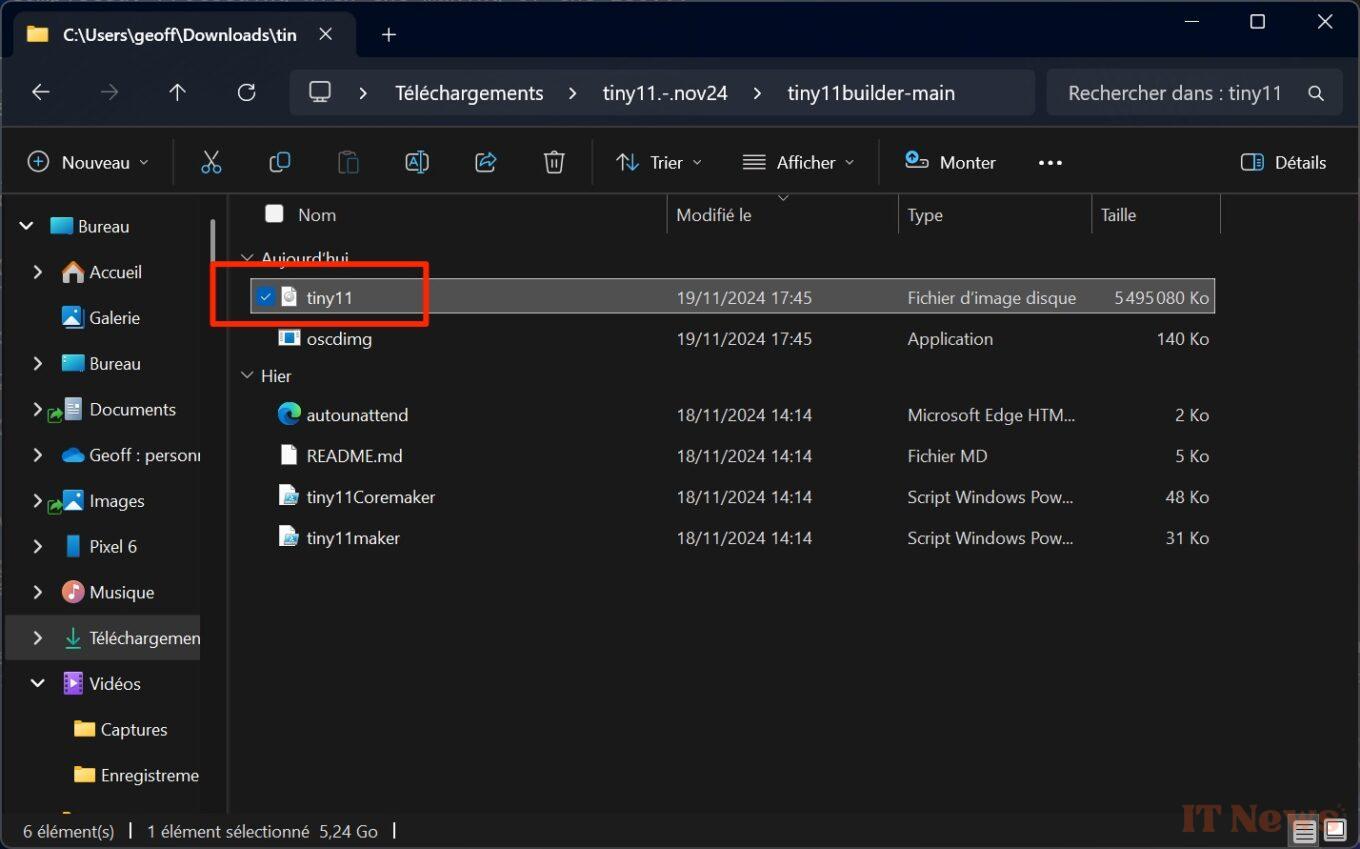
Your Windows 11 lite disk image is automatically saved under the name tiny11.iso in the tiny11builder directory. Now all you have to do is create a bootable USB drive using this disk image to install a stripped-down version of Windows 11 on your PC.


0 Comments