
Whether you love Google or hate it, it seems difficult to deny the effectiveness of Google Photos today. The Mountain View company's online photo backup platform automatically syncs photos and videos from your smartphone and lets you sort and organize them.
Over the years, Google has managed to make a large number of users dependent on its service. When it launched, the platform allowed you to store your photos and videos without any restrictions. But this gift didn't last. As of June 1, 2021, Google ended free storage on its service.
However, Google Photos doesn't seem to have really suffered from this change. Users continue to use it, sometimes subscribing to a Google One subscription to benefit from a little more space, but also exclusive features. For several years now, Google has been reserving a number of new features exclusive to Pixel smartphone owners and Google One subscribers.
The possibilities offered by Google Photos are numerous, but not always known to everyone. Also, to allow you to take full advantage of Google's photo library, you will find in the following lines everything you need to master Google Photos at your fingertips.
1. Free up space on the allocated storage
By default, Google provides 15 GB of storage space free of charge for all users. Unfortunately, this space is not entirely dedicated to Google Photos. You must share it with your documents stored on Google Drive, as well as your messages in Gmail. Suffice it to say that storage fills up very quickly.
But before rushing into subscribing to a Google One subscription to increase your storage space, why not start by cleaning up your photos and videos a little?
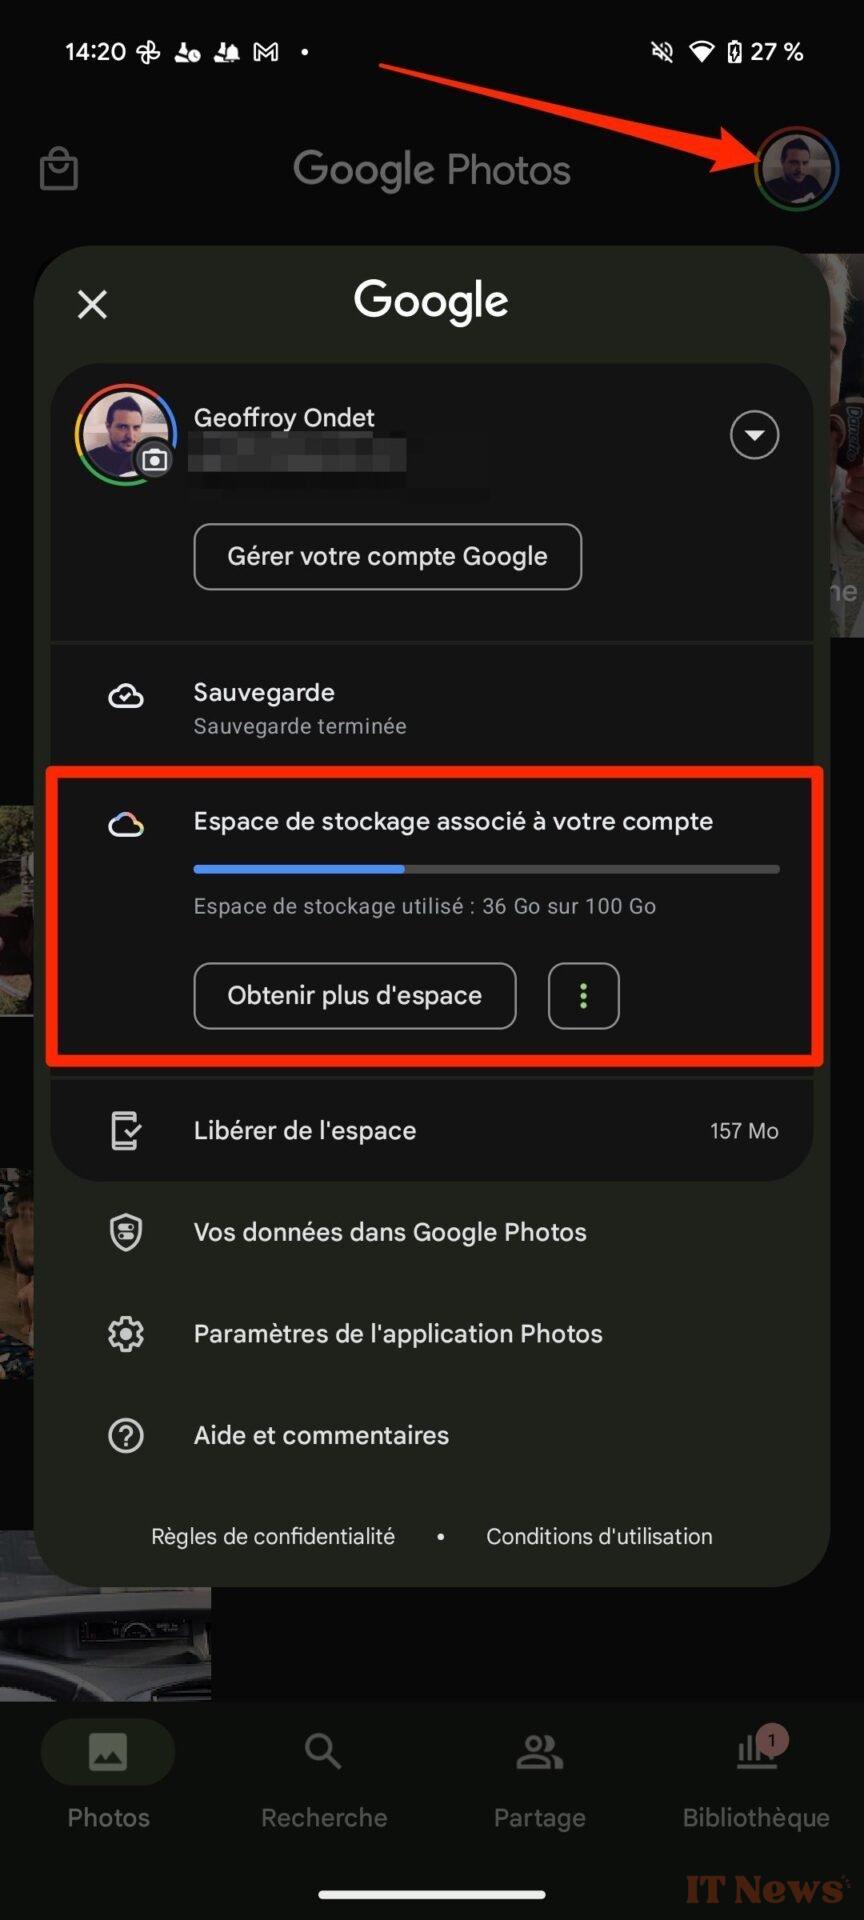
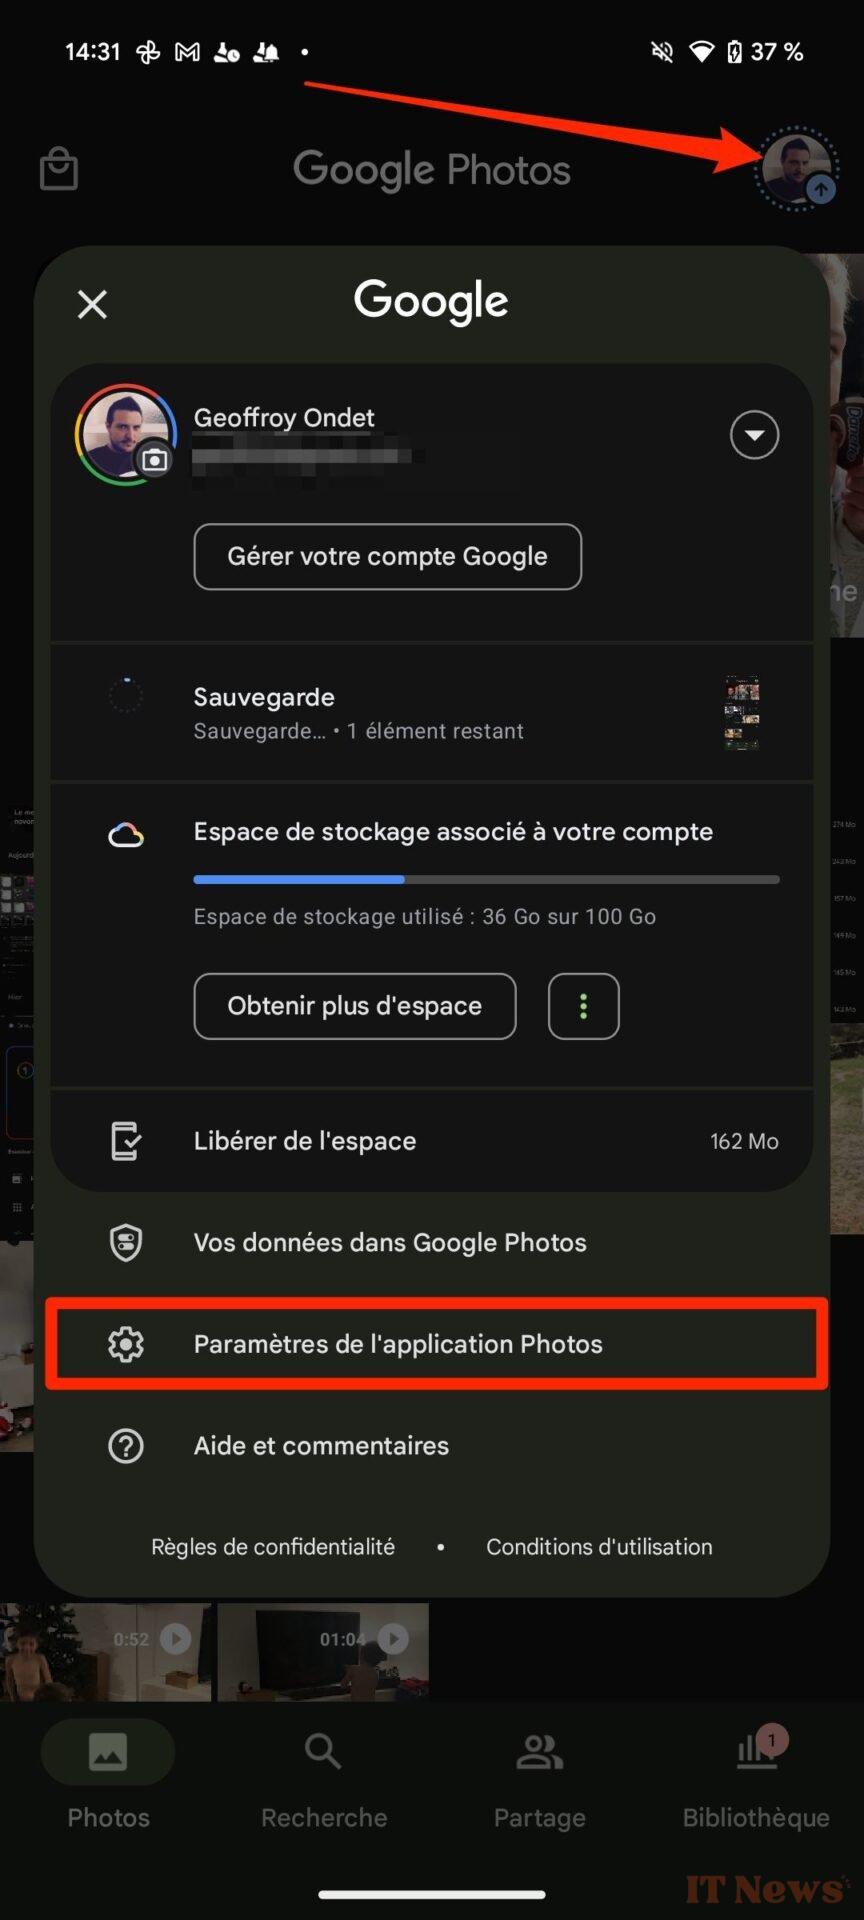
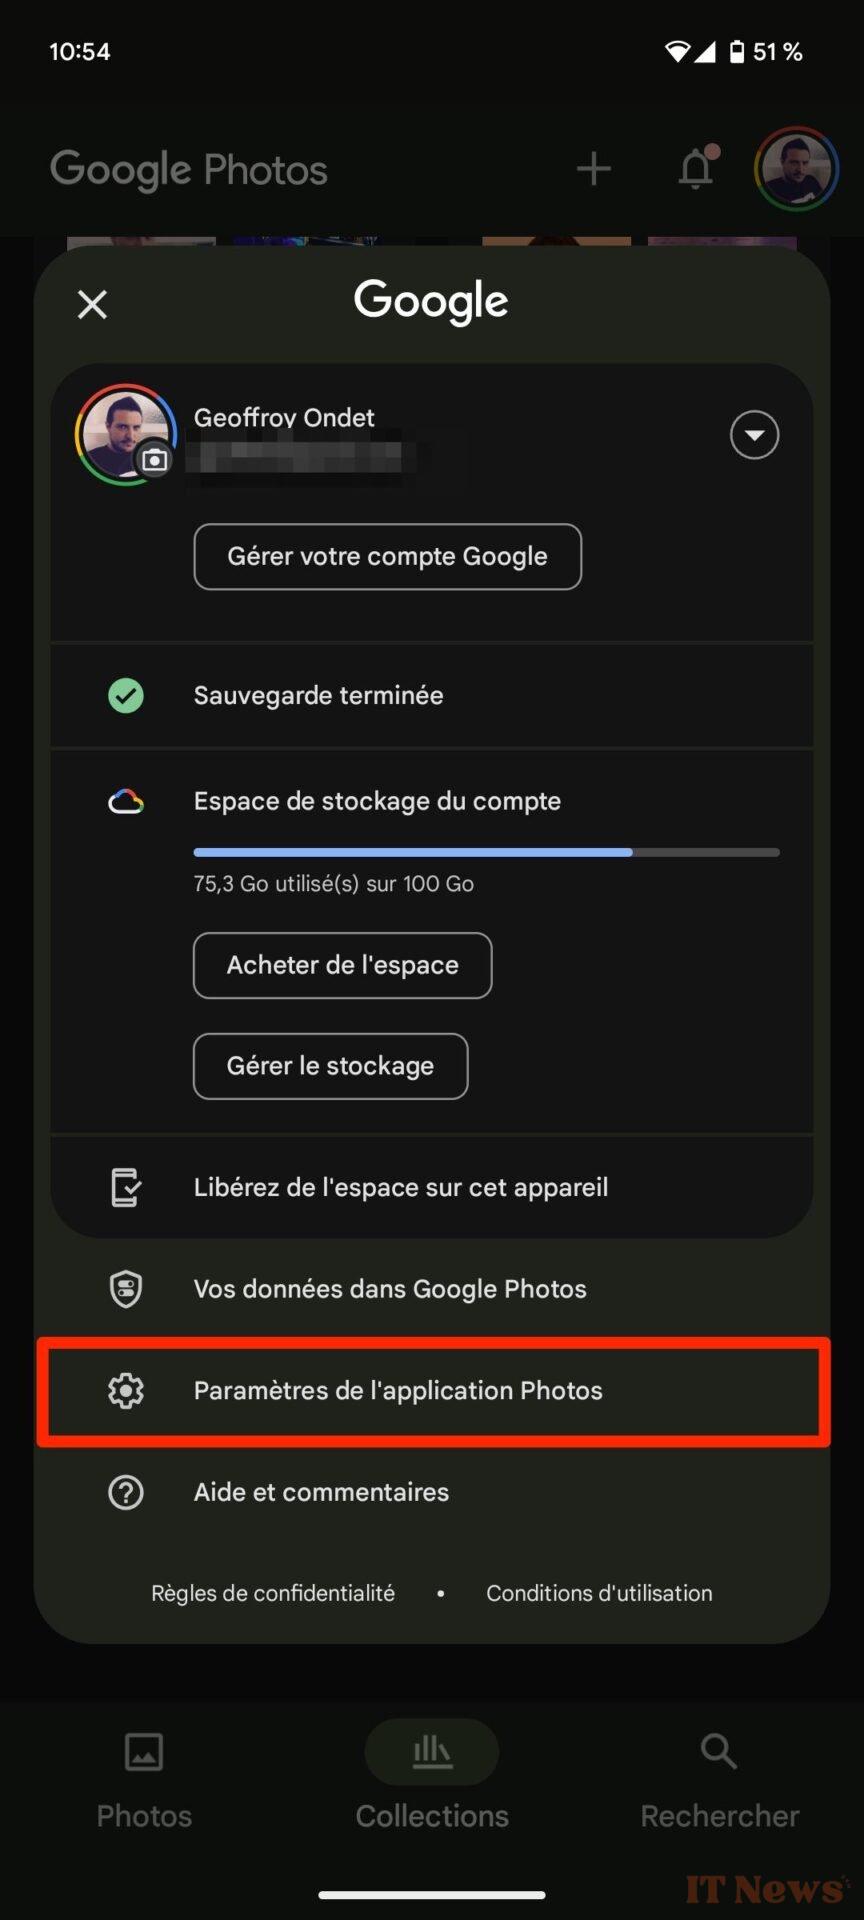
To do this, tap your avatar in the top right corner to open the app's main menu, then select the Storage space associated with your account.
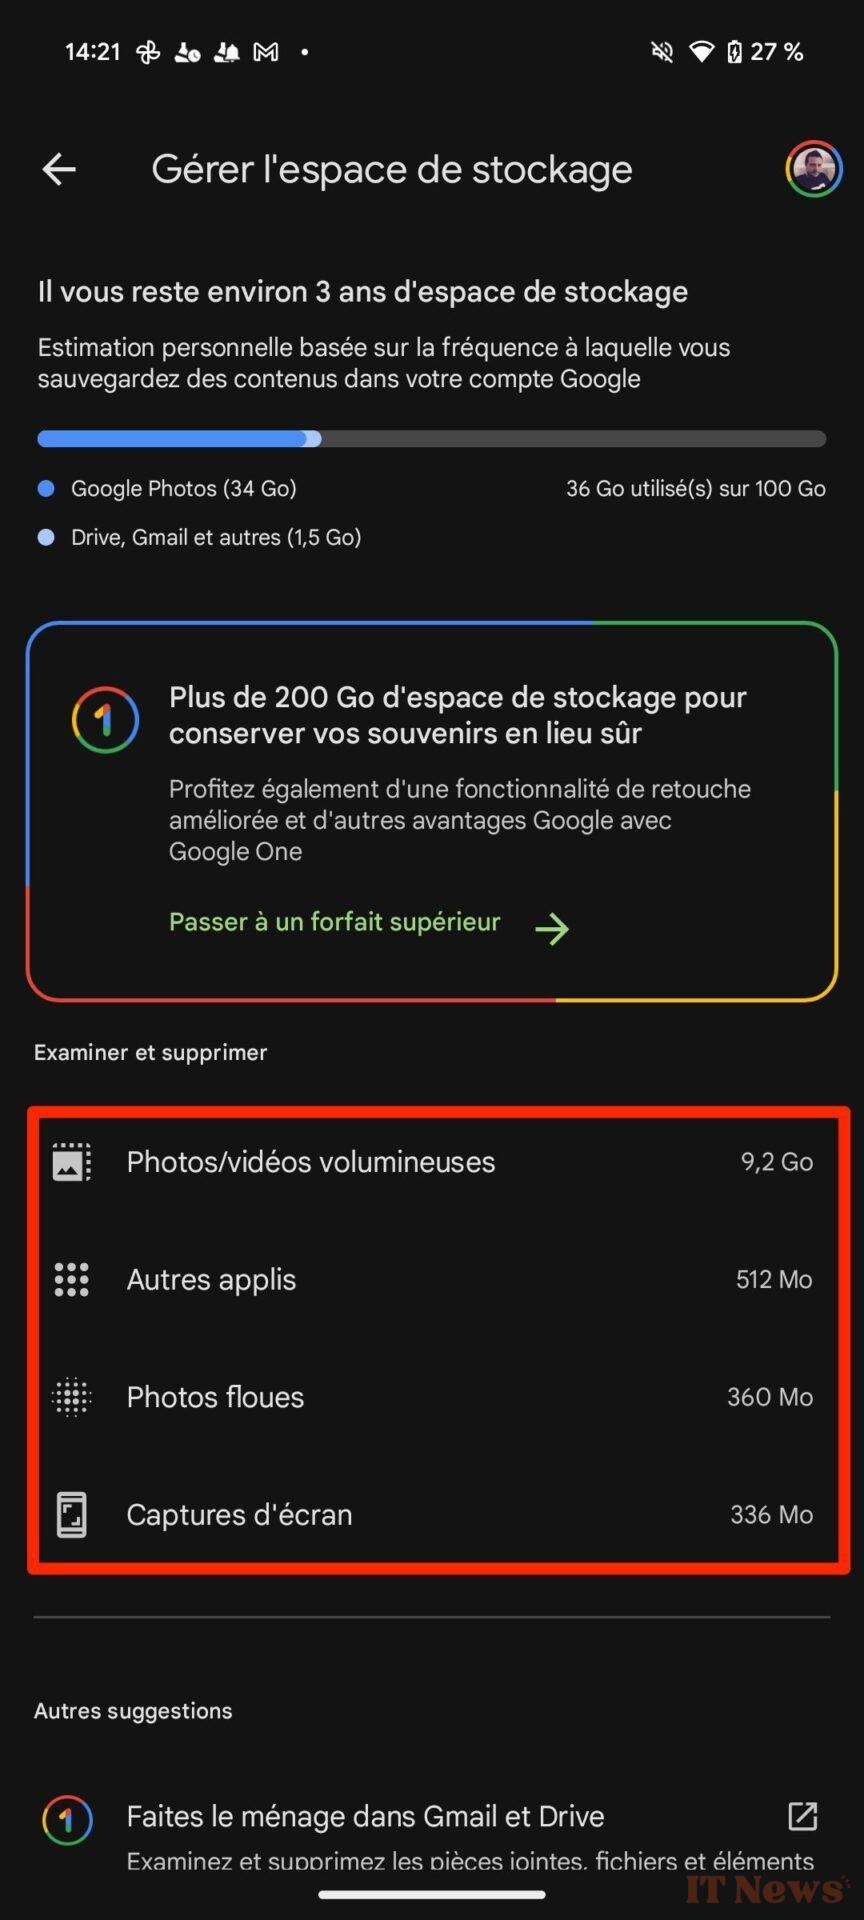
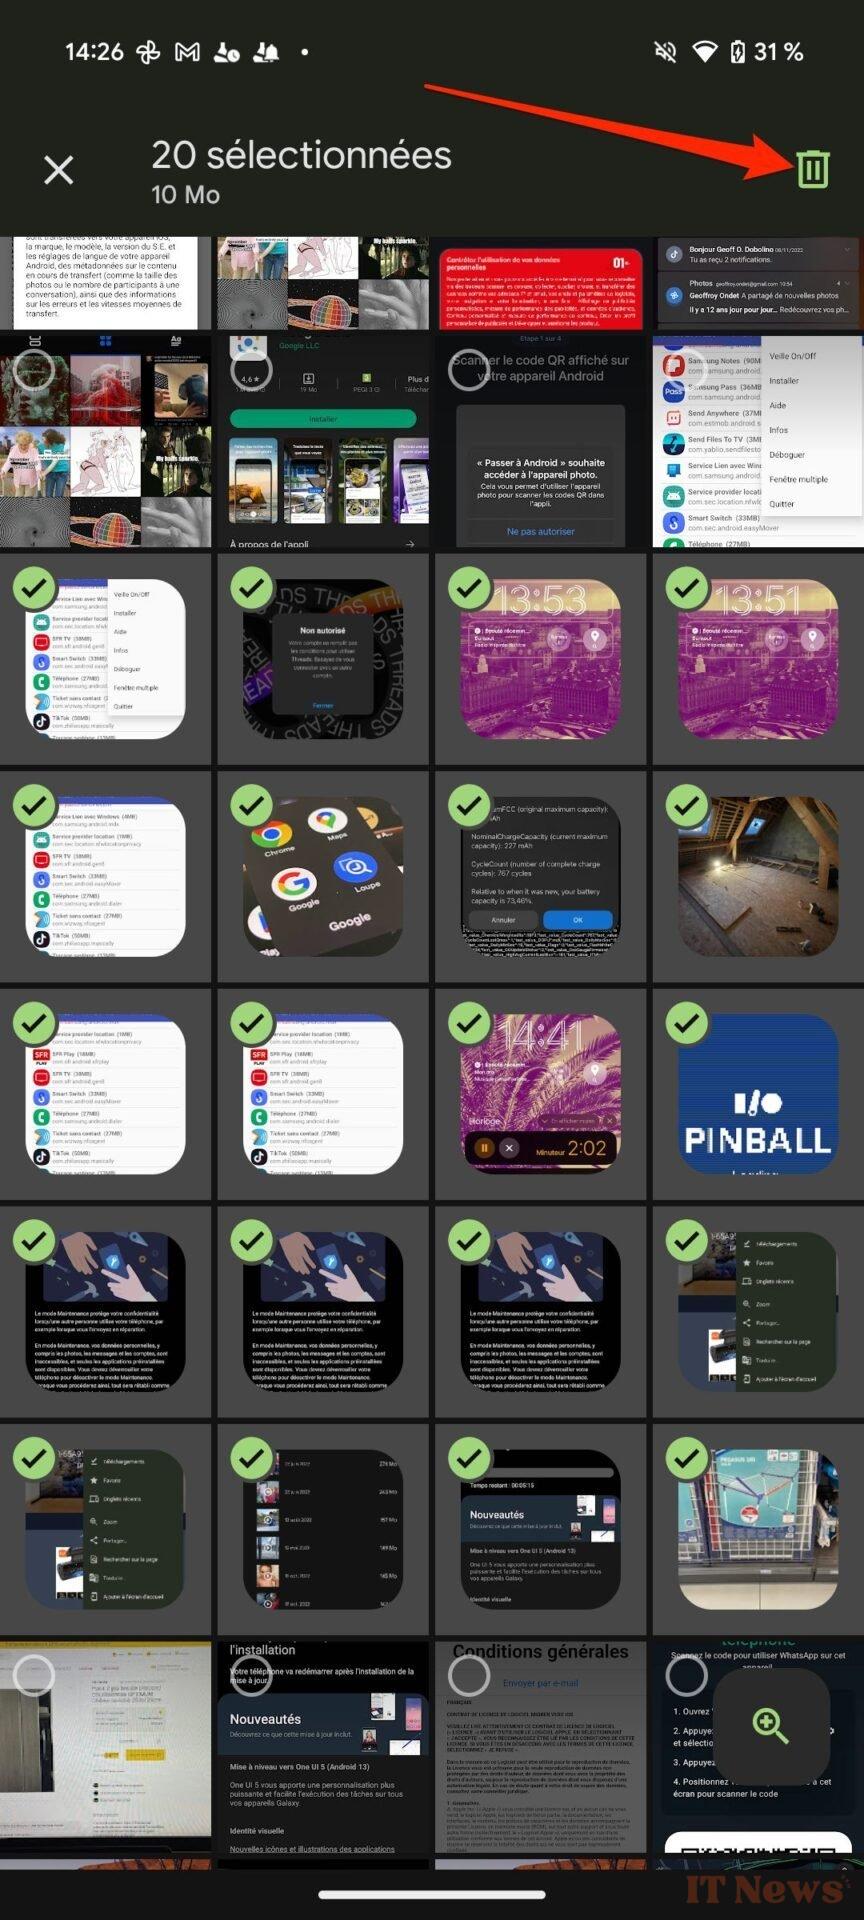
On the page that appears, under the heading Review and delete, Google Photos suggests several categories of content that you can review to do a little cleaning. Go to the options Large photos/videos, Other apps, Blurry photos, and Screenshots, and select the items you no longer need to delete them. This will free up precious gigabytes of space to store new photos and videos captured with your smartphone.
2. Free up space on your smartphone
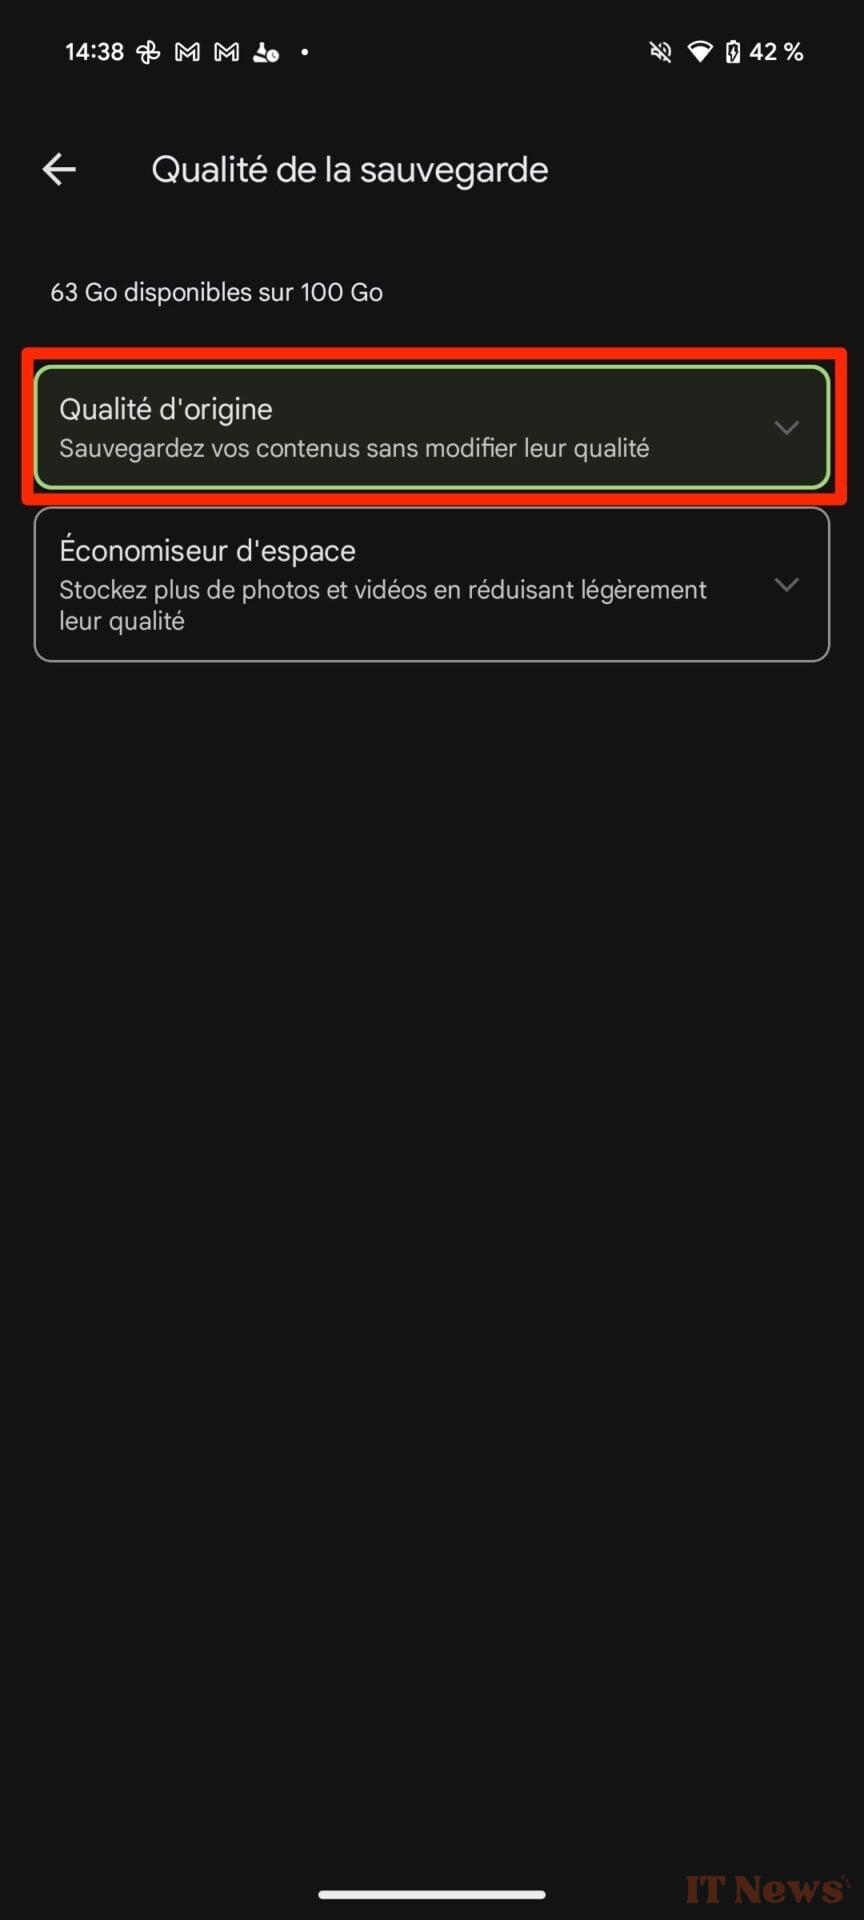
The main benefit of being able to store your photos and videos on Google Photos is above all to be able to free up space on your smartphone's storage. And that's a good thing, since Google Photos includes an option that allows you to delete all photos and videos stored locally on your smartphone, as long as they are saved to the Cloud. Be careful, however, it is best to first ensure that your images synchronized on Google Photos are in their original quality. Google Photos also offers in its options the possibility of saving your images in a slightly degraded quality to save space, you could risk having to give up your photos and videos in their original quality.
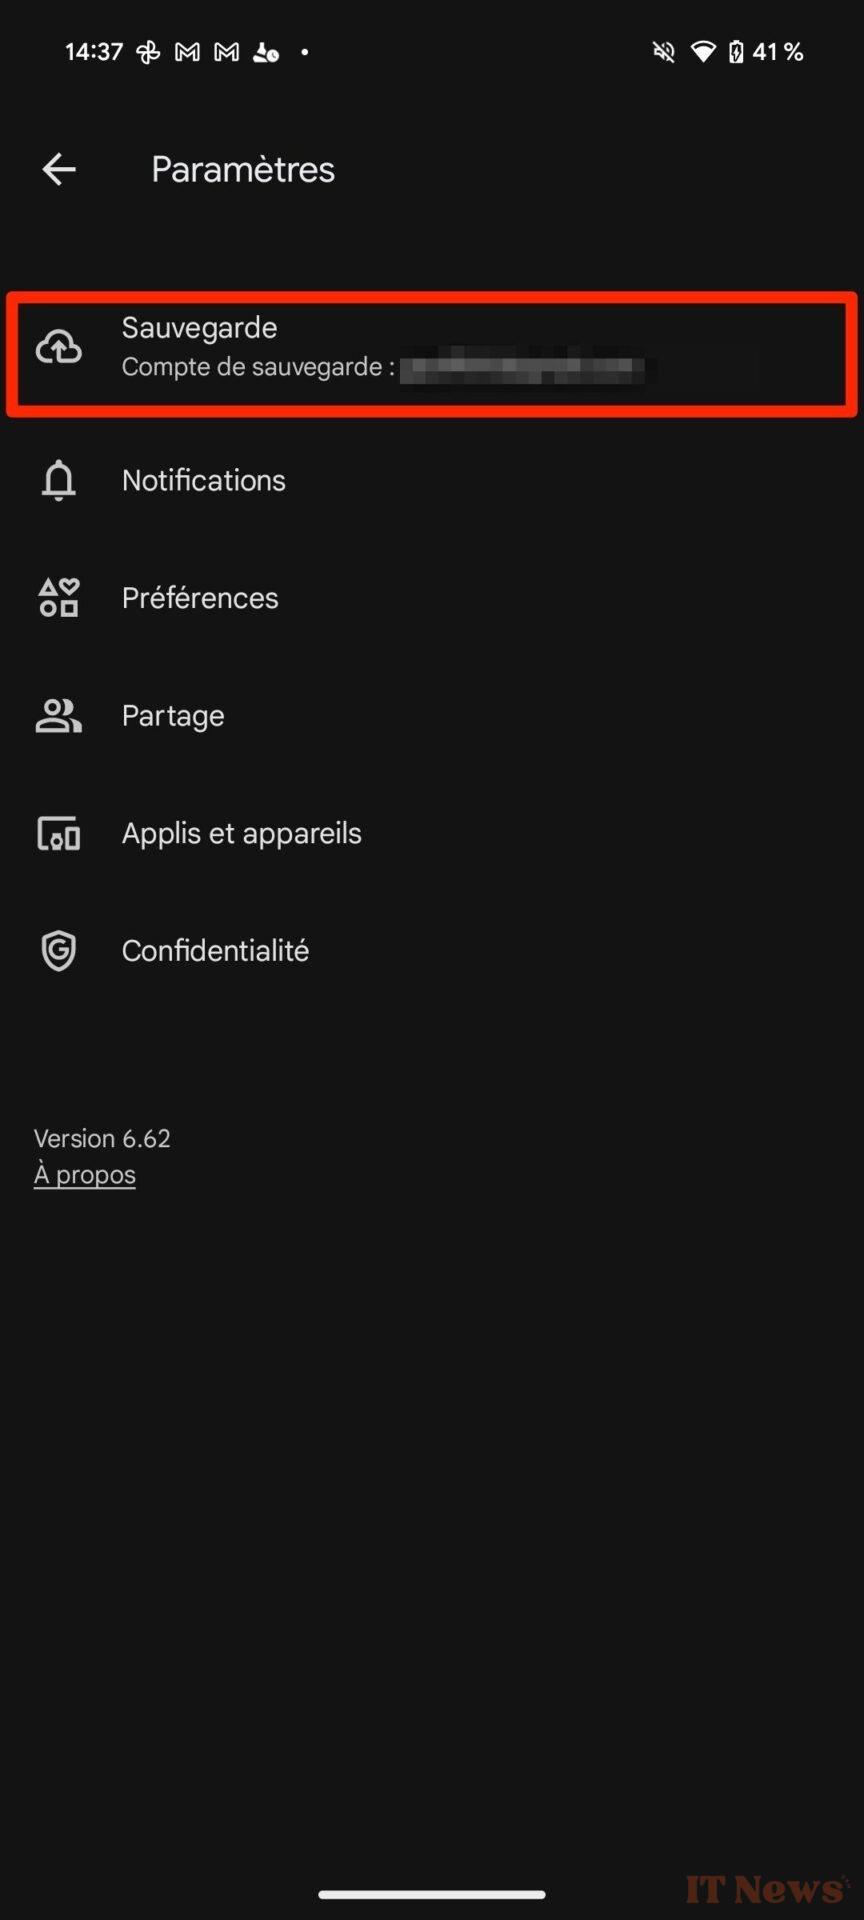
To check the quality of your content saved to Google Photos, tap your avatar in the top right corner and go to the Settings of the Photos app. Then select Backup, then in the Backup Quality menu, make sure that Original quality (unmodified quality) is selected.

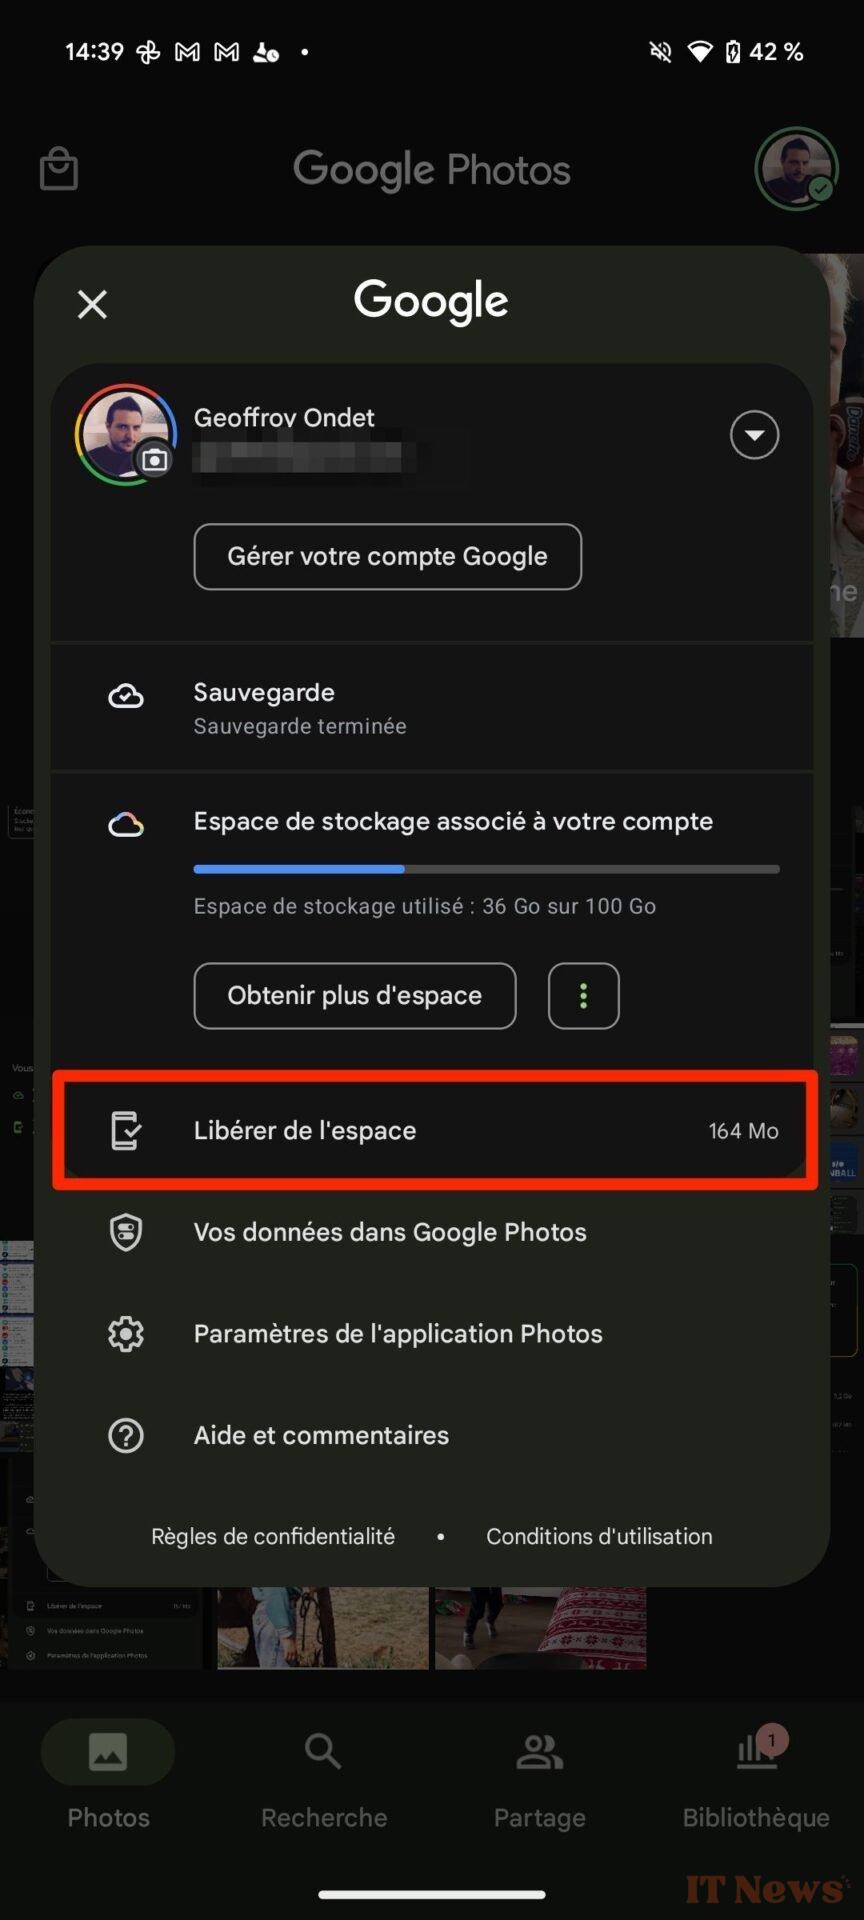
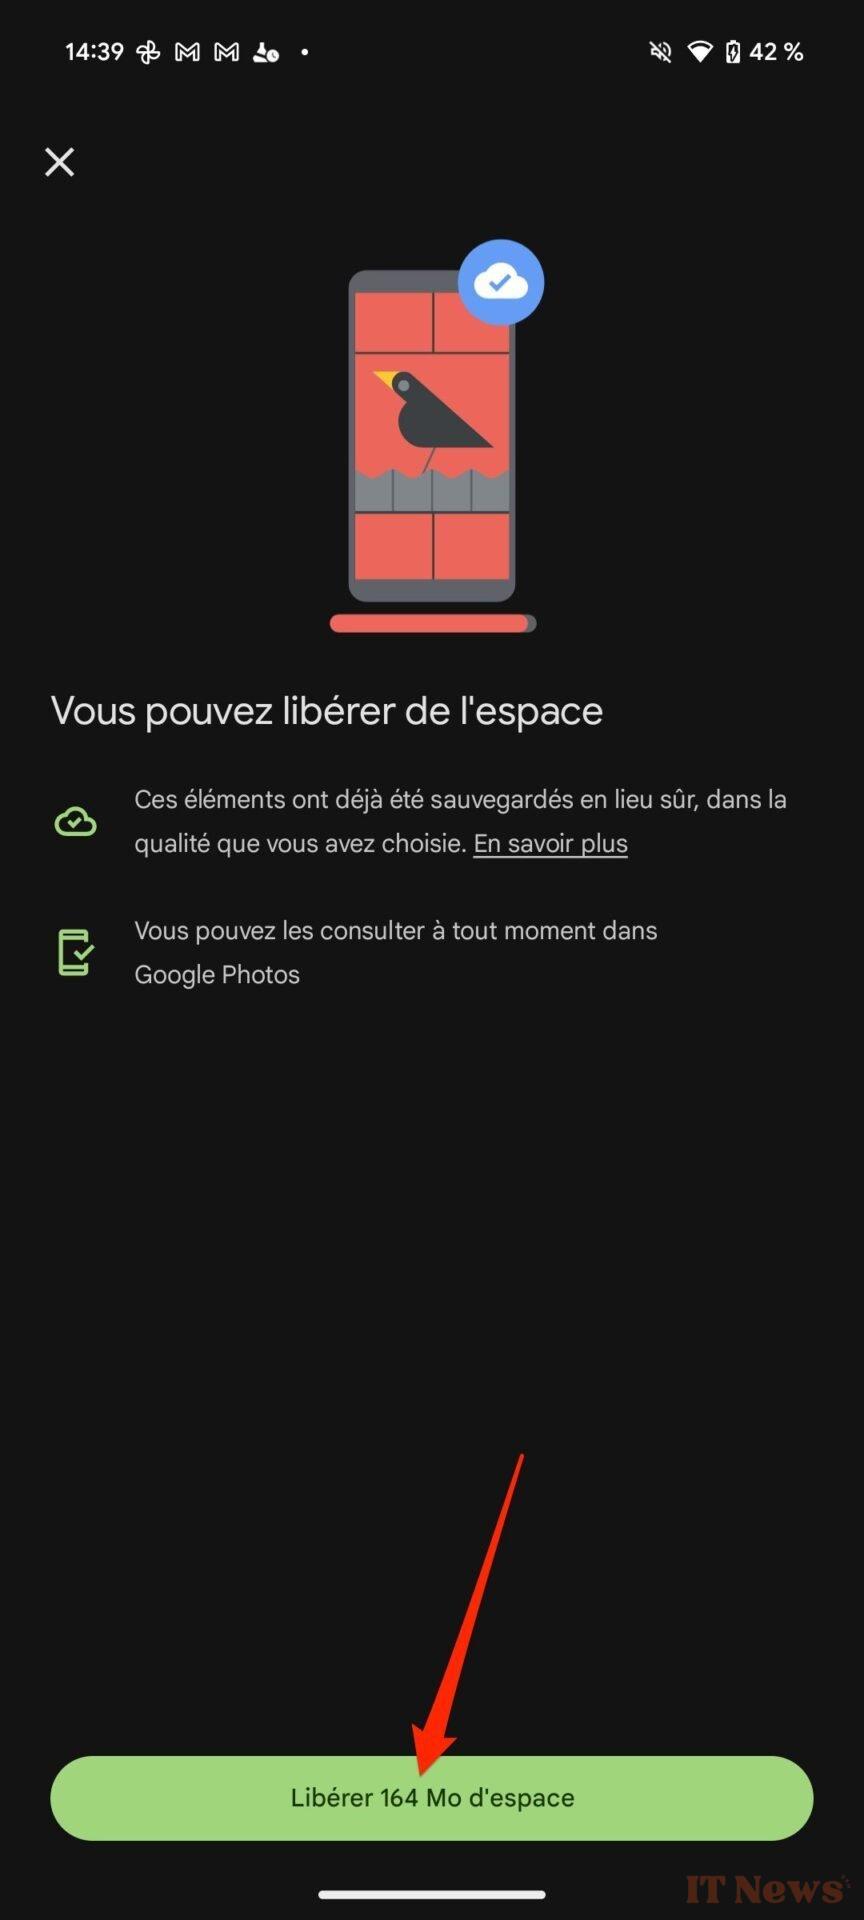
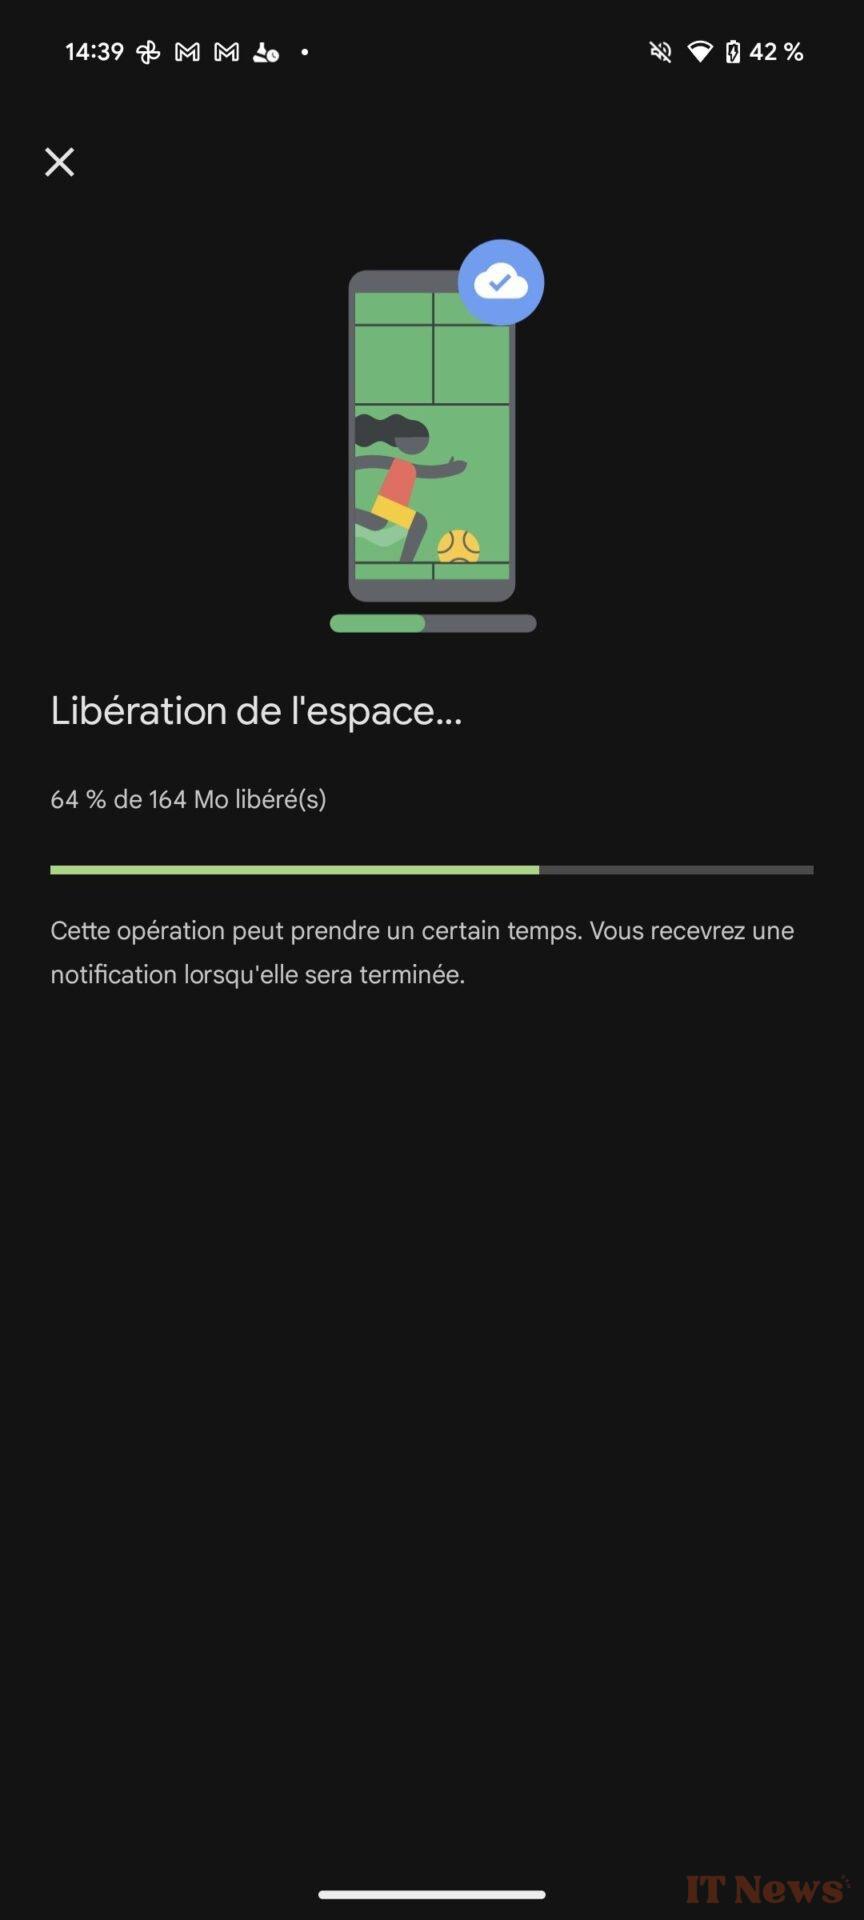
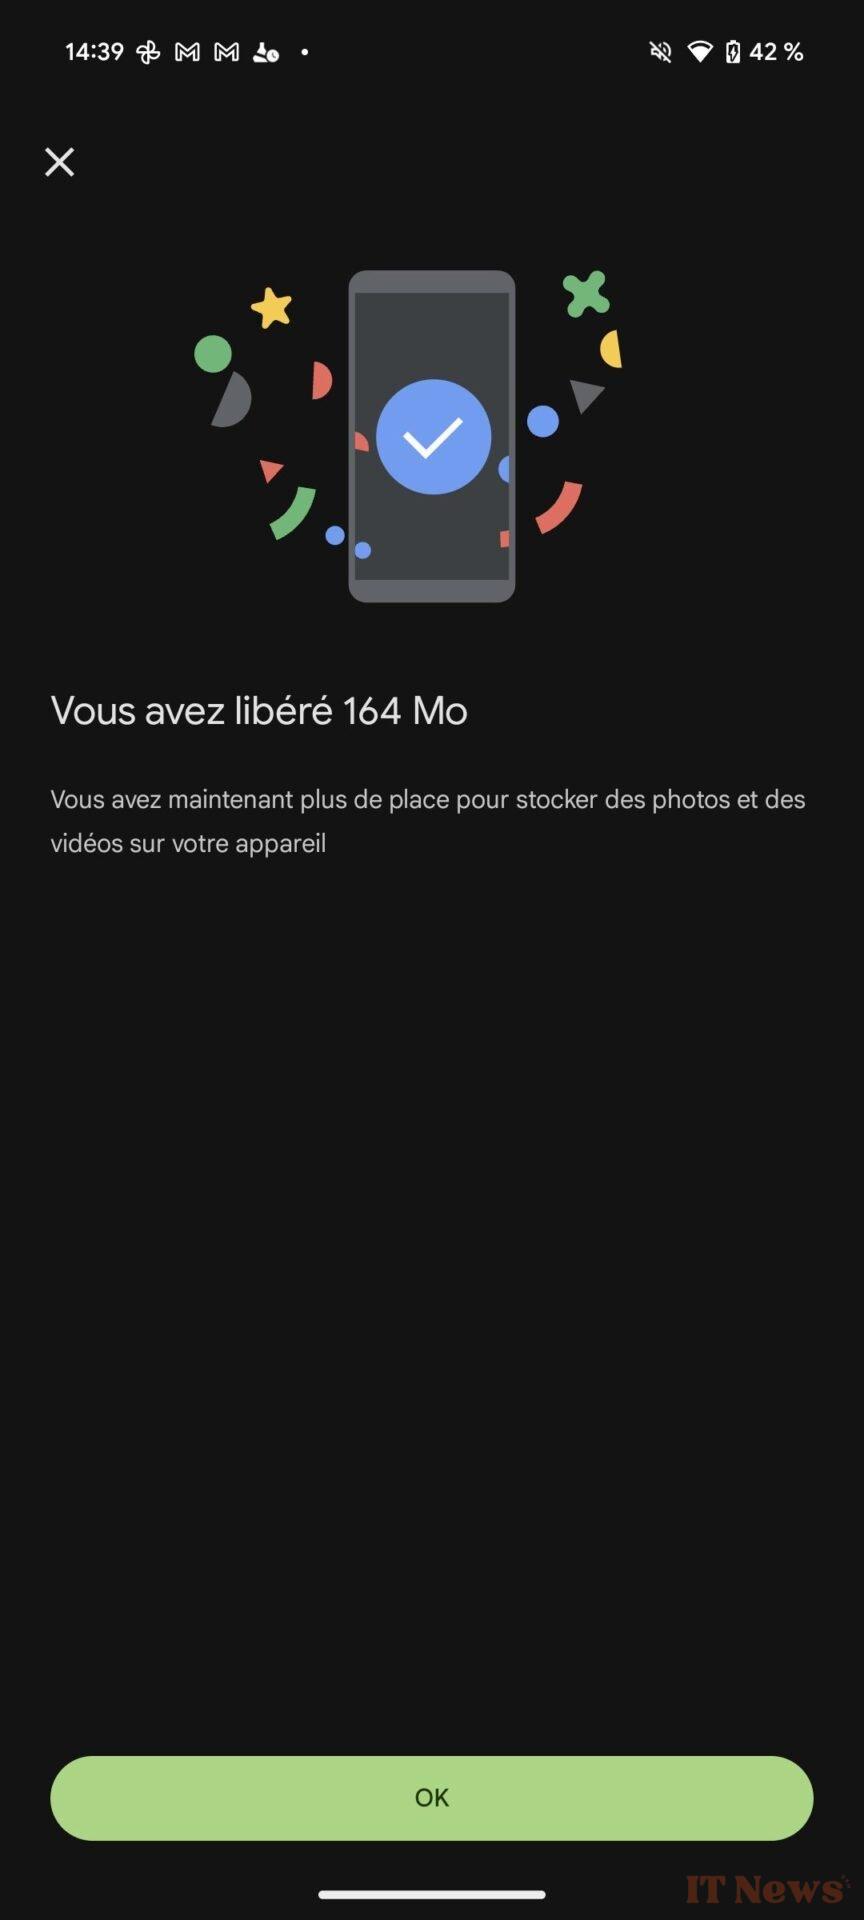
Once this step is completed, you can use the module integrated into Google Photos to free up space on your smartphone. To do this, select your avatar in the top right corner of the screen and tap the Free up space option. A screen indicating that You can free up space should then appear. Tap the Free up X MB (or GB) of space button and wait a few seconds for Google Photos to delete the items from your device's internal storage.
Since storing photos and videos in original quality is particularly space-consuming, we recommend that you only free up space on your smartphone if you have a Google One subscription with sufficient online storage space.
3. Recover an accidentally deleted photo
Just like on your PC, it can happen that an accidental action leads you to unintentionally delete photos or videos stored online. Don't panic, deleting your content in Google Photos is not irreversible. Provided, however, that you don't wait too long.
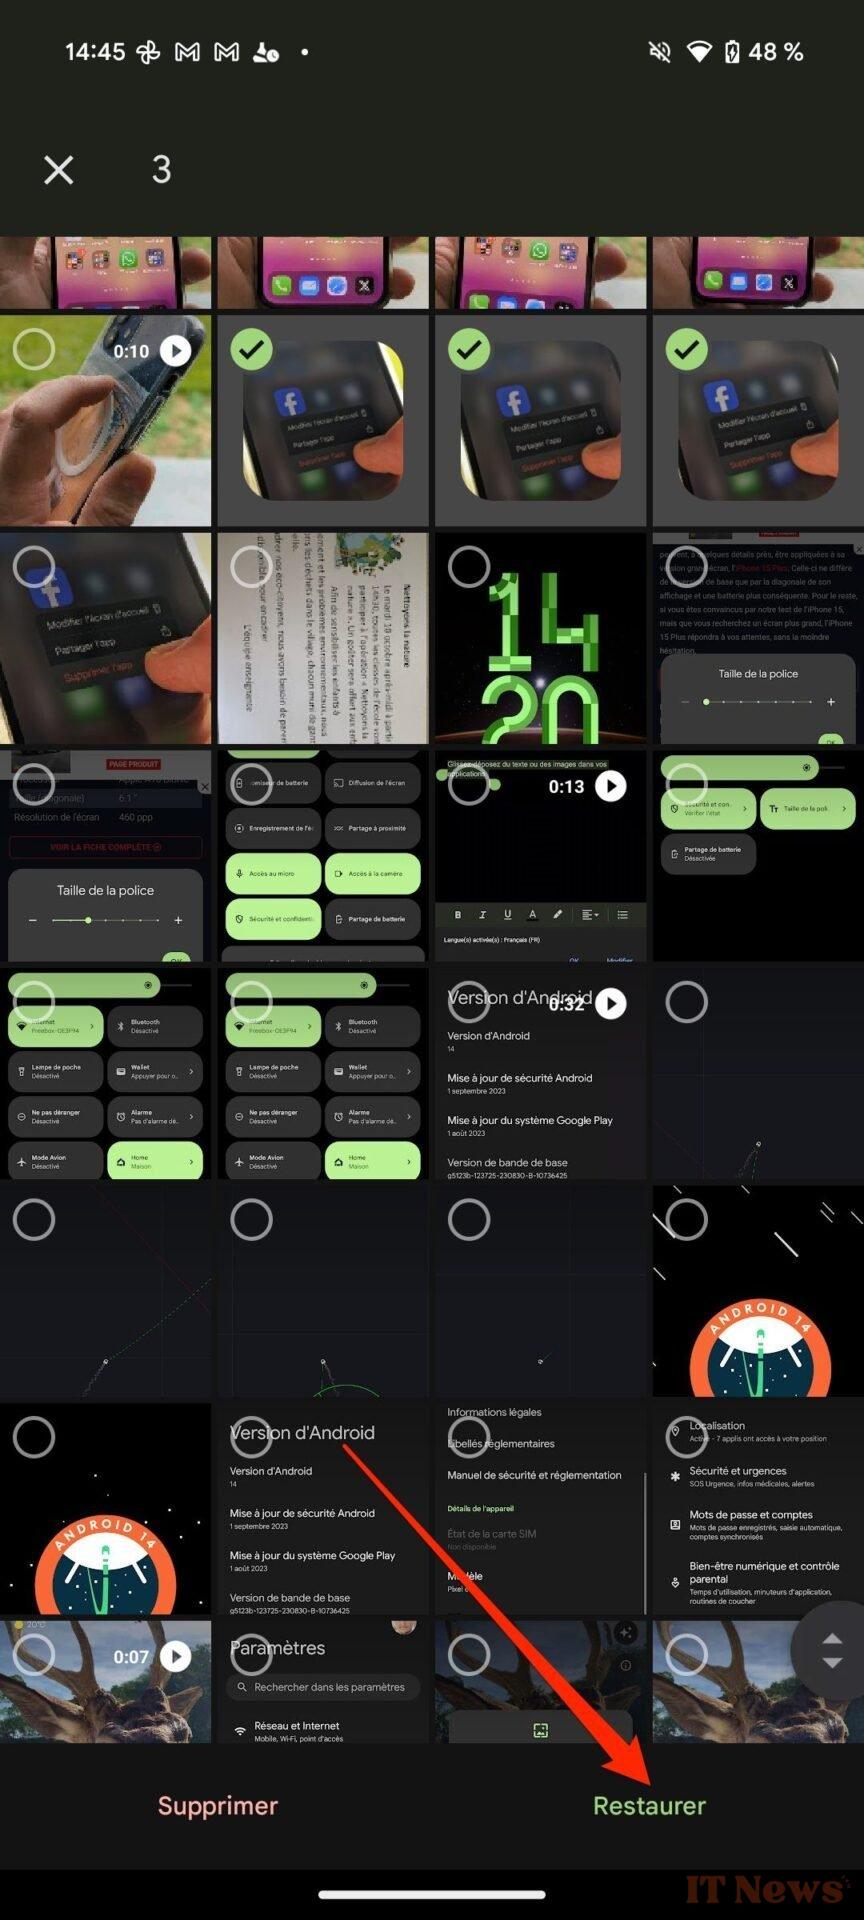
The application does indeed have a recycle bin to which all items deleted in Google Photos are sent. And these are kept there for around thirty days, before being permanently deleted.
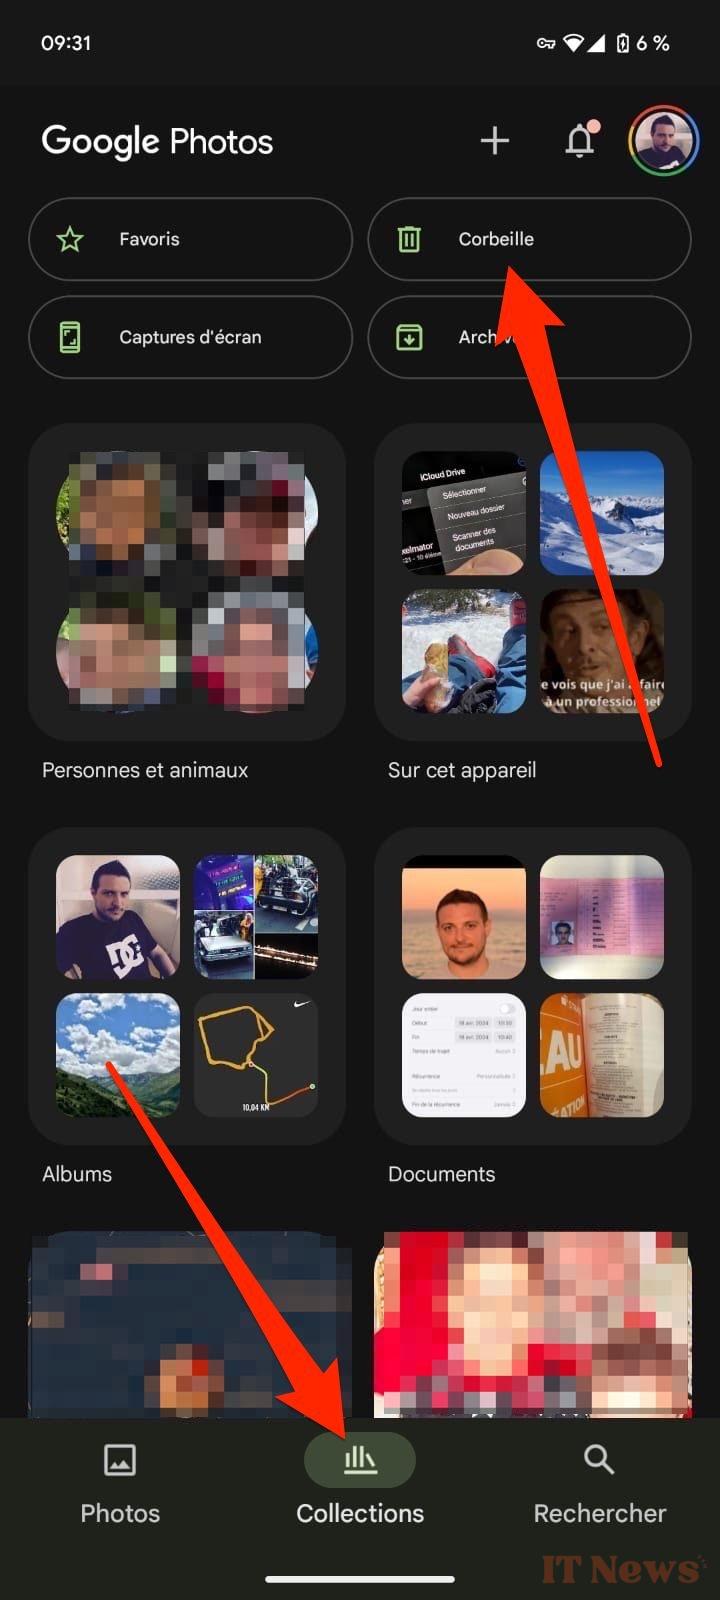
Therefore, you have about a month to recover accidentally deleted items. You will find the Google Photos Recycle Bin by going to the Collection tab. You will then only have to select the items to recover, and press the Restore button displayed at the bottom of the screen to reintegrate your photos and videos into your photo library.
4. Quickly navigate through the camera roll
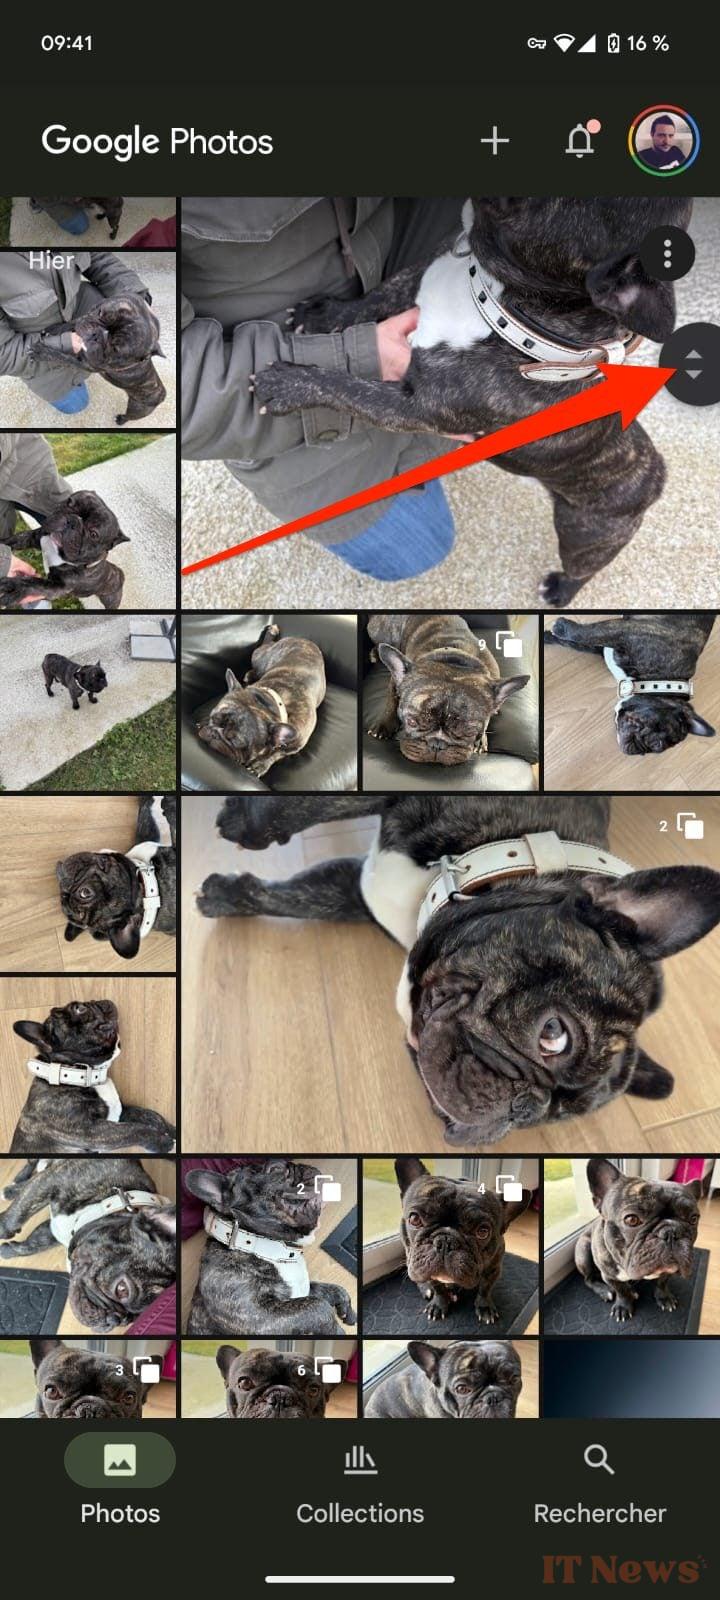
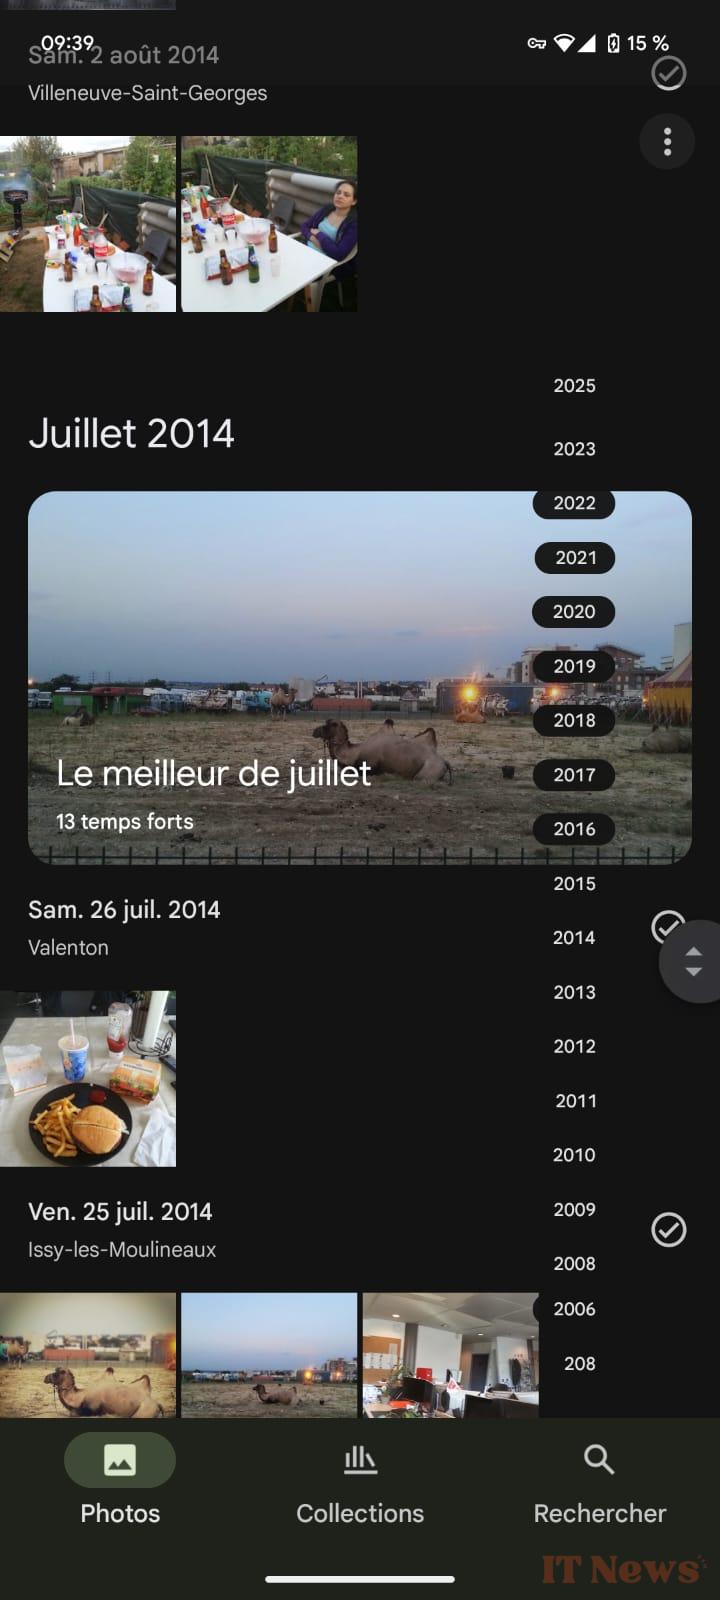
Do you also have the annoying habit of frantically scrolling through your photo library to find the photos and videos you're looking for? However, by using the scroll button displayed at the top right of the interface, you can navigate back years much more quickly, without having to scroll through the last ten years of your life in images.
5. Identify faces and animals
One of the great strengths of Google Photos is the integration of a number of features powered by artificial intelligence. Among these, face and animal recognition. When enabled, this feature allows you to identify people, as well as your pets, in your photos.
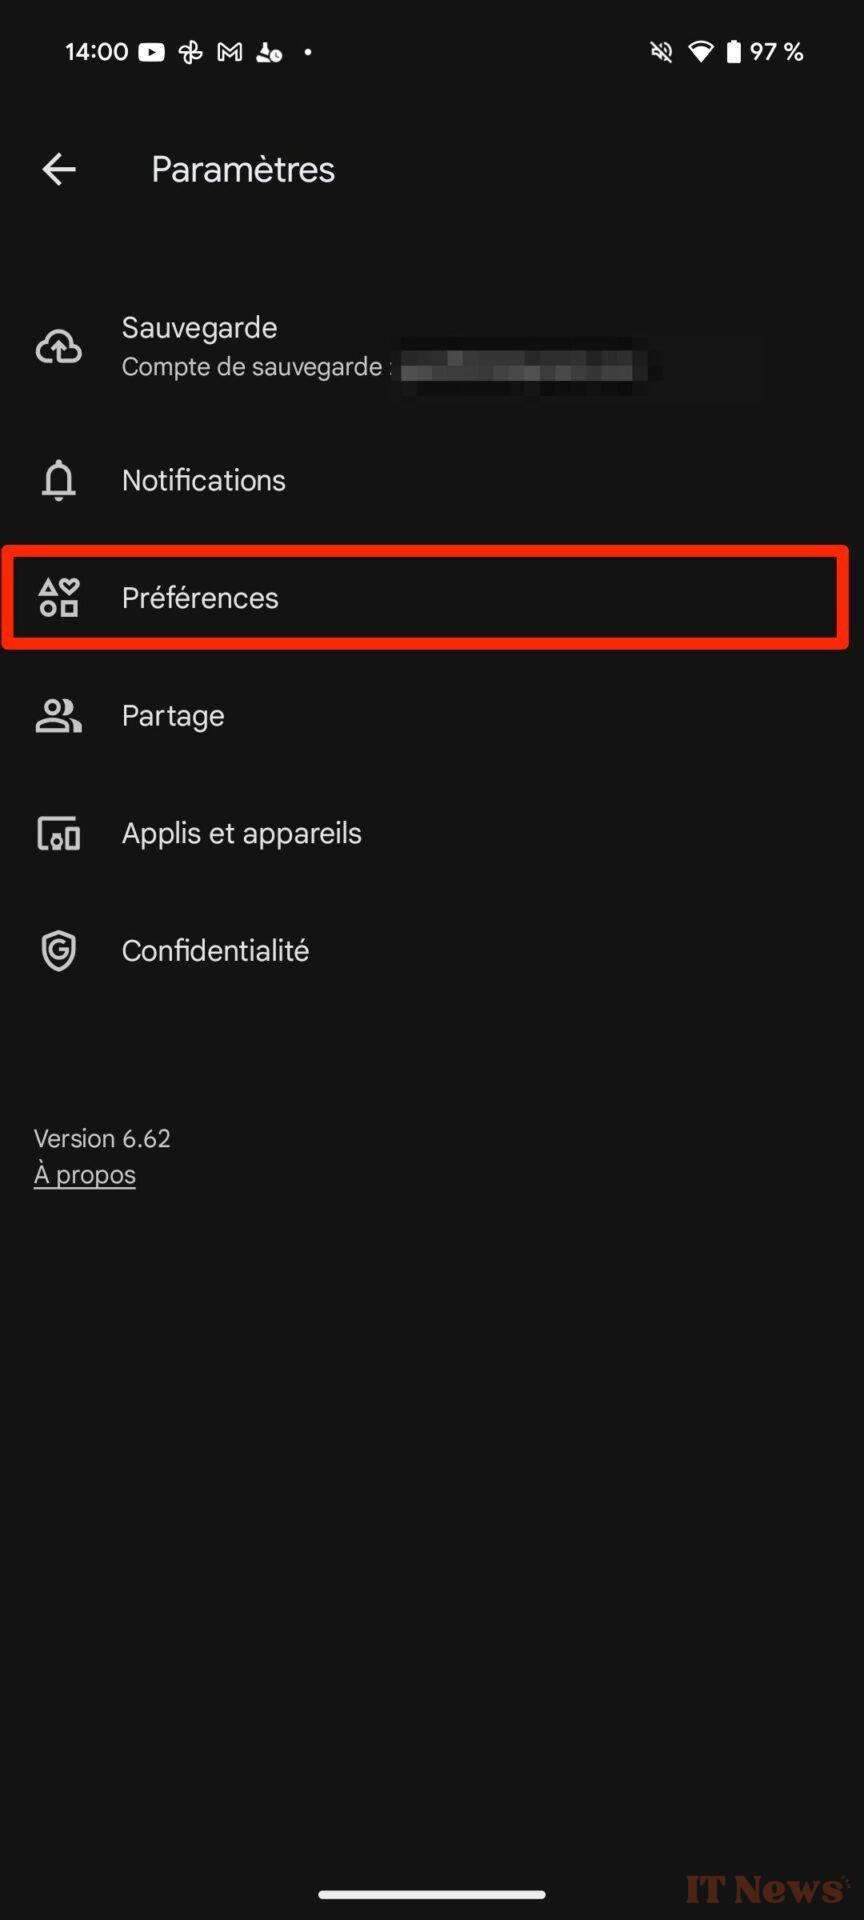
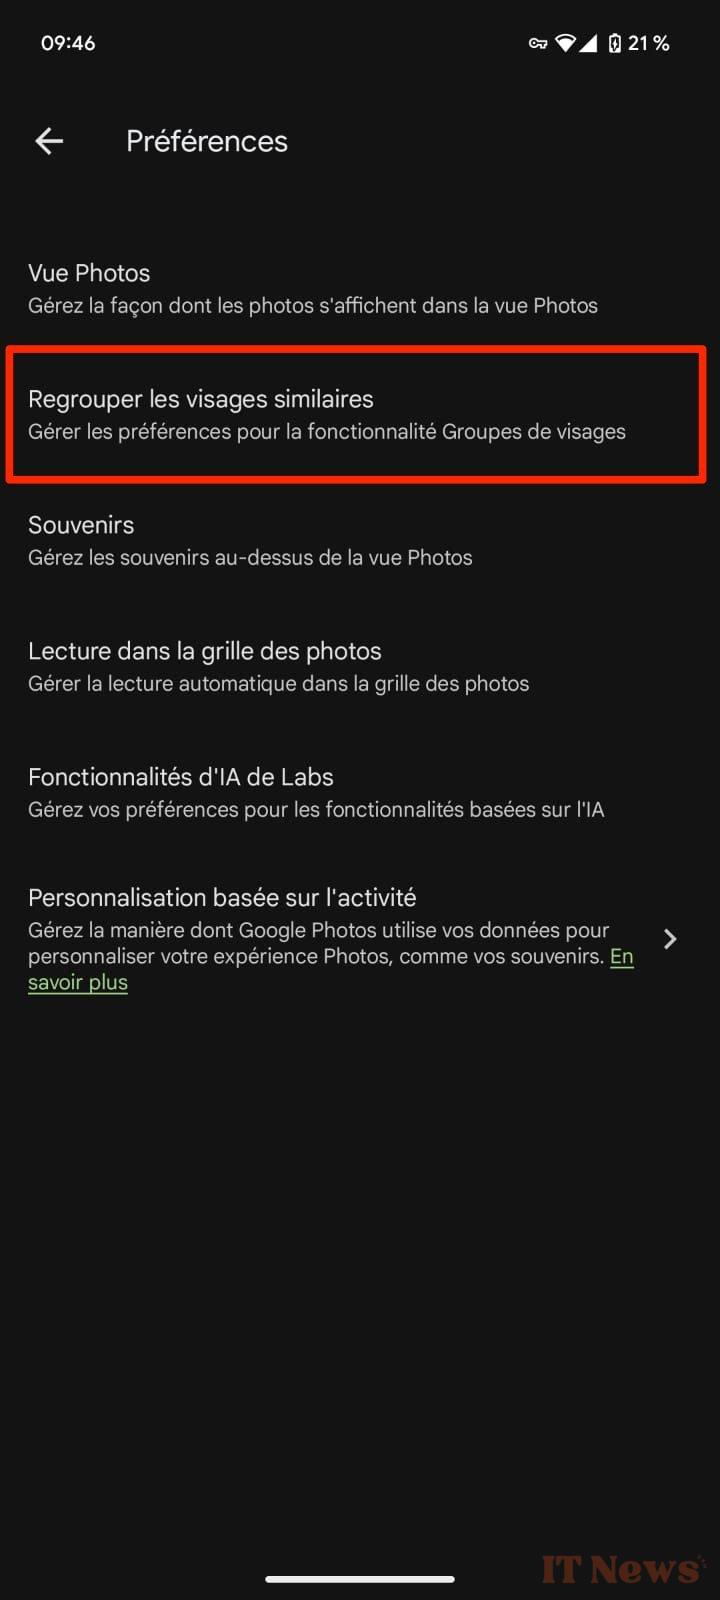
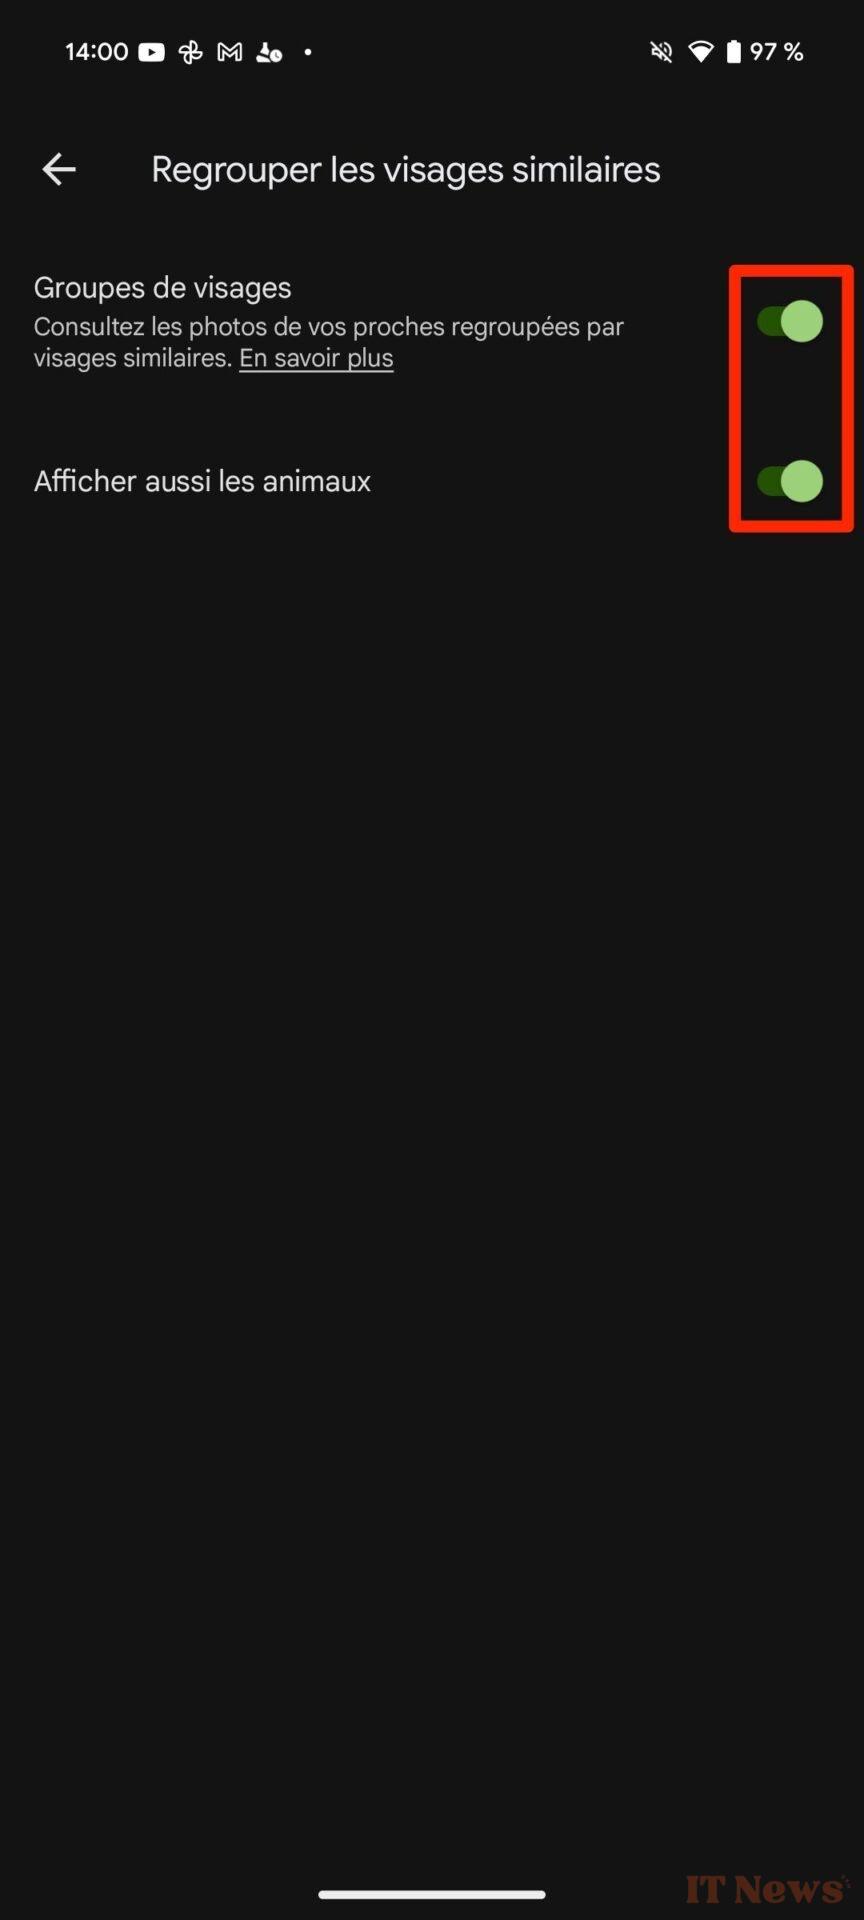
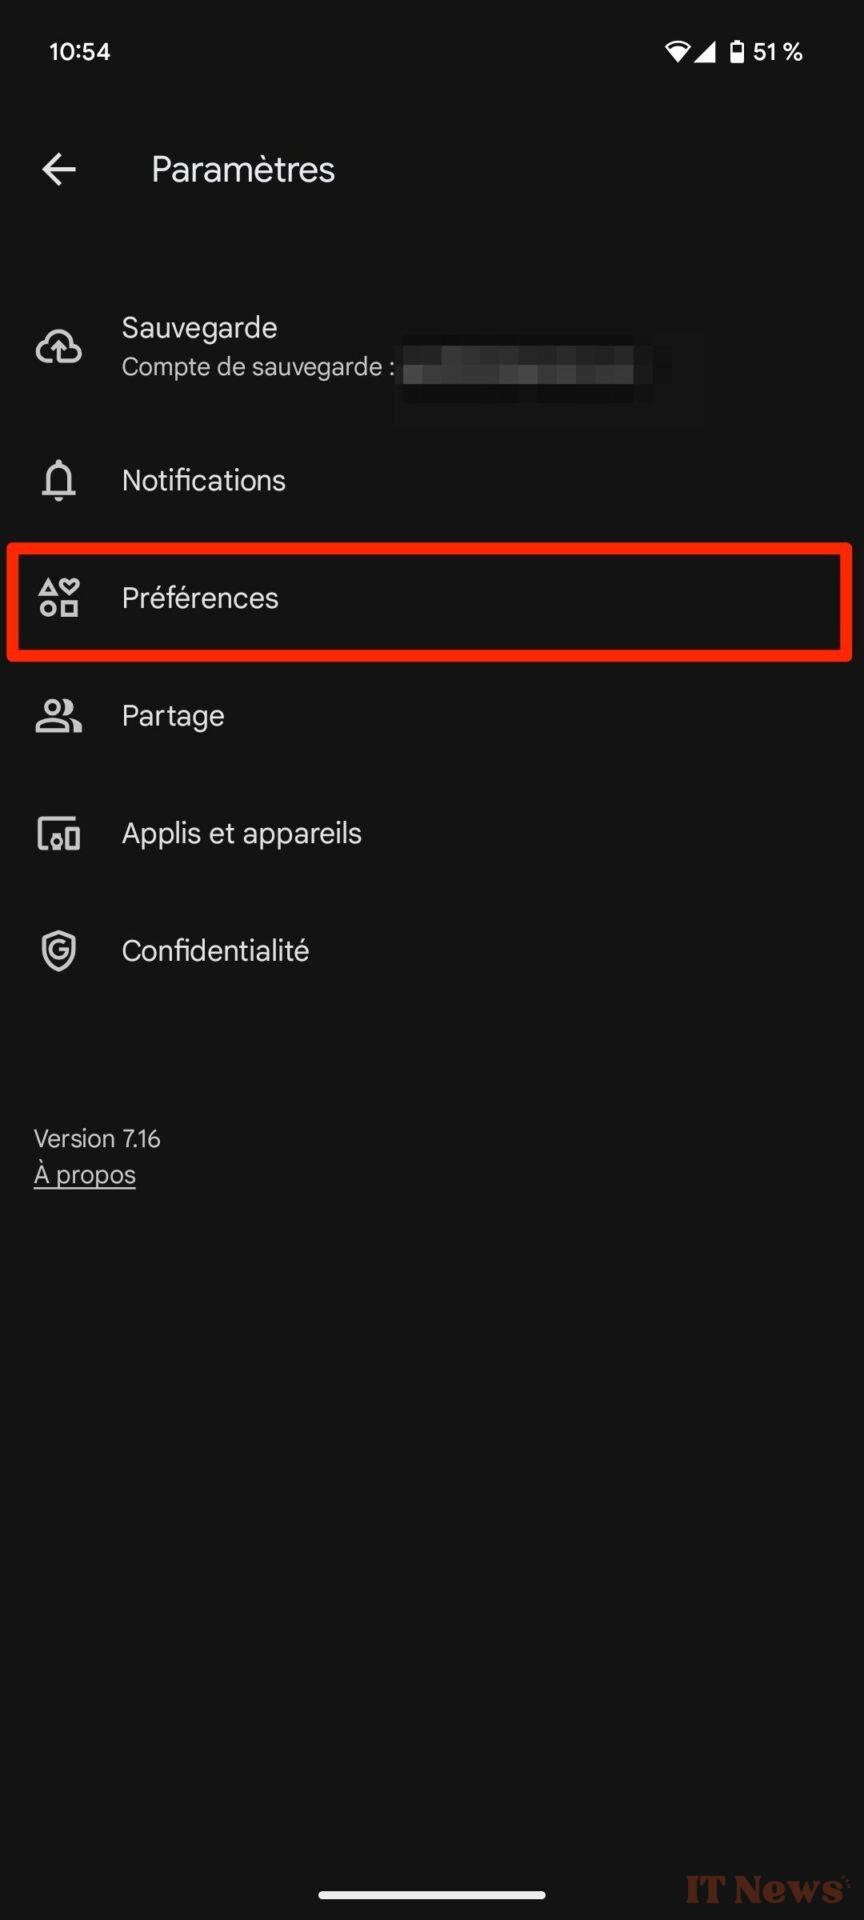
To enable it, tap on your avatar to open the main menu, and go to the Settings of the application. Then go to Preferences, then in the Group similar faces menu, make sure that the Face groups and Also show animals options are enabled.

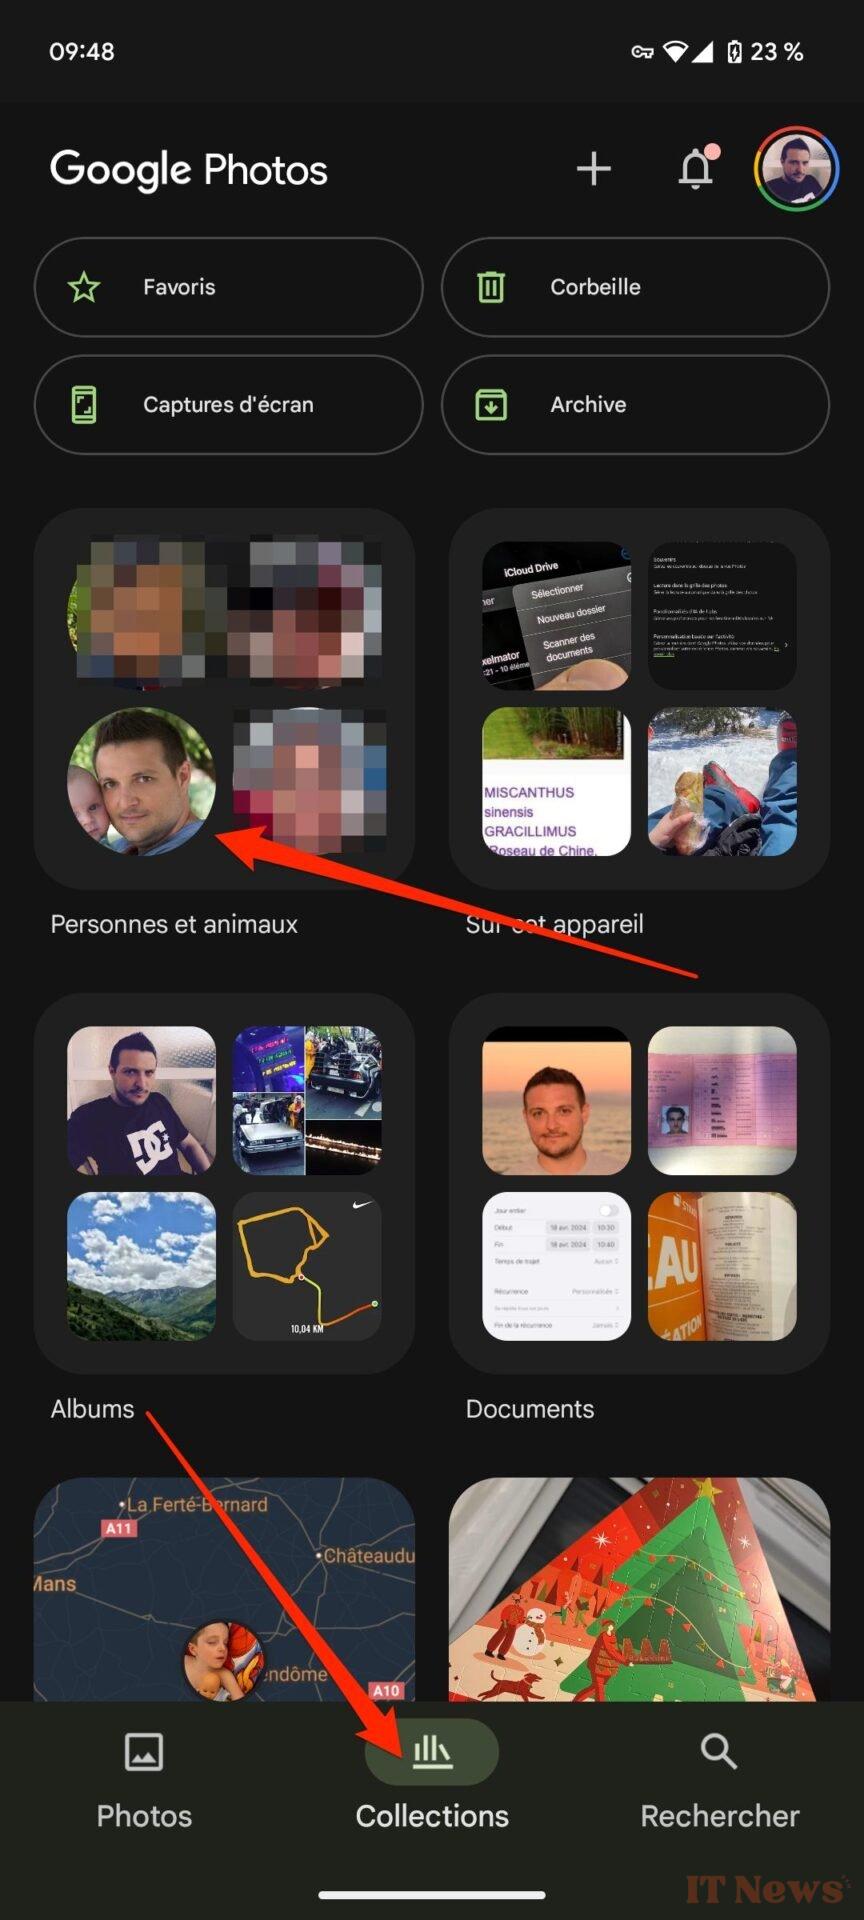
Once this prerequisite is met, go to the Collection tab. Then enter the People and Animals section, you should see a suggestion of faces detected by Google Photos. Select one, and enter the person's name to identify them.
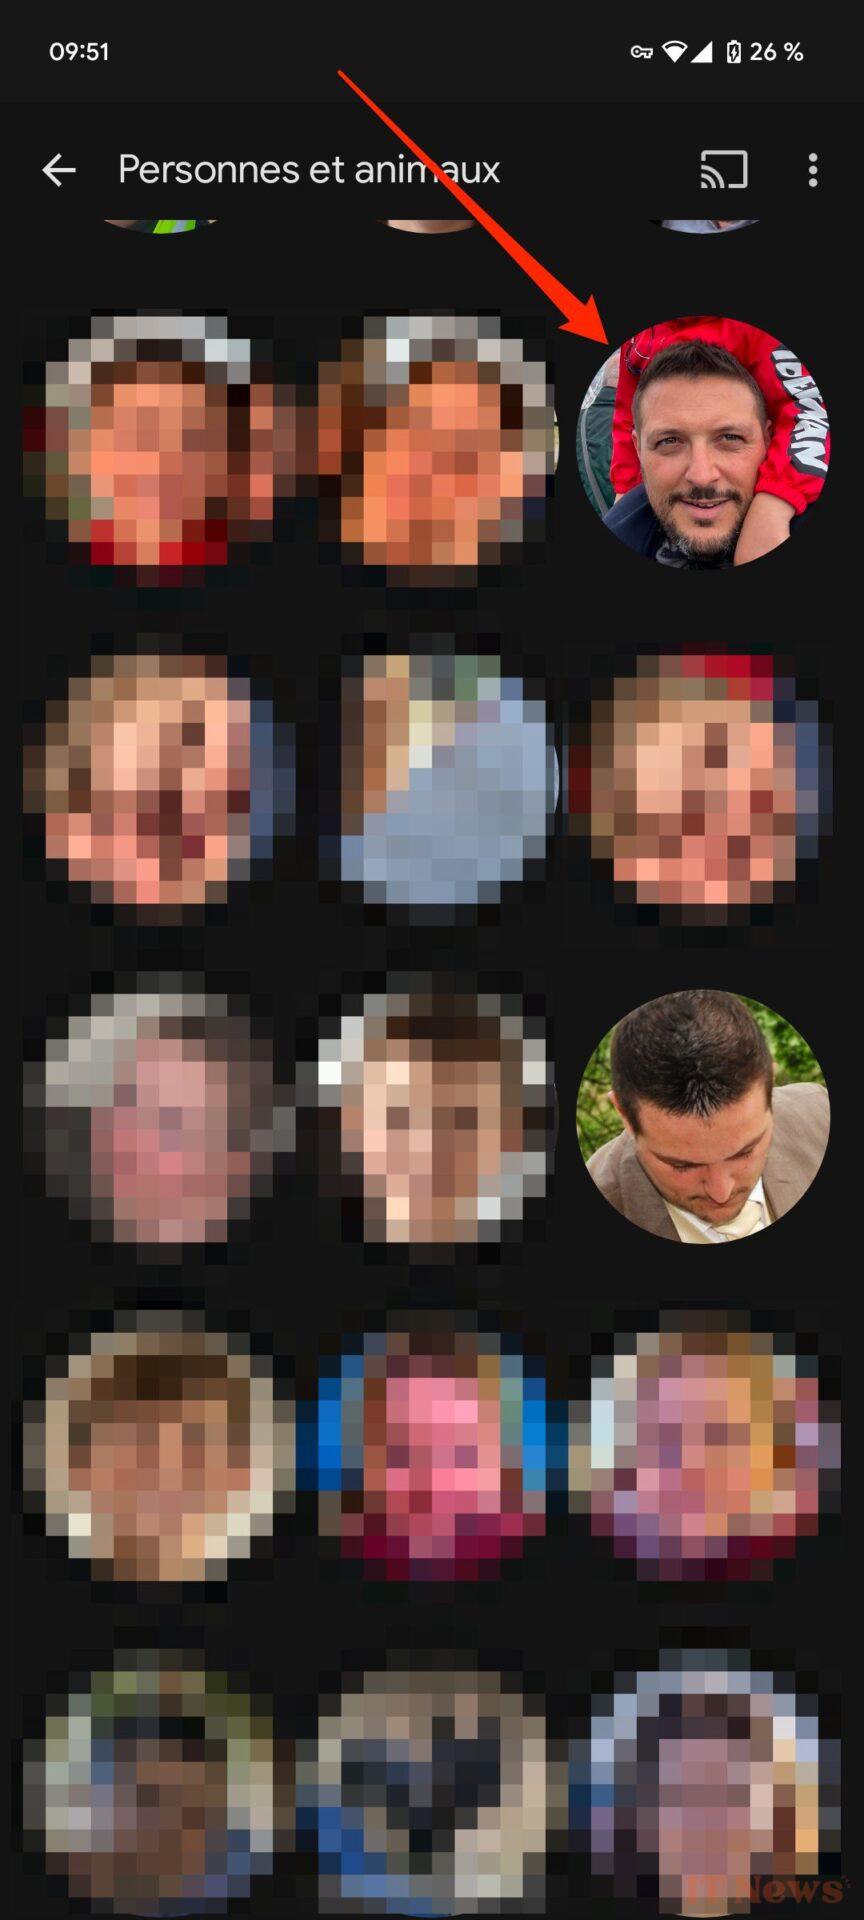
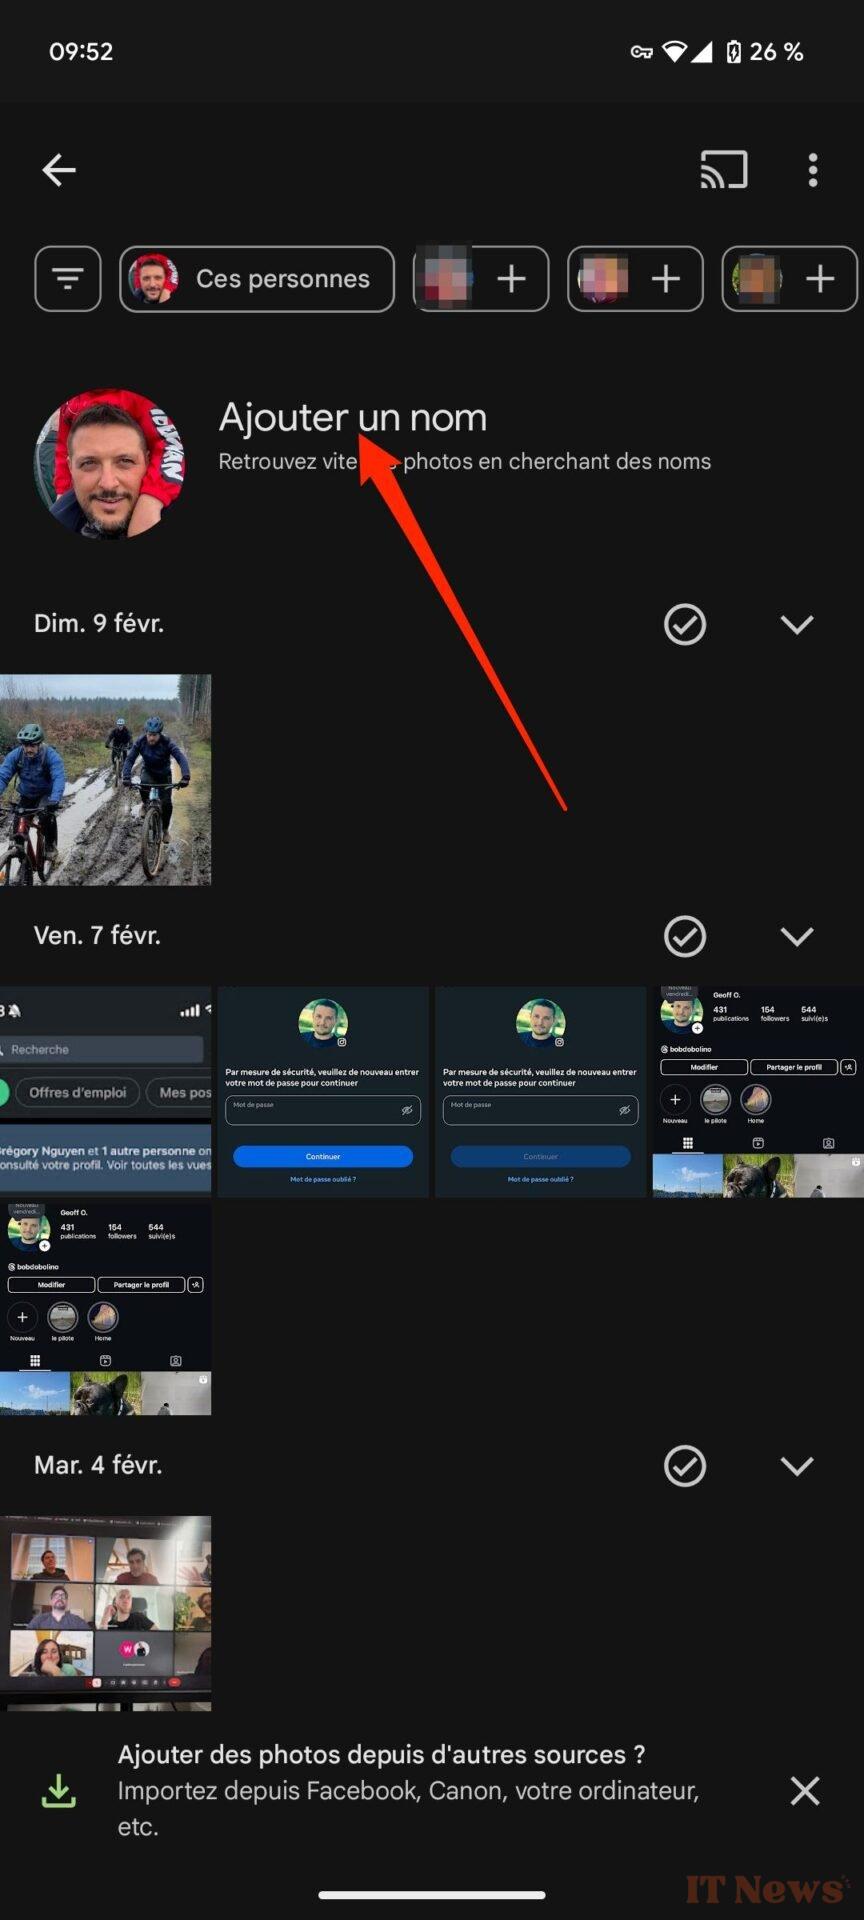
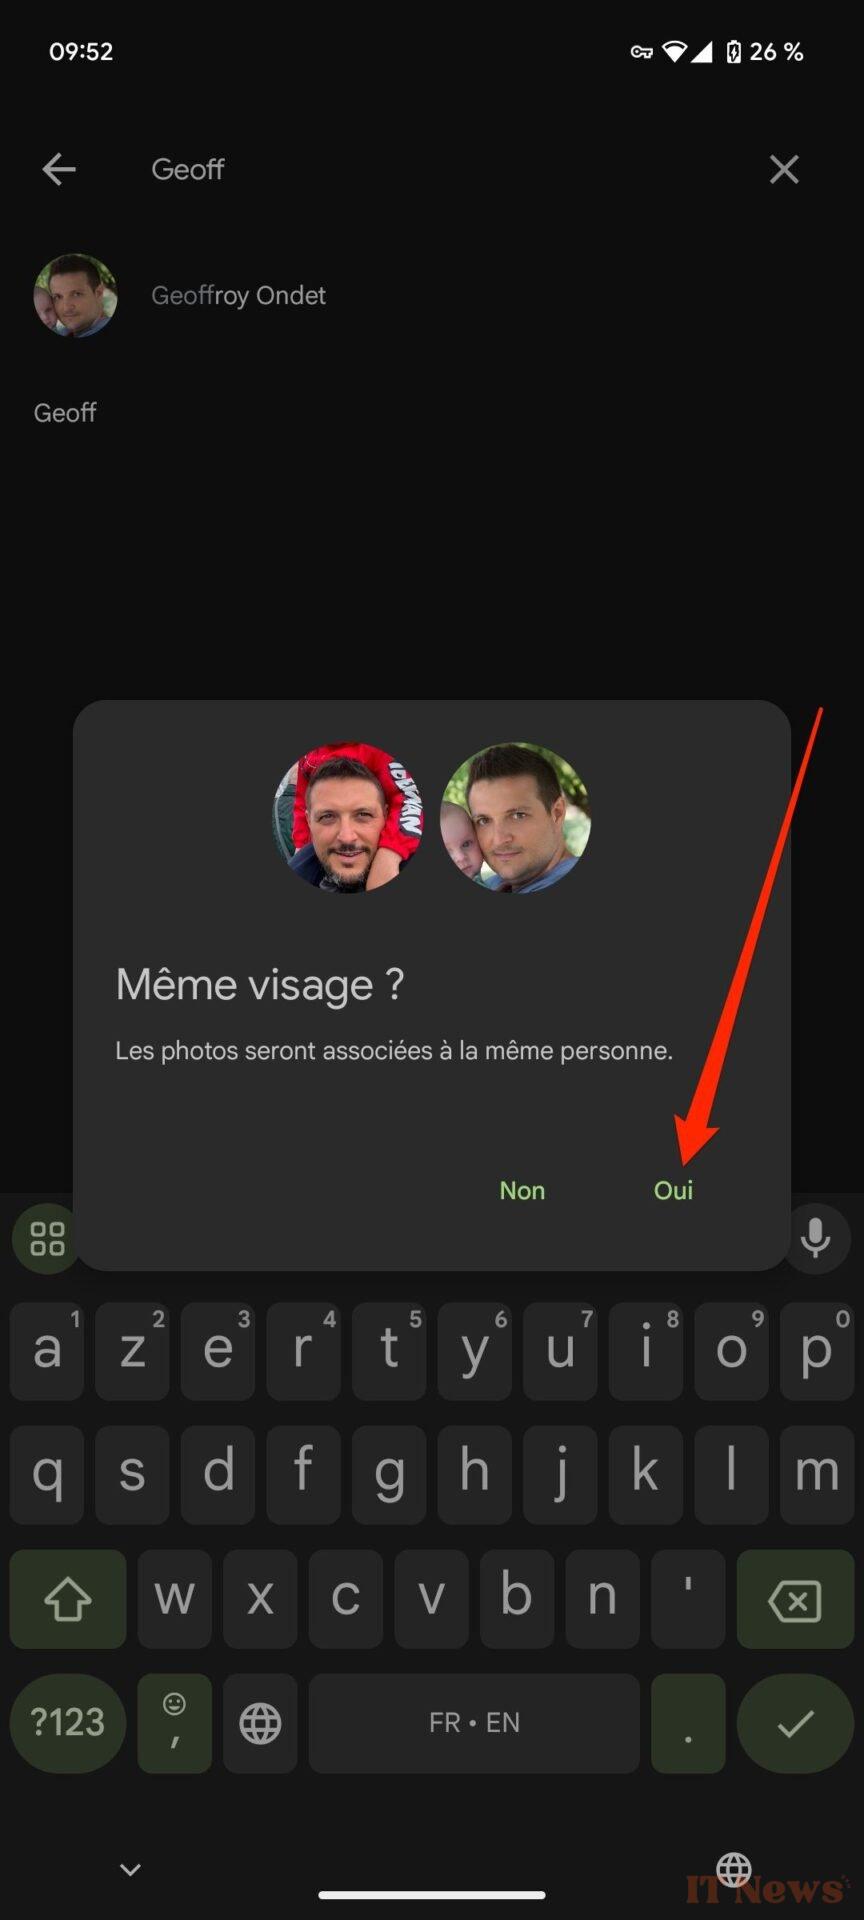
Repeat for each recognized face. The Google Photos algorithm will then analyze your photo library and group together all the photos in which each person appears. You can then easily view all the photos in which your face, or that of a loved one, appears. When a face is already saved but not recognized, entering the person's name will allow Google Photos to refine its algorithm to recognize other images in which the person appears.
6. Easily find a photo
You may not know it, but finding an image in Google Photos is much simpler than you might imagine. If you want to find, for example, images of a particular event, you can simply enter the date of the event into the search engine. The latter is also fully capable of displaying images captured in a specific location.
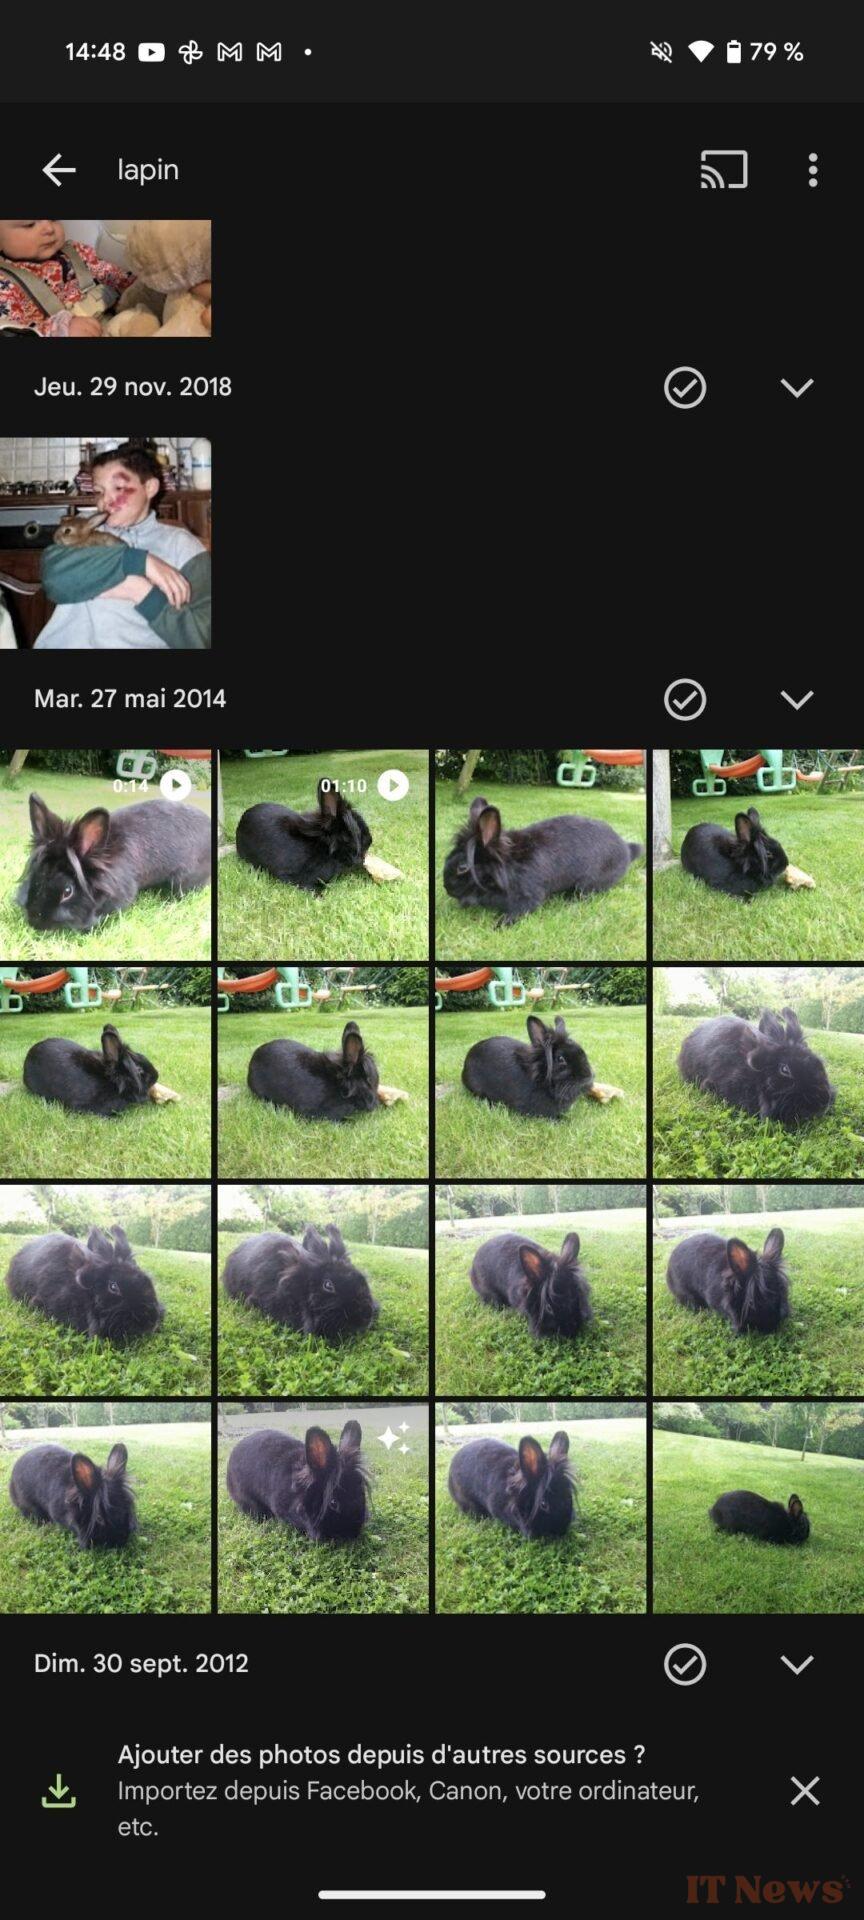
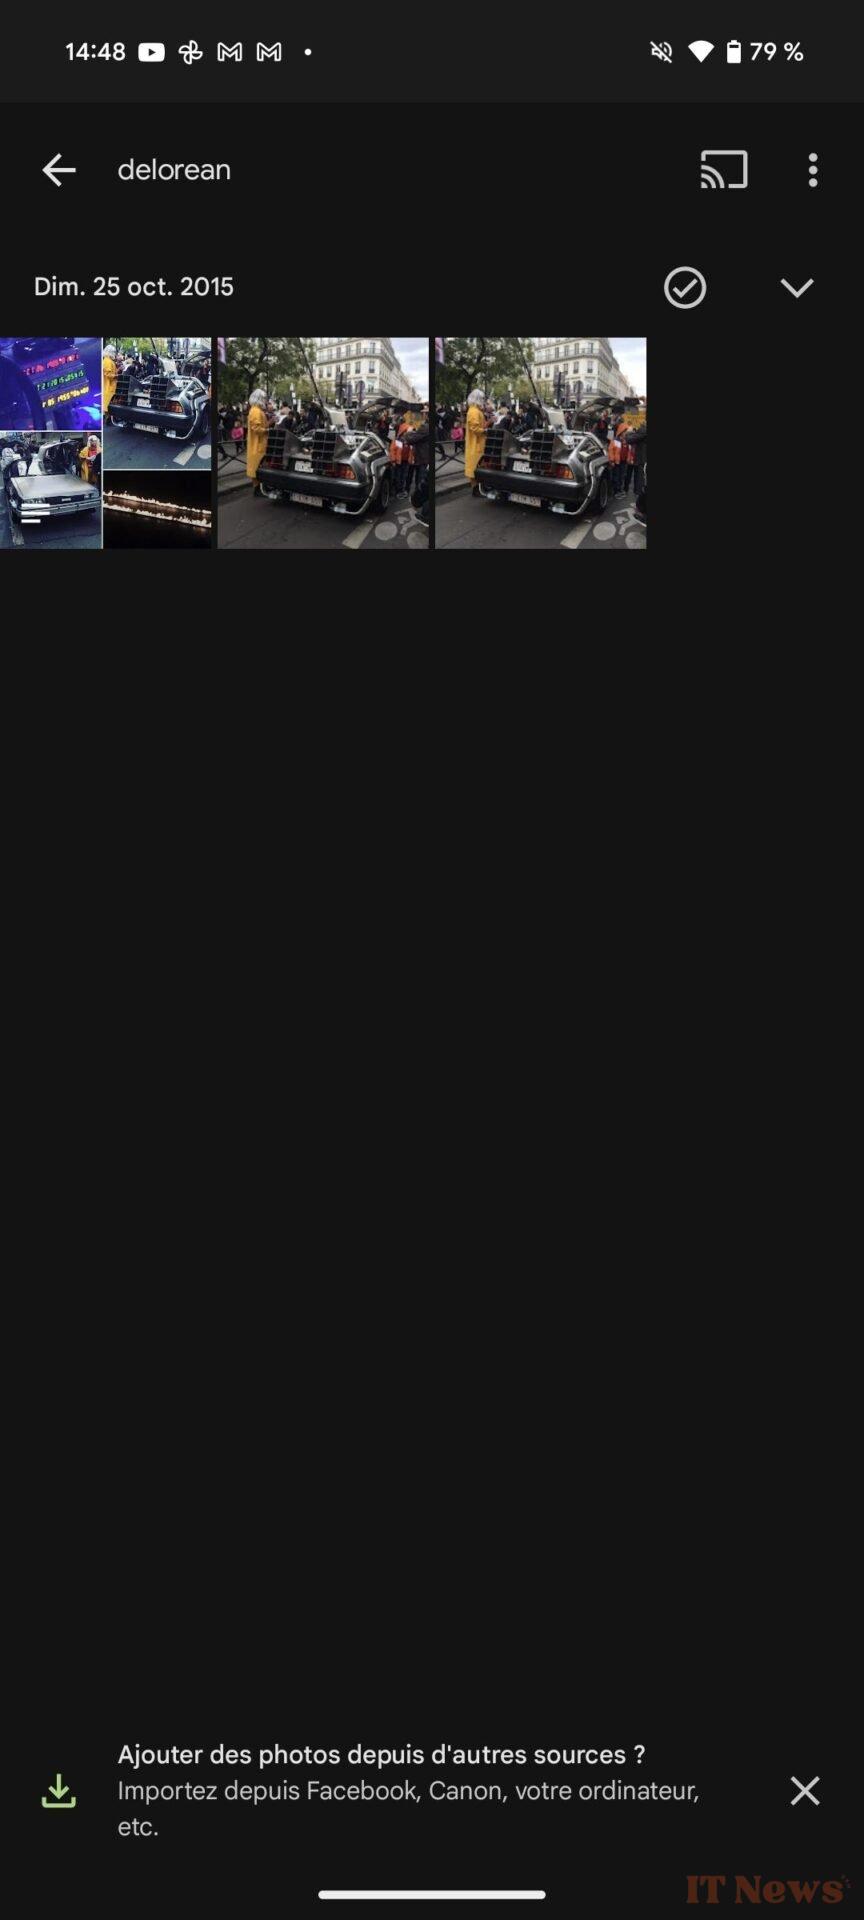
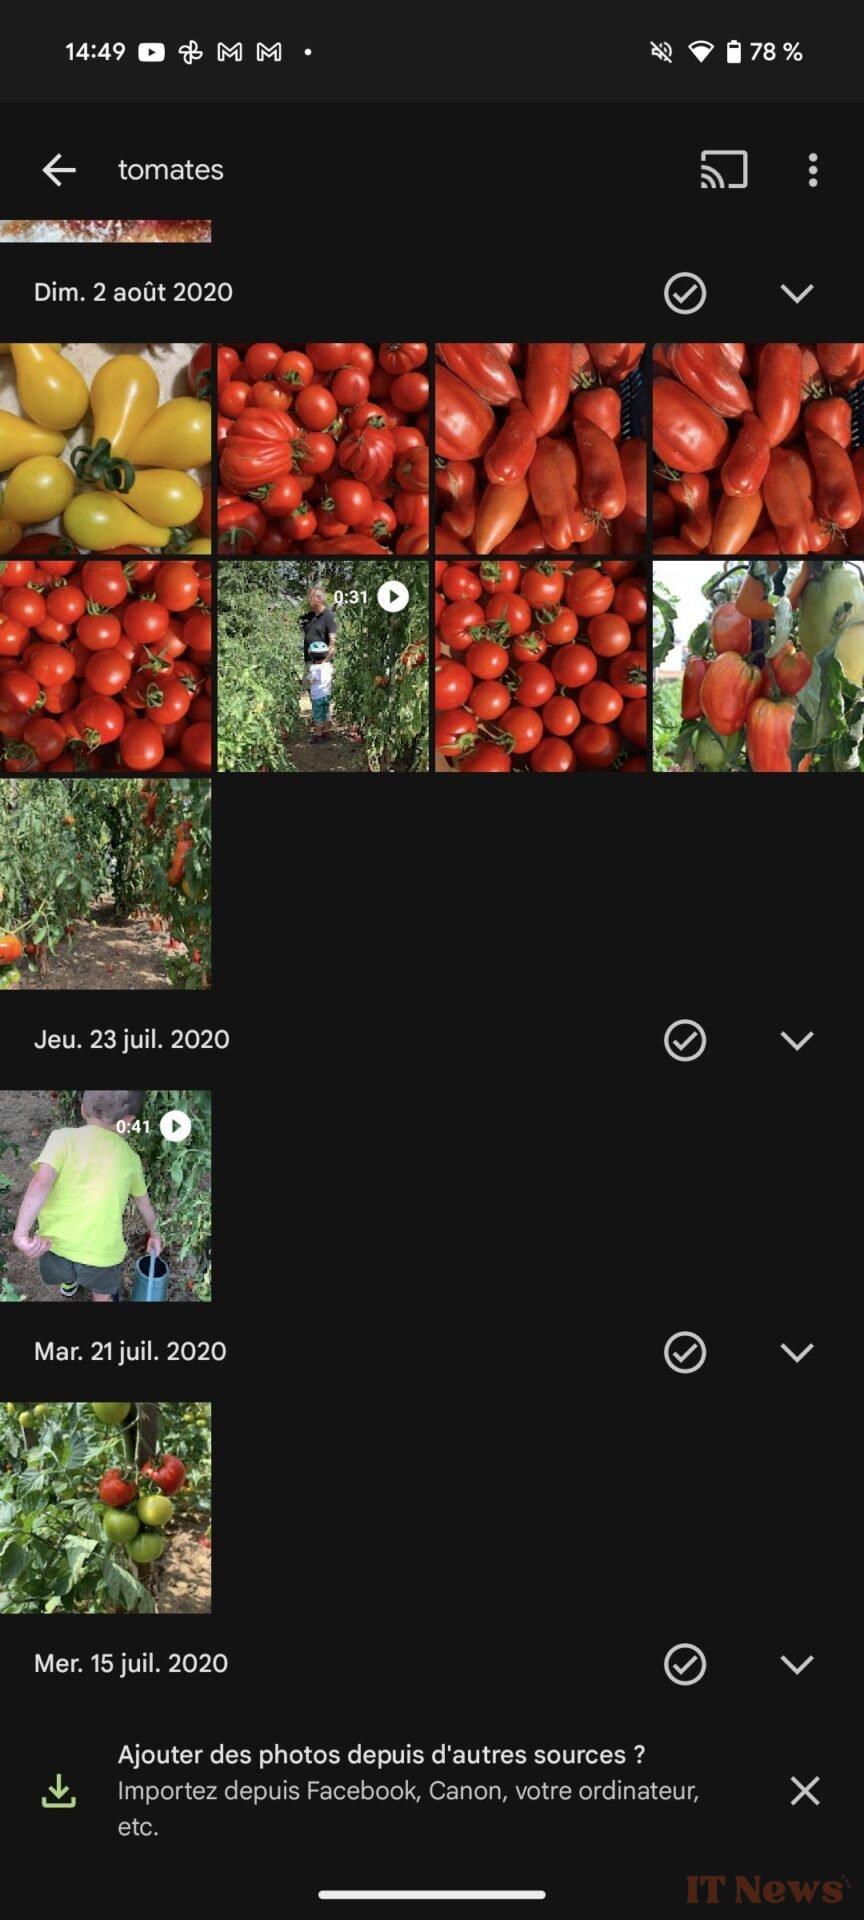
But the big strength of Google's application is also its ability to recognize the elements displayed in your images. Thanks to a little artificial intelligence, Google Photos is able to show you all the images containing cars, tomatoes, rabbits, etc.
You can even enter text present on documents that you have photographed, Google Photos will be able to find them for you.
If you have identified your loved ones and pets in the application, you can even enter their names directly into the search engine to obtain the images in which they appear.
7. Create souvenir videos
The main problem with photos and videos taken on a smartphone is that they usually end up lost in the depths of your photo library. To avoid this, Google Photos has several tools to help you find your memories. For example, the application displays new memories from the past daily in thematic selections displayed within a carousel displayed at the top of the screen. But you can generate small souvenir videos yourself in a completely automated way, simply by telling Google Photos what you want to include.
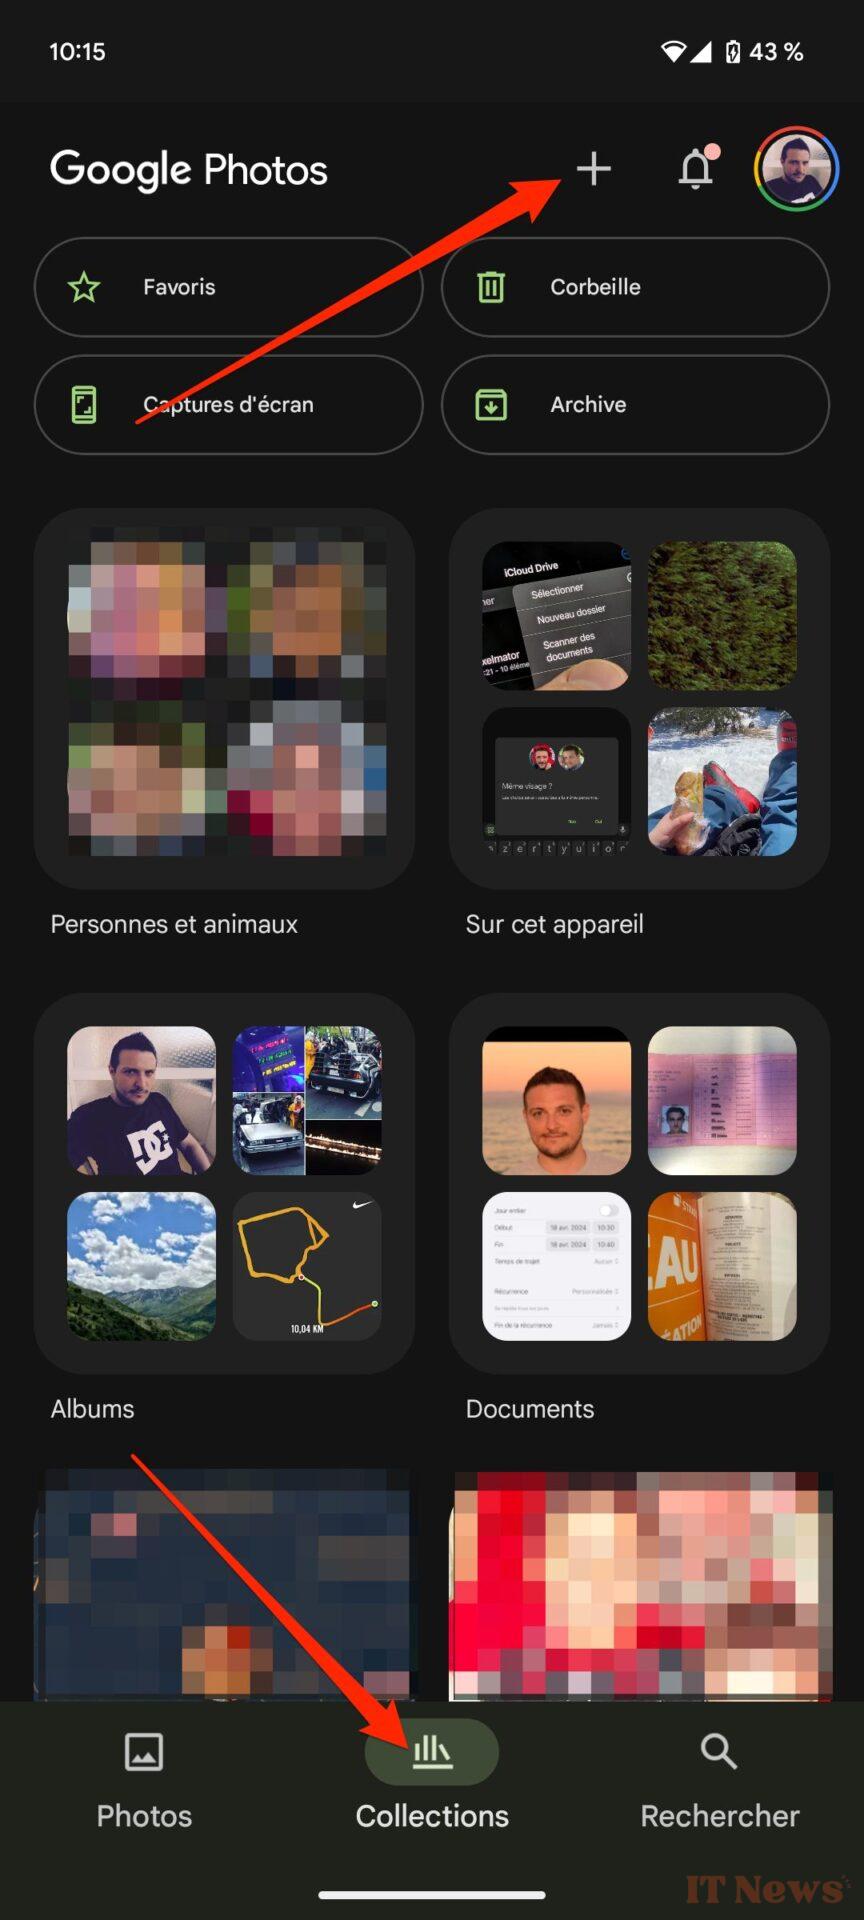
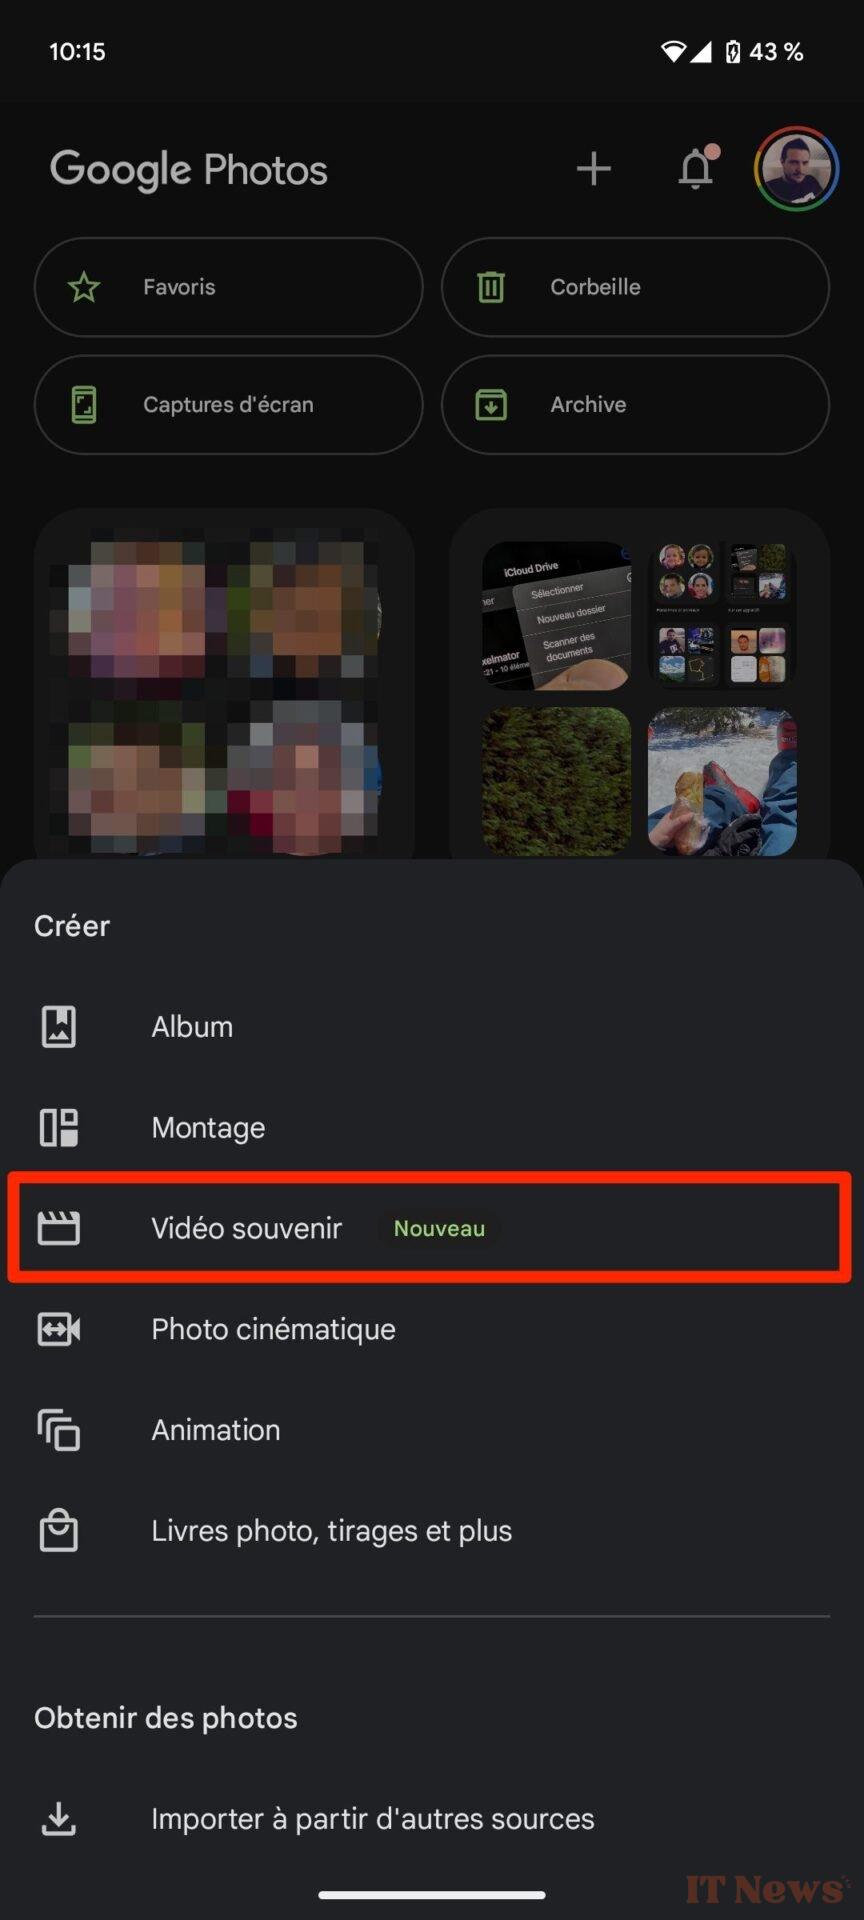
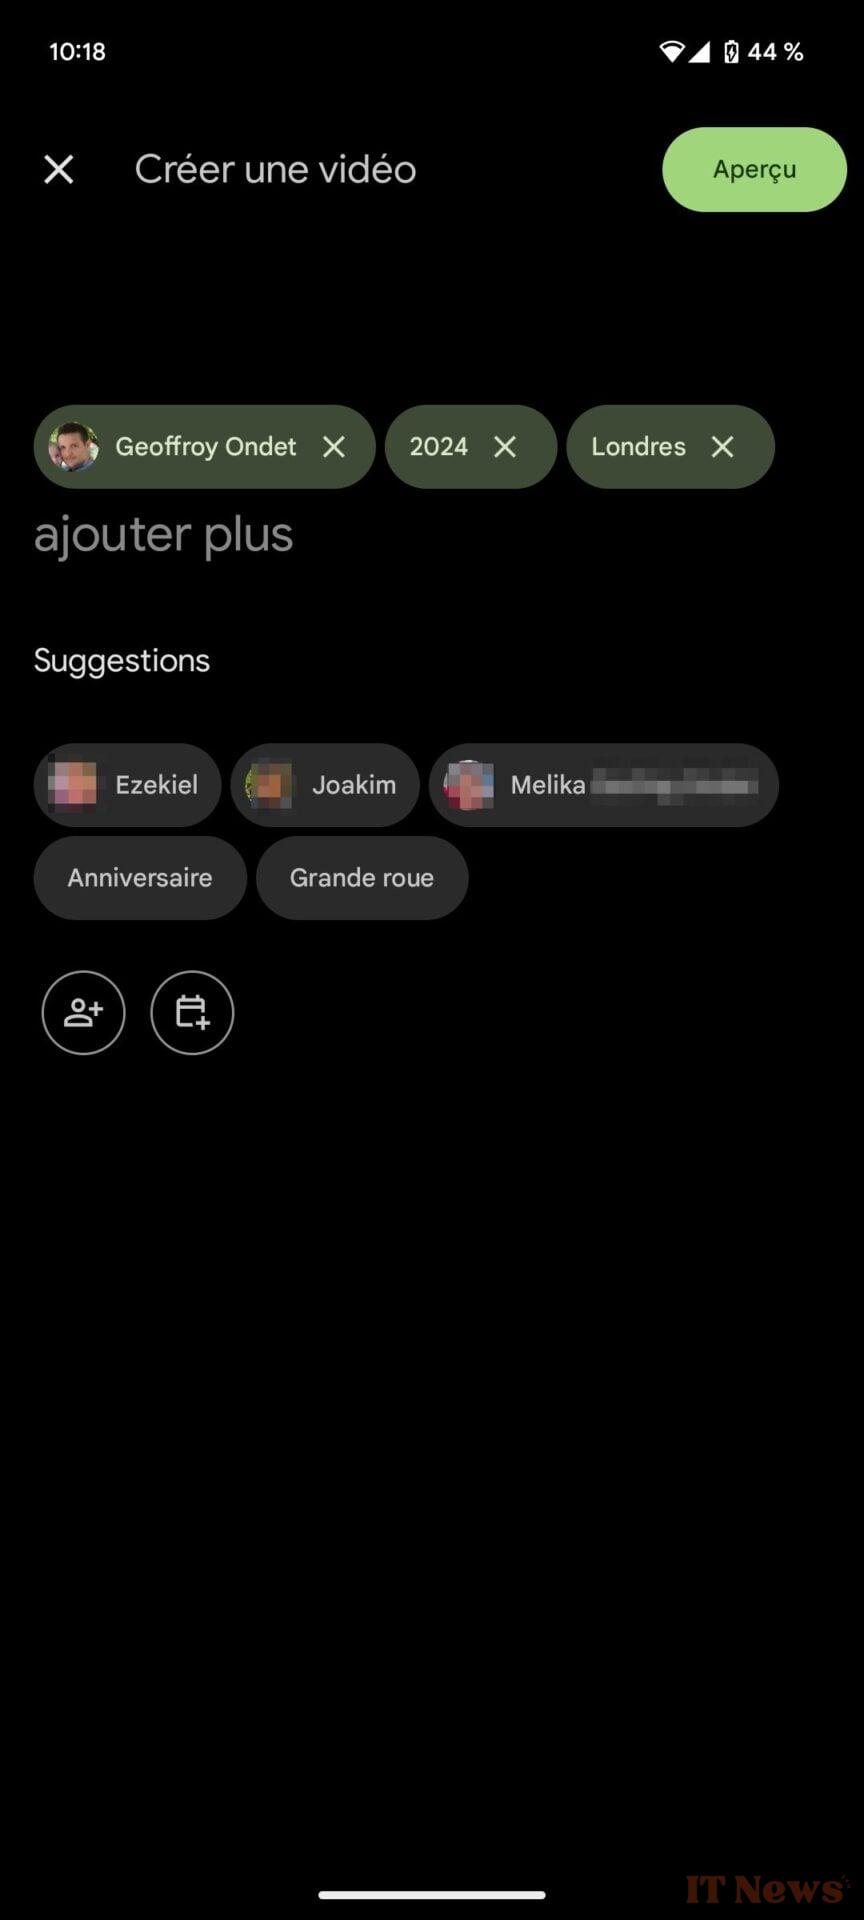
To do this, go to the Collections tab and tap the + button at the top right of the screen. In the pop-up that appears, under the heading Create, tap Souvenir Video.
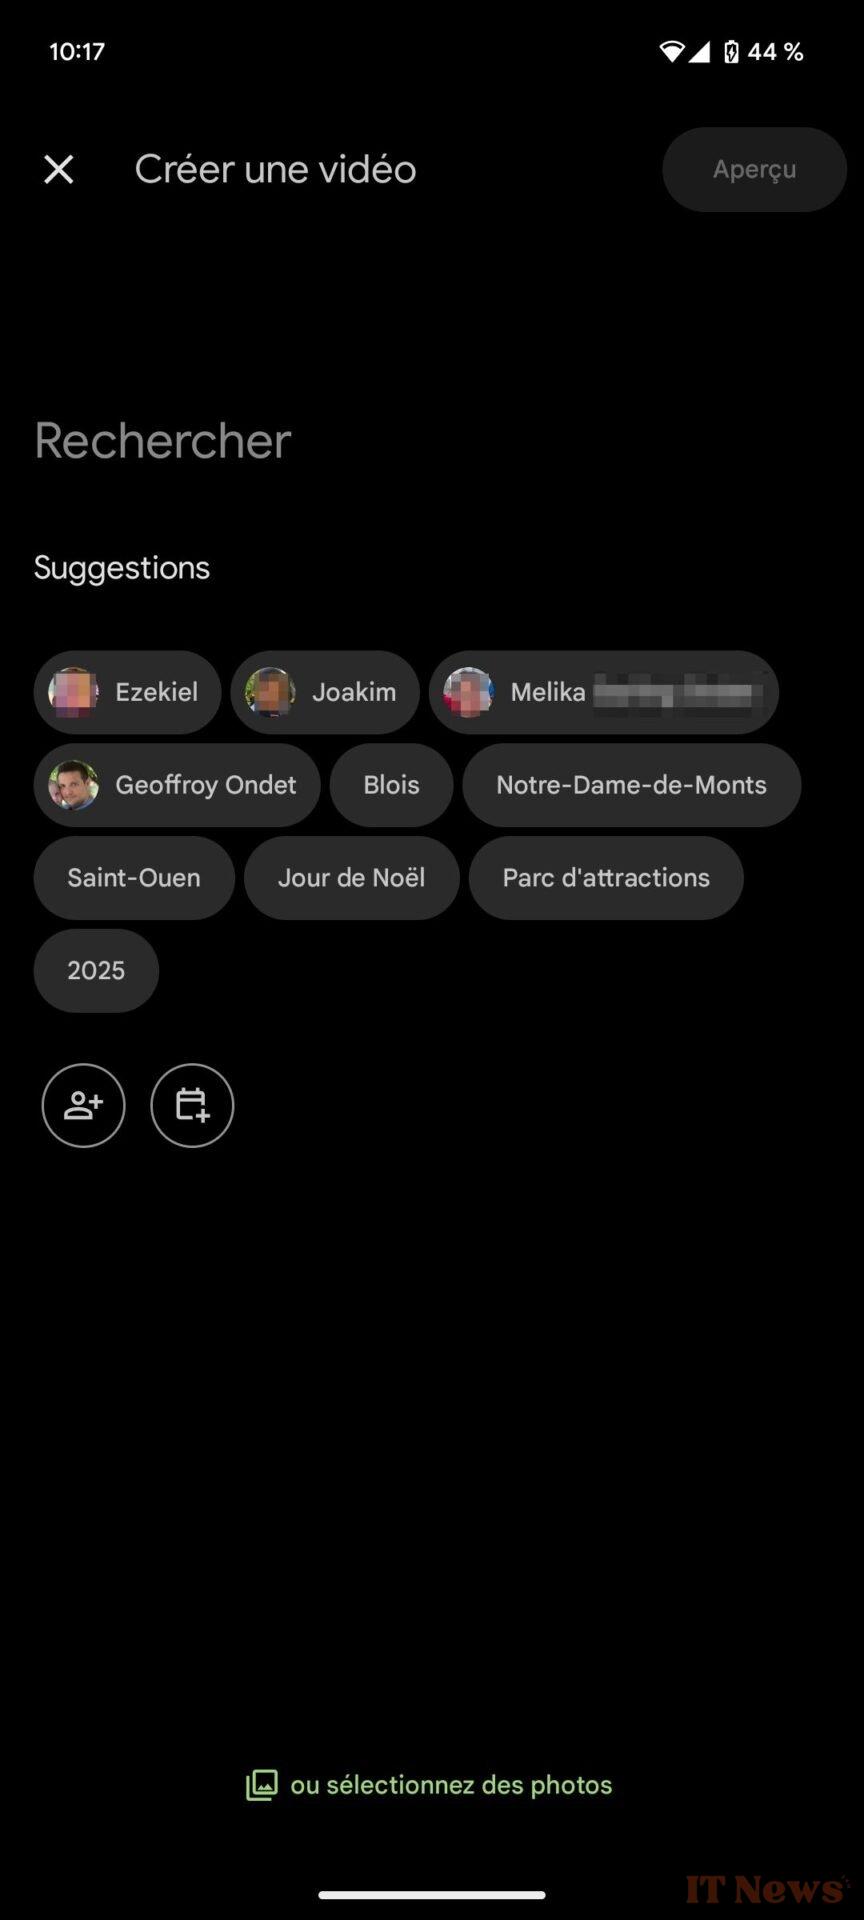
Google Photos then displays a wizard that guides you step by step through creating your souvenir video. Tap Next, then Start. You can then search directly for photos, add people, or specify dates or locations for Google Photos to include. Finally, press the Preview button to view a quick rendering of your video.

You can then modify the soundtrack or adjust the format of the selected images. If you're happy with the memory generated by Google, select Save to keep it. The video will be automatically added to the most recent items in your photo library.
8. Create animations, moving photos, and montages
In the same way that you can automatically generate movies, Google Photos offers tools for creating Animations, Cinematic Photos, or even montages. Go to the Collections tab, as in the previous step, and press the + button.
Again, enter each category and select the image(s) you want to include in the project. Google Photos takes care of everything and will, of course, allow you to save your creation to your photo library.
9. Import your film photos
You probably don't know this, but you can very easily import your old film photos into Google Photos. All you need to do is download the Google Photoscan app on your smartphone.
Then simply scan your paper photos using your smartphone's camera and they will be automatically added to your Google Photos library.
10. Manage the memories displayed
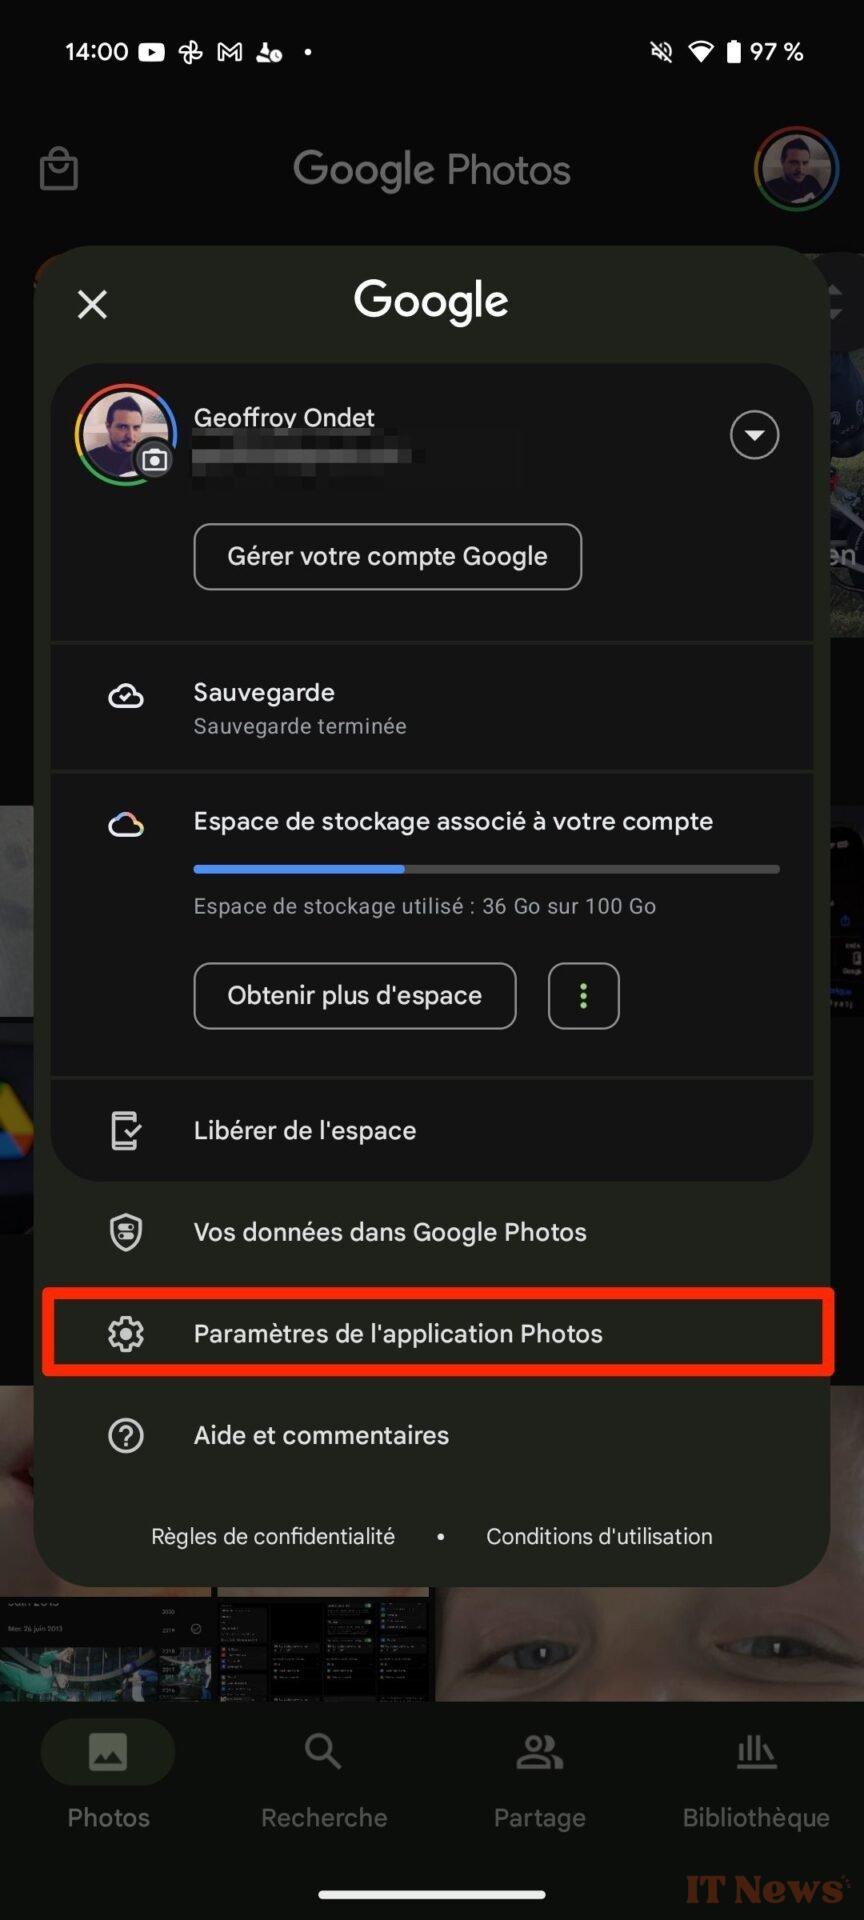
Do you generally appreciate the memories automatically displayed by Google Photos, but would you like to be able to forget some of them? It's entirely possible. To do this, tap on your avatar and go to the Settings of the app. Then go to Preferences, then to the Memories menu.

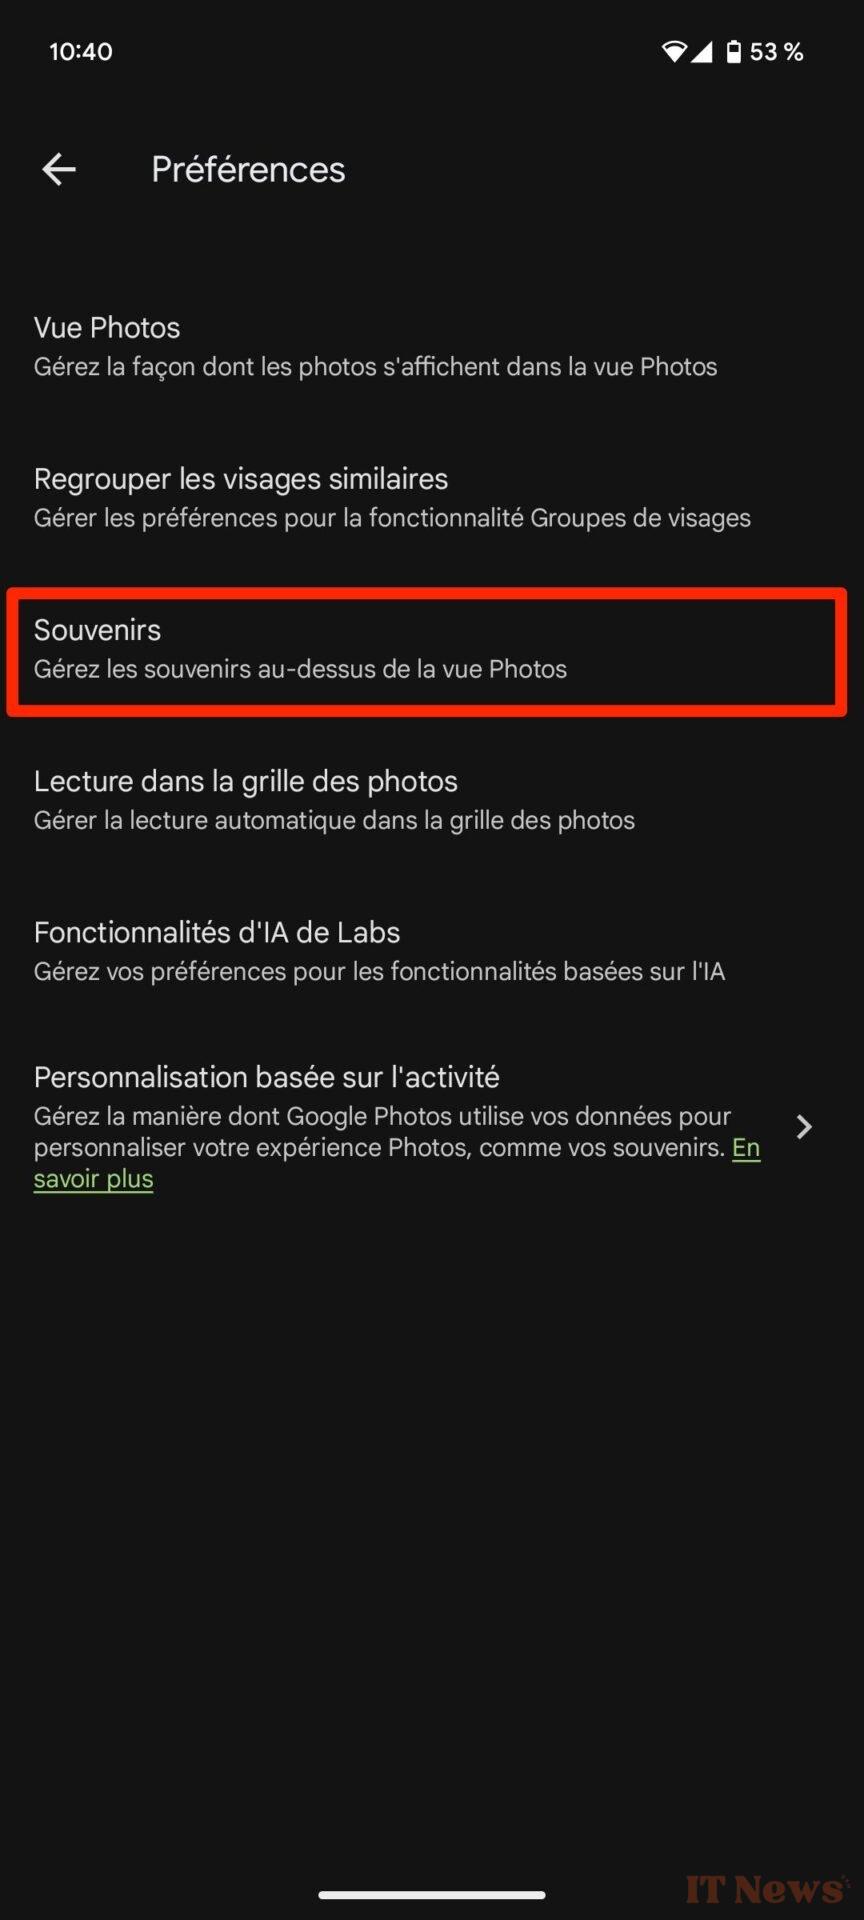
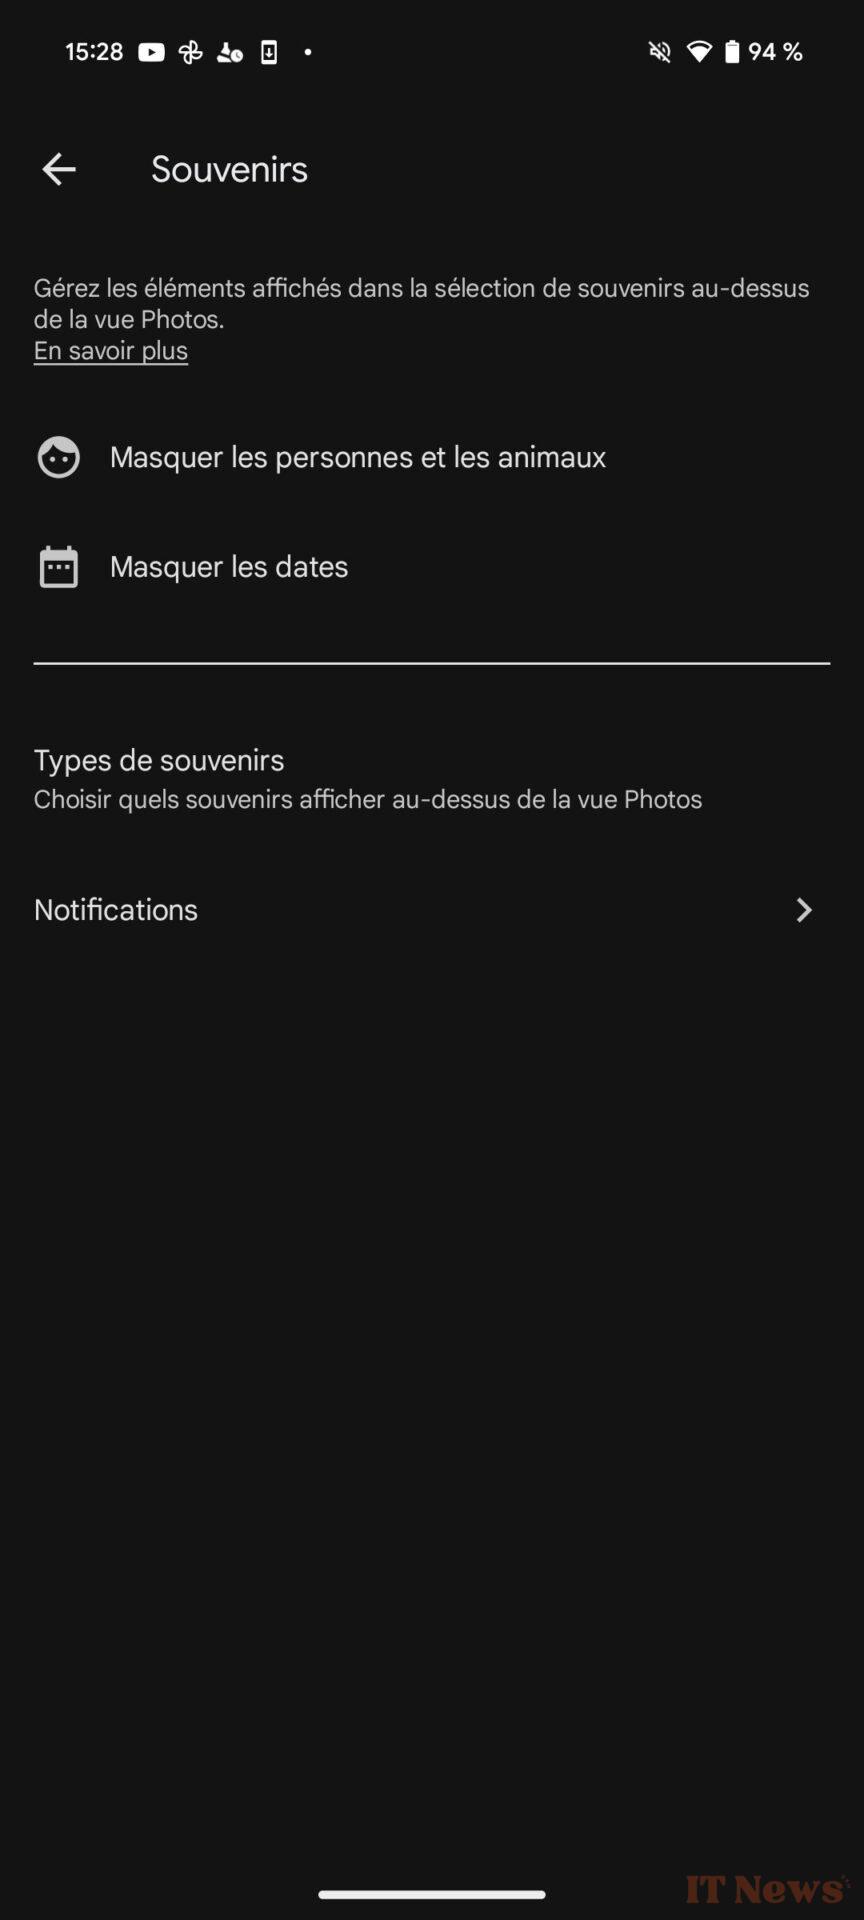
This is where you can hide people, hide dates, or select the types of memories to display in the application.
11. Hide your sensitive photos in a locked folder
Do you have sensitive (or slightly “racy”) photos (or videos) on Google Photos? You should know that it is entirely possible to hide them so that they do not appear in your main library.
To do this, go to the Collections tab. Then scroll down the page and enter the Locked menu.
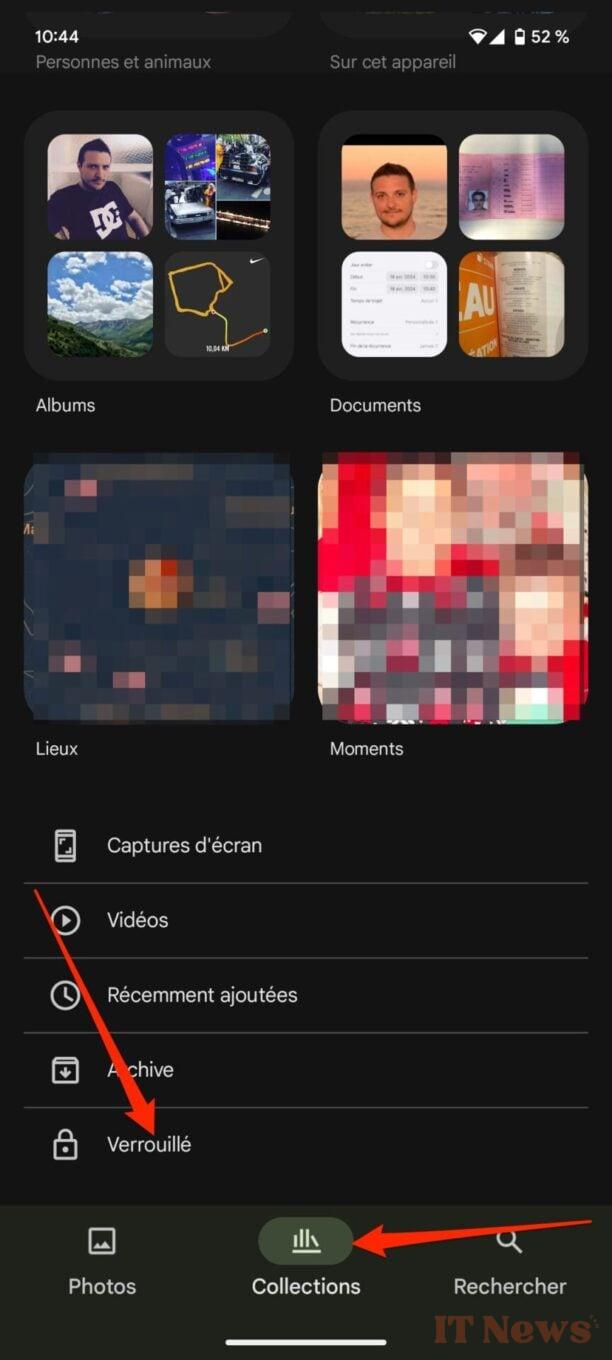
Now choose Configure the locked folder and log in. Google Photos should then prompt you to Backup Locked Folder, so that it is synced to Google Photos and can be accessed on all your devices connected with the same Google account. Finally, tap the Move Items button, then select the sensitive items from your photo library to protect in the locked folder.
12. Cast your photos and videos to your TV
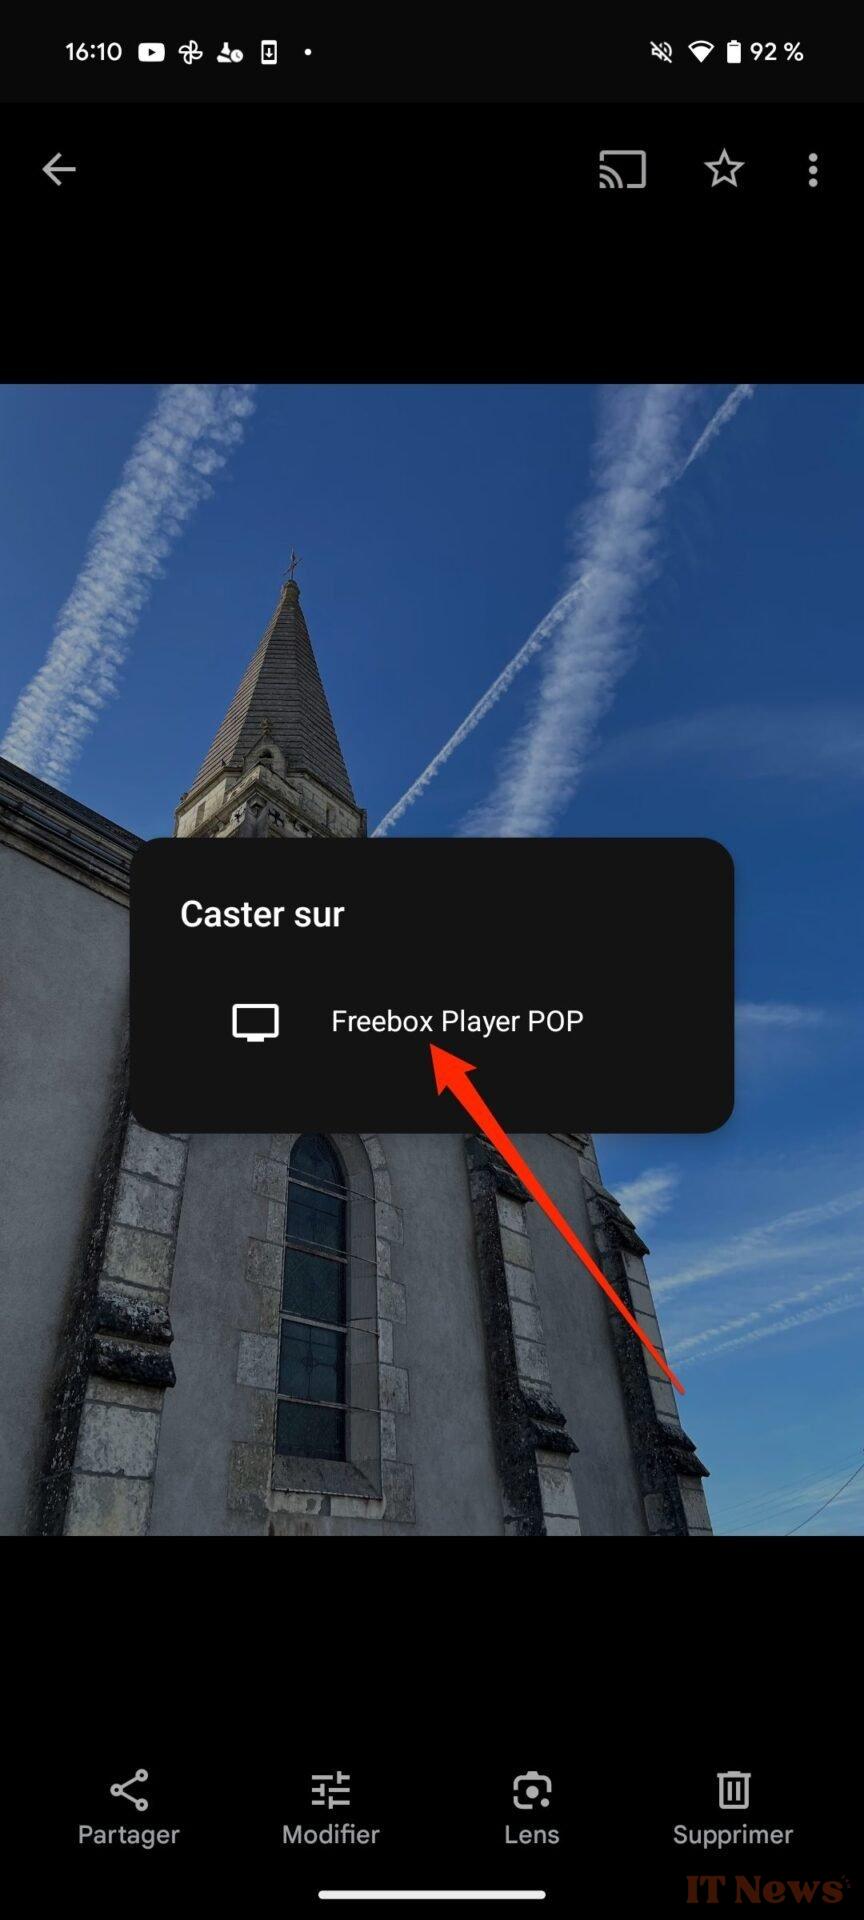
Would you like to cast your latest vacation photos to your TV? It's entirely possible, provided your TV is Chromecast compatible. If you have a TV running Android TV, this should be no problem.
To cast your photos and videos to your TV, simply tap the cast icon displayed in the top right corner of the screen when a photo or video is displayed in full screen, then select the device you want to send the image to.

13. Display your photos on a map
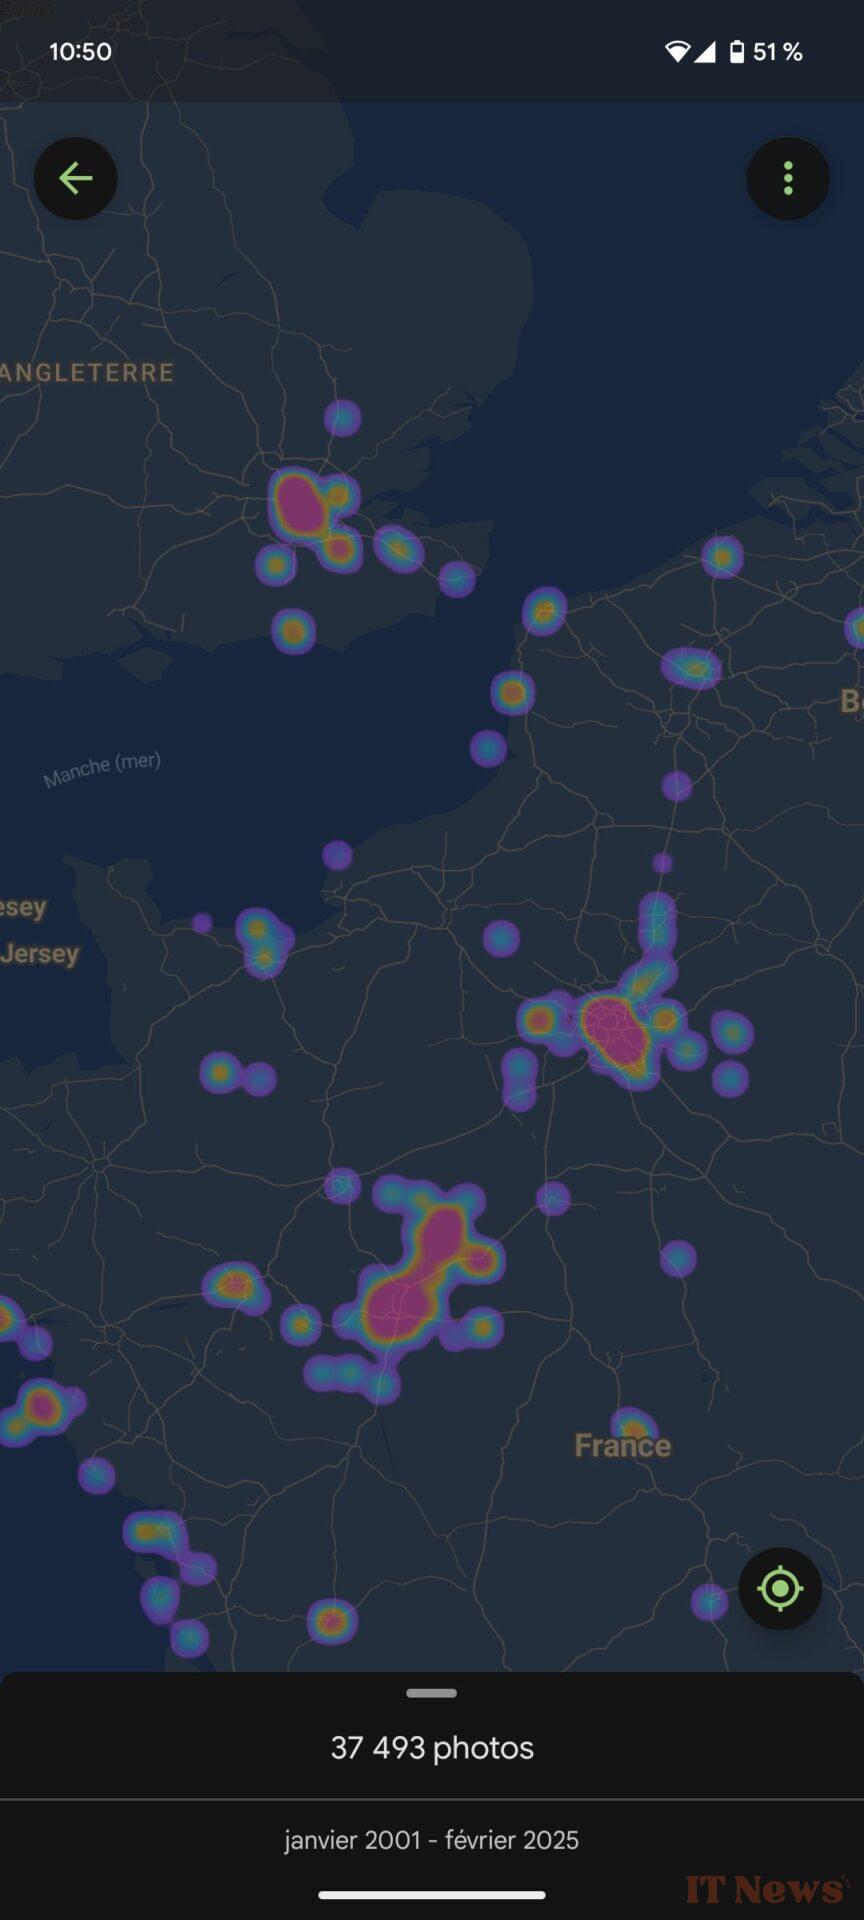
The photos you capture with your smartphone are usually automatically geotagged. This allows you to display them on a map and thus see more broadly all the places you have visited.
To display your photos on Google Maps, go to the Collections tab and then select Places. You will then see a list of all the locations you have visited, along with a selection of photos for each. By selecting the map, you can view the different areas you have visited and where you have captured your memories.


14. Delete duplicates
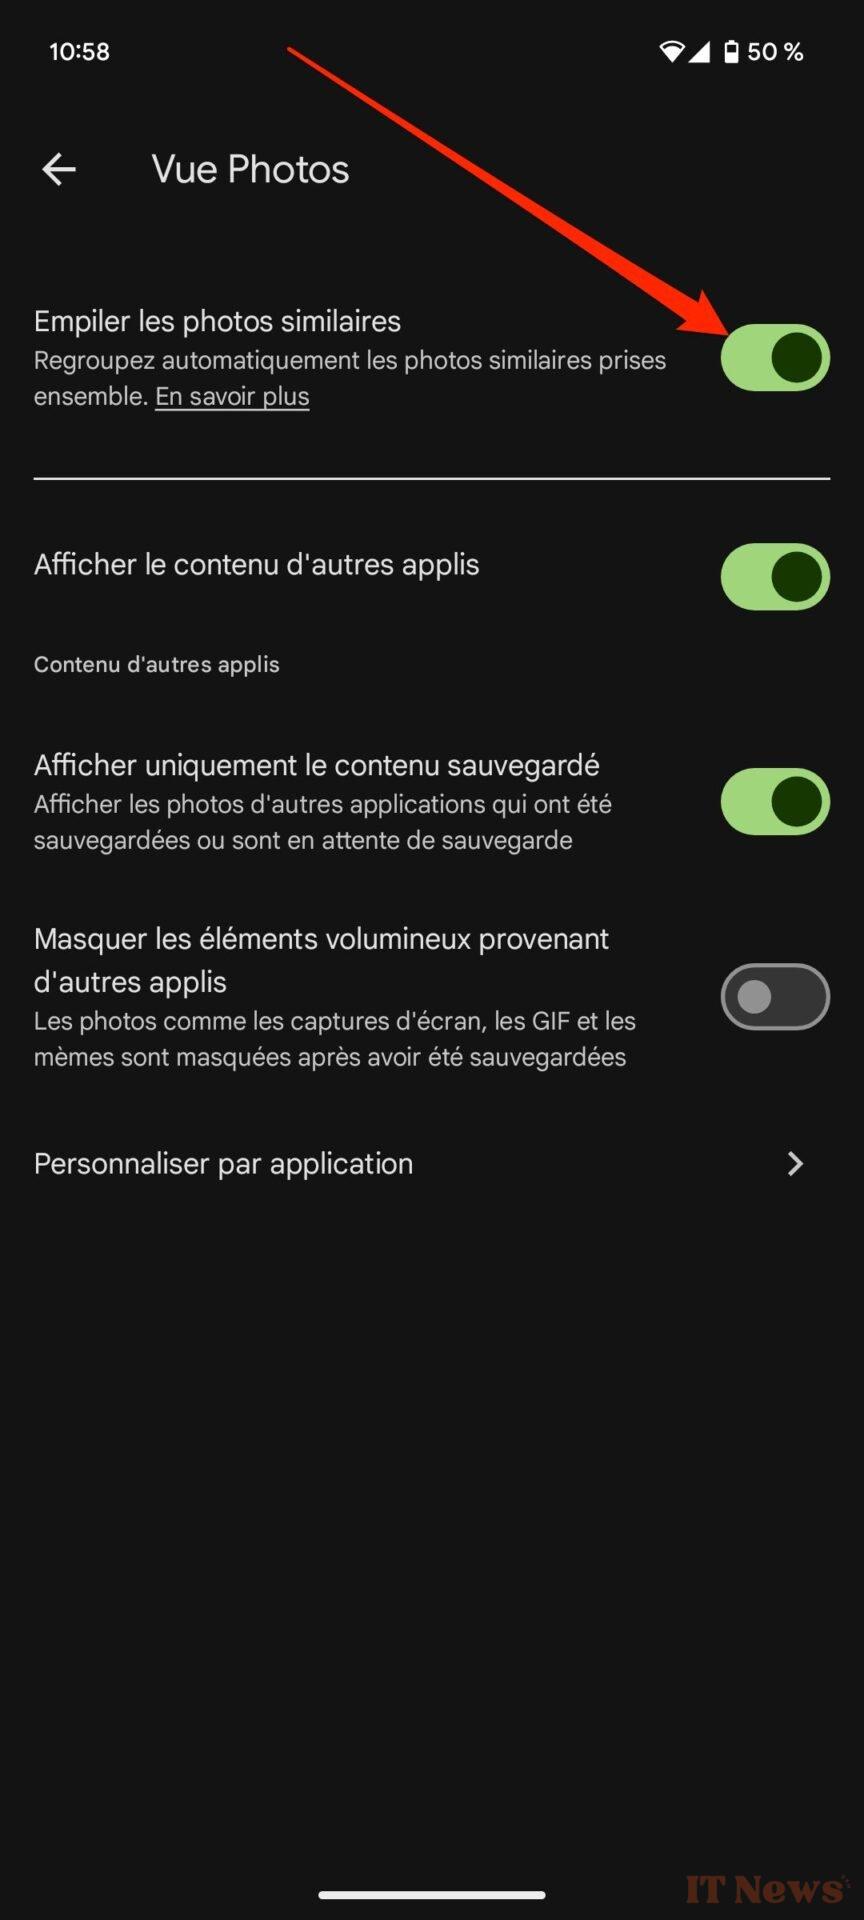
Google rolled out a new feature a few months ago that's supposed to help you easily free up space on your storage. This allows you to group similar photos together to remove duplicates that clutter your photo library.
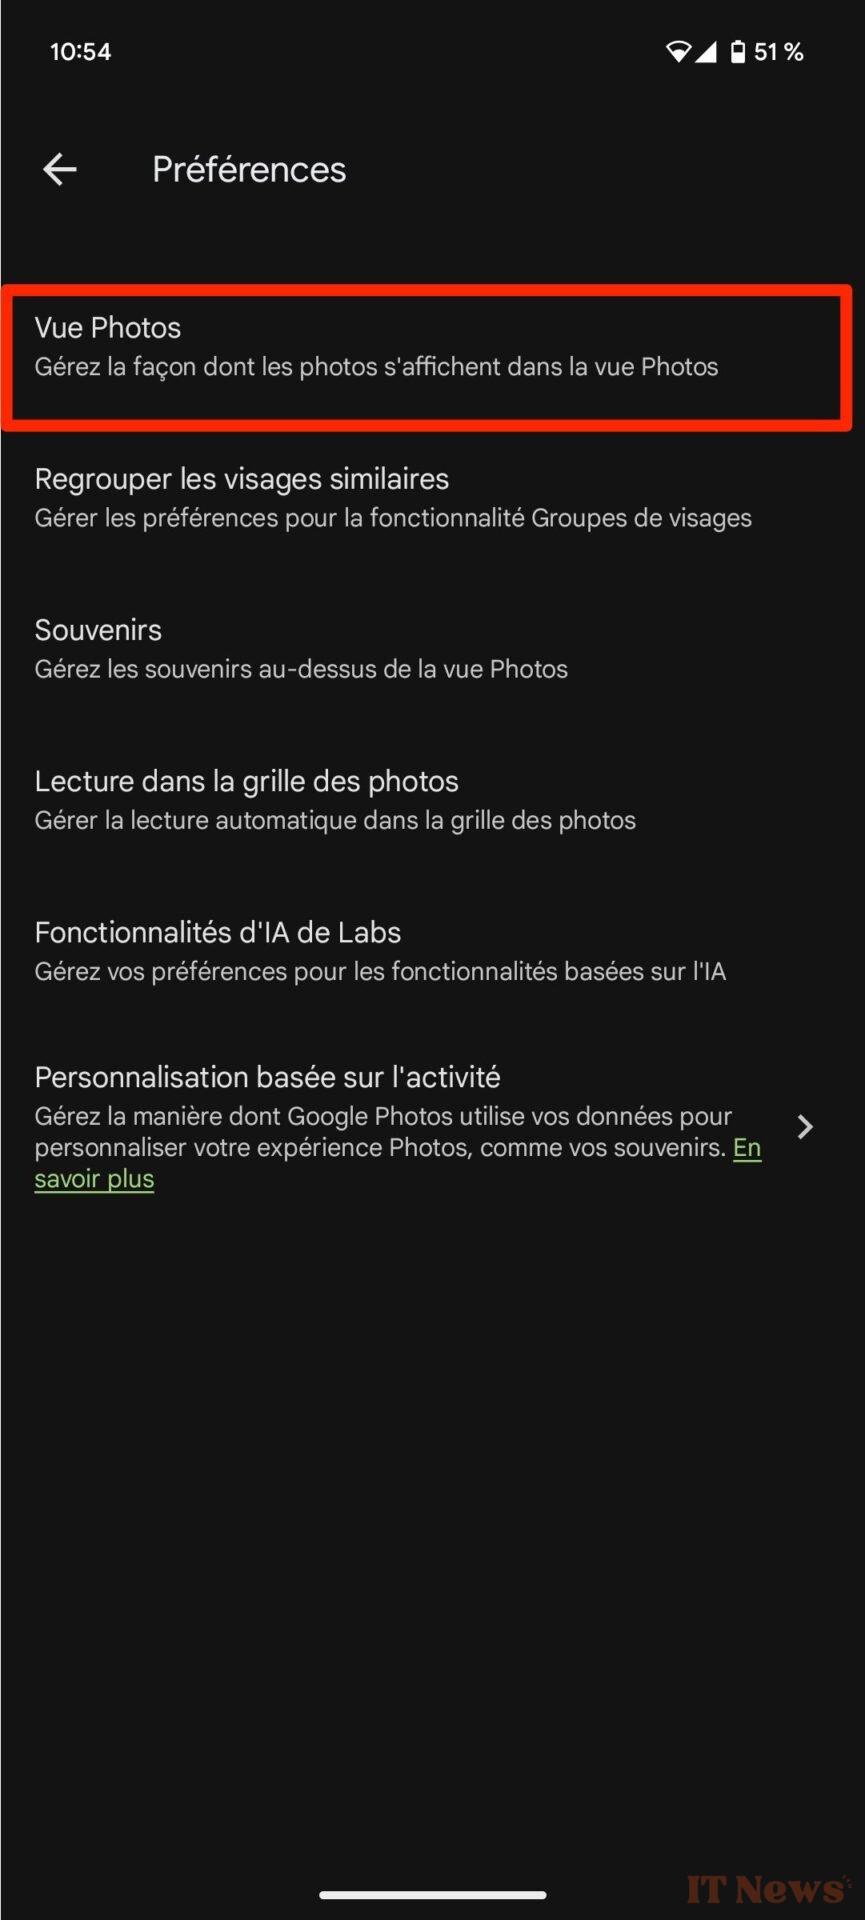
To do this, go to Google Photos Settings, then in Preferences, enter the Photos View menu. Now activate the option Stack similar photos.
15. Upload all your photos
Automatically backing up photos from your smartphone to Google Photos is great, but keeping a copy of your entire photo library on a physical device is even better.
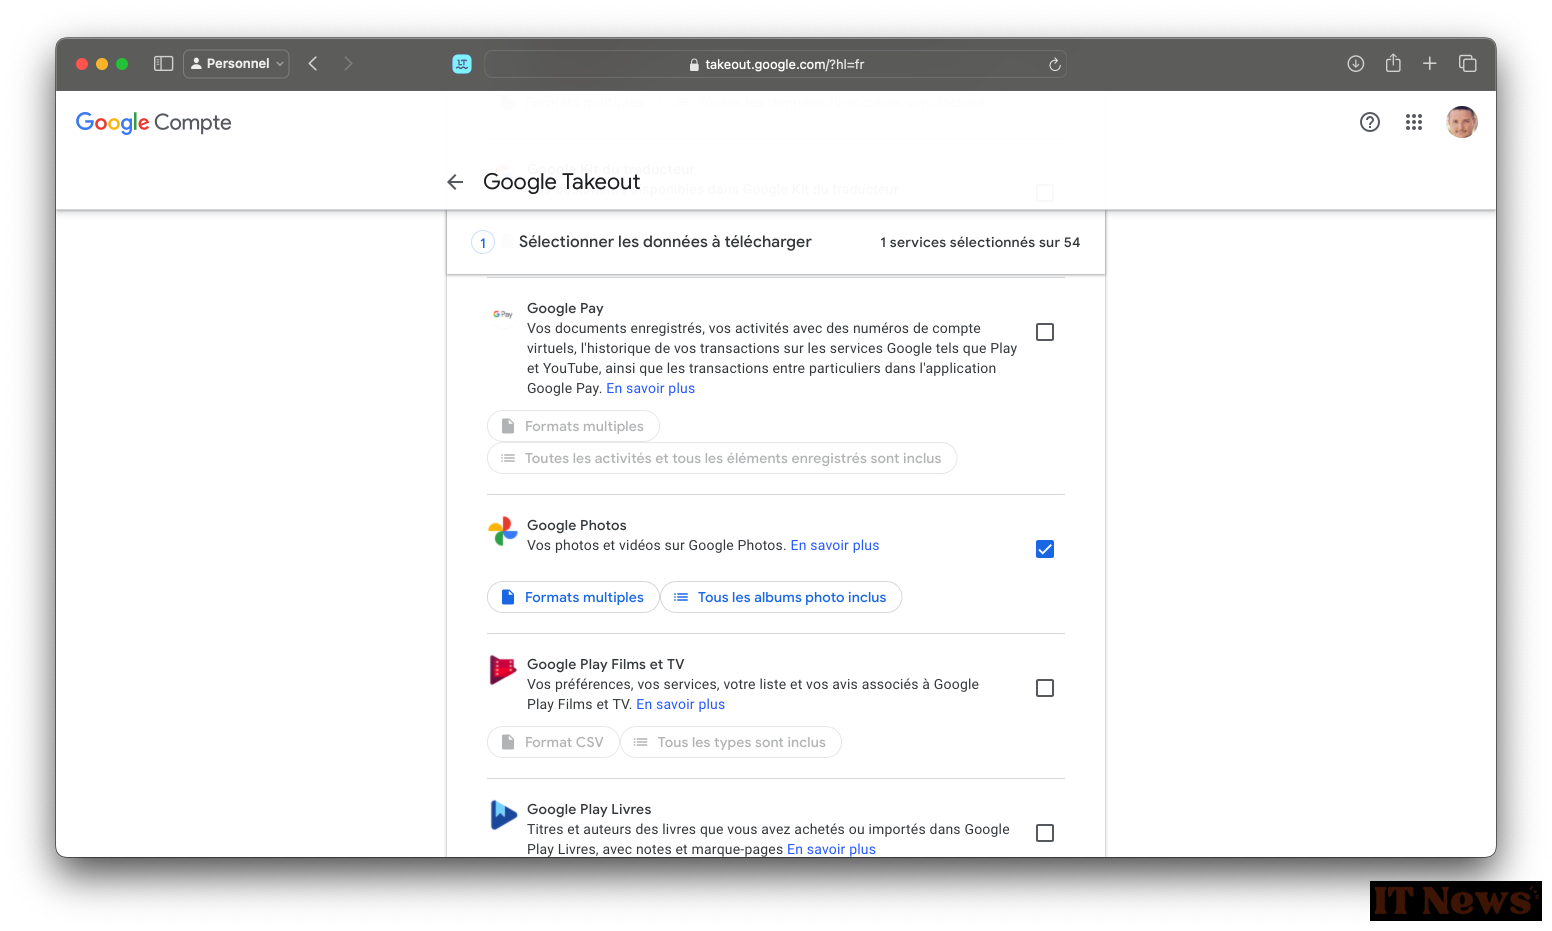
And, no, you don't need to select the tens of thousands of photos in your Google Photos account to upload them. To save a complete copy of all your photos and videos, Google offers an official export tool: Google Takeout.
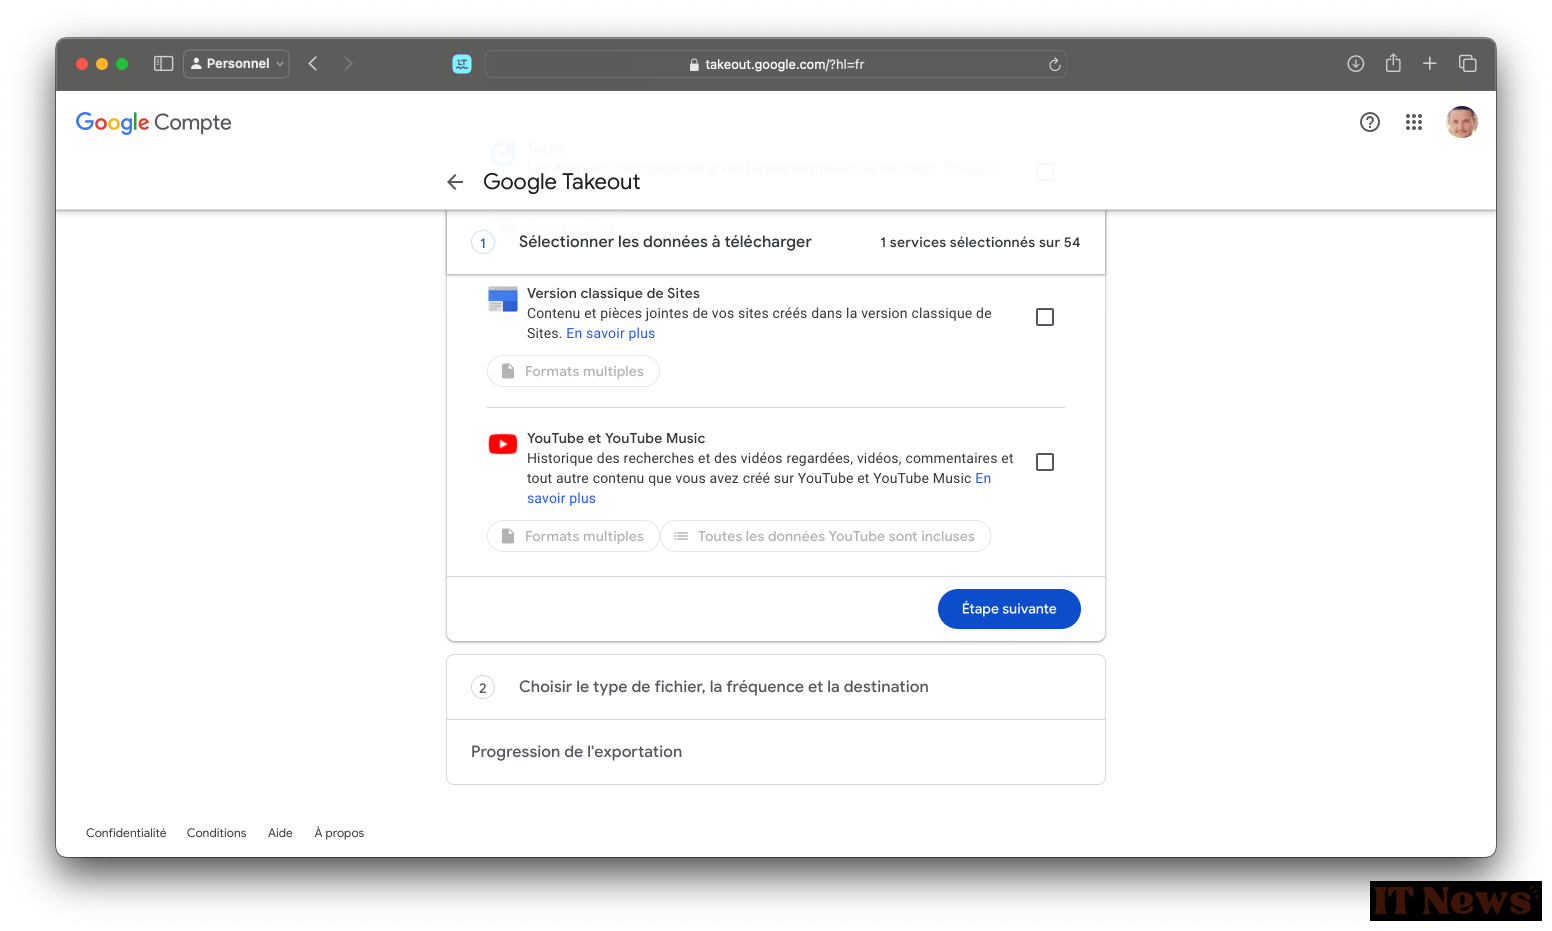
So, go to Google Takeout, click on Deselect All at the top to uncheck the data pre-selected by default, then select only Google Photos. Then click on the Next button displayed at the very bottom of the page.
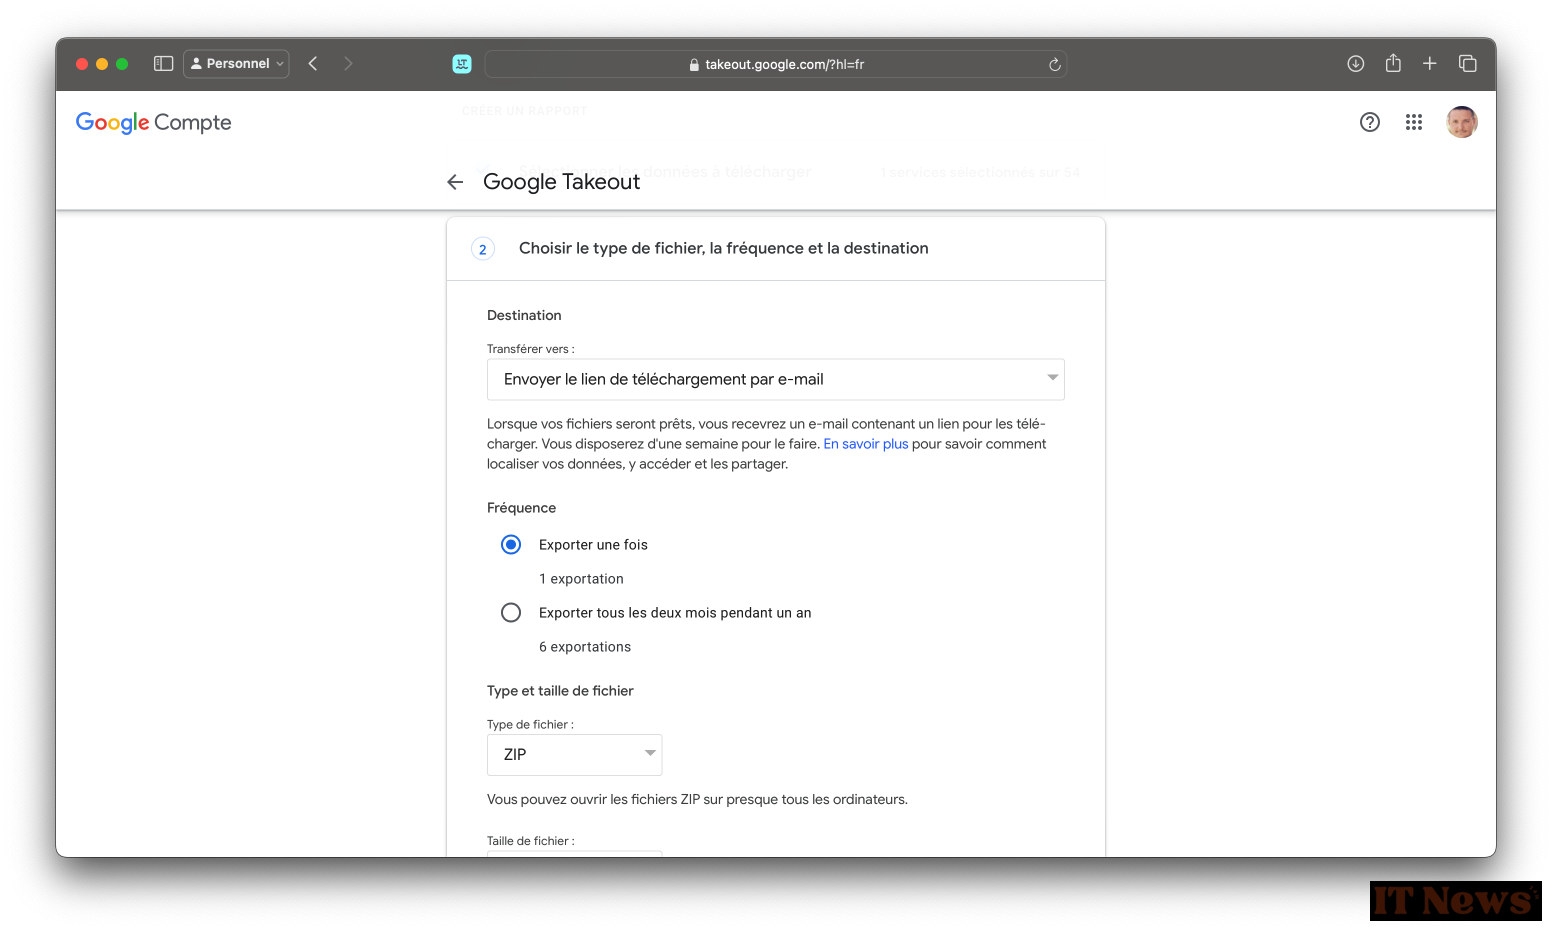
The next step allows you to choose the file type, export frequency, and export destination. Specifically, you can decide to do a single export, or to export your updated backup at regular intervals. You can also choose the maximum size of the export files. Finally, click on Create an export to start the process.
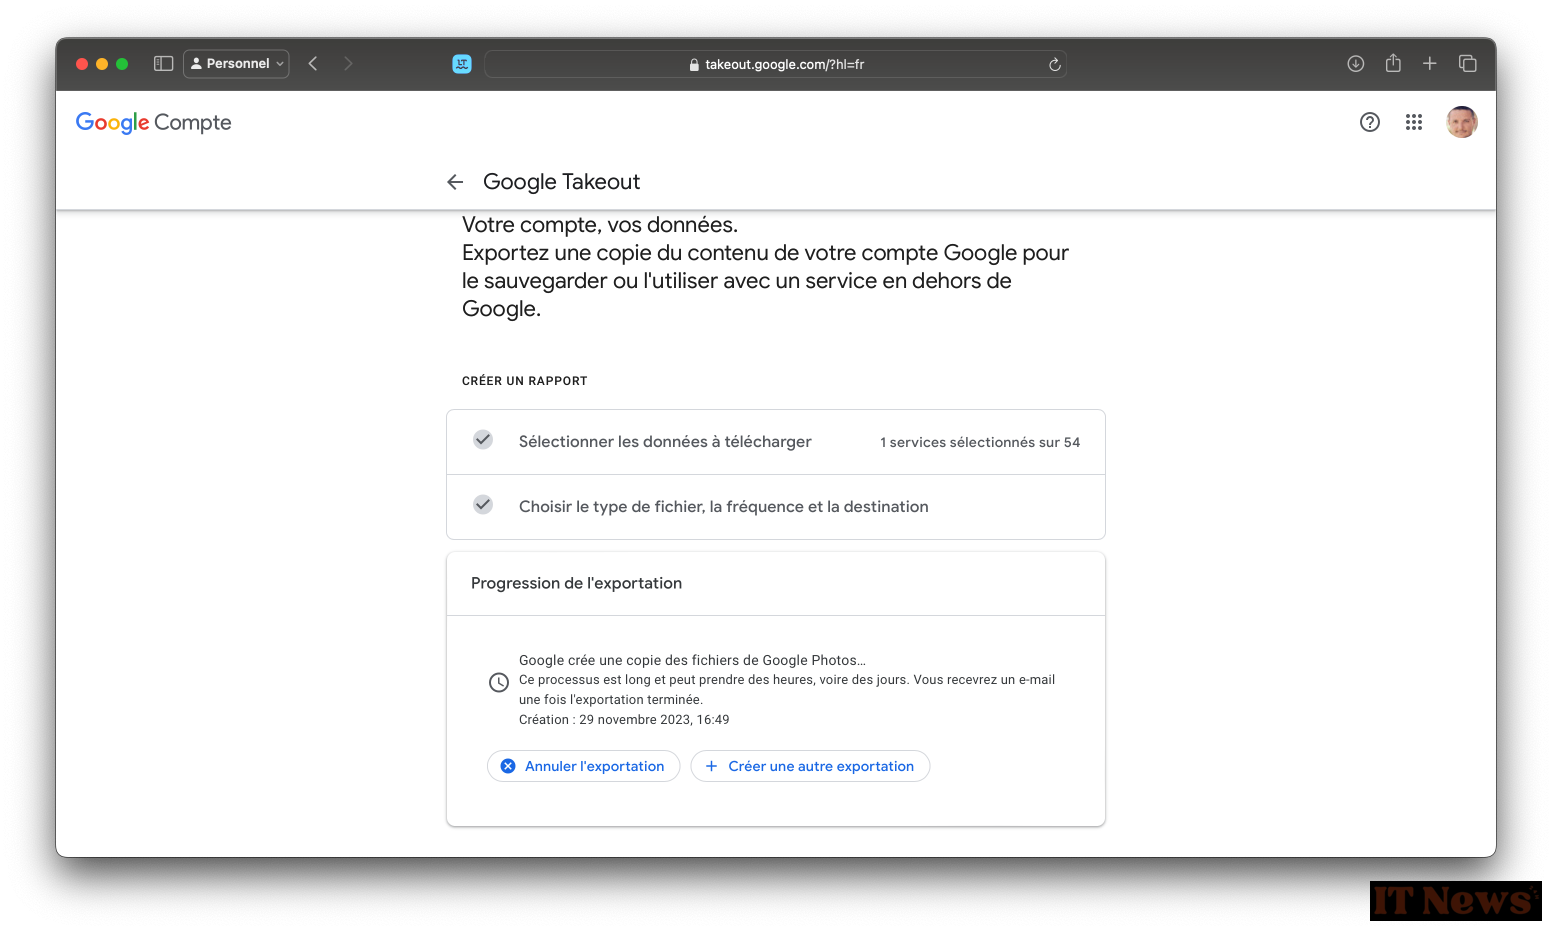
Note that the procedure may take more or less time, depending on the size of your photo library.
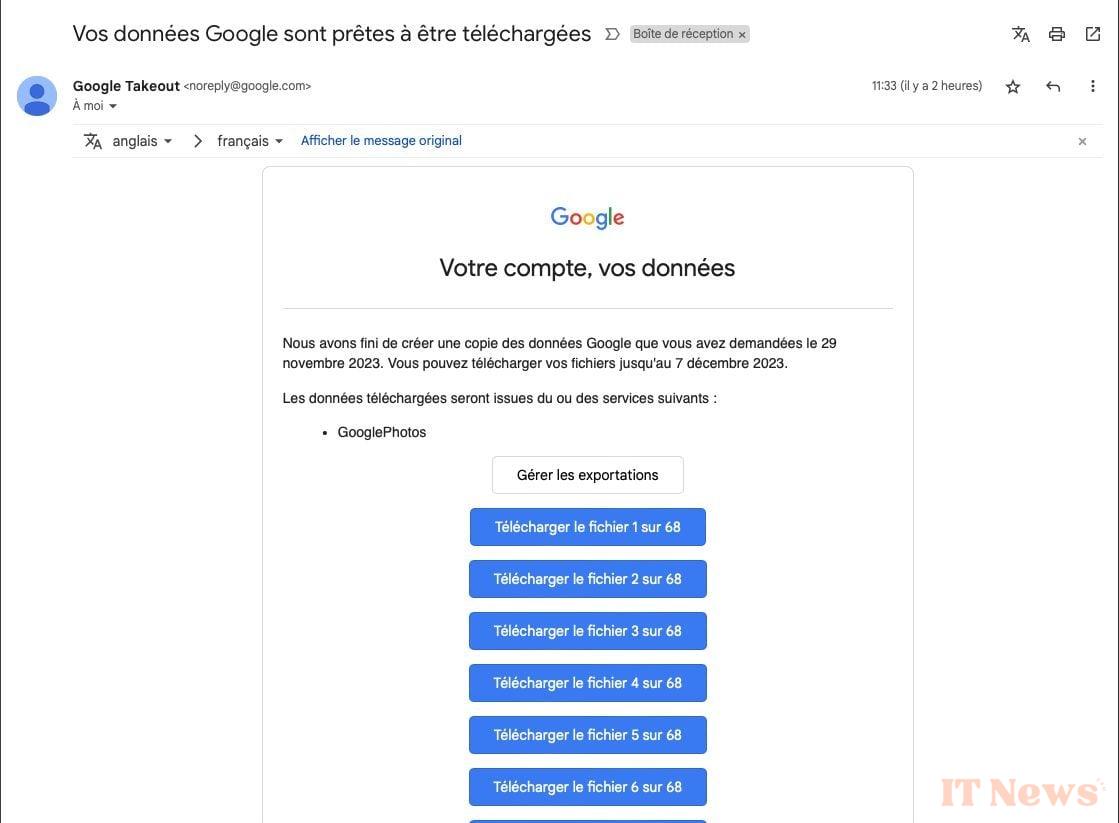
Google will automatically send you an email to notify you that the export is complete, with the various download links allowing you to repatriate your photos on your PC.


0 Comments