"Your startup disk is almost full." If this message appeared on your Mac's screen, a shiver may have run down your spine. It's time to do some cleaning to free up storage space on your Mac.
But despite all your cleaning sessions to try to make space, some categories of data stored on your machine just won't melt away. This is usually the case for "System Data" displayed in the macOS Storage Manager. This category of data is a veritable catch-all, as mysterious as it is impenetrable. At least in appearance.
And in most cases, no matter how much you migrate your documents to the Cloud, empty your trash, or delete large files you've downloaded, the size of this "System Data" category won't decrease. The only problem is that it often represents a significant amount of storage.
However, there is a very simple solution to clean it up a bit. Using a utility capable of analyzing the contents of your disk to list the files and their size, you can identify unnecessary "System Data" to delete to free up space on your Mac. Here's how to do it.
1. Download Disk Inventory X
Start by downloading the Disk Inventory X utility. This application, free and open source, allows you to display the size of files and folders within a tree structure. It's an ideal solution for identifying the items taking up the most space on your Mac's storage.
2. Open Disk Inventory X
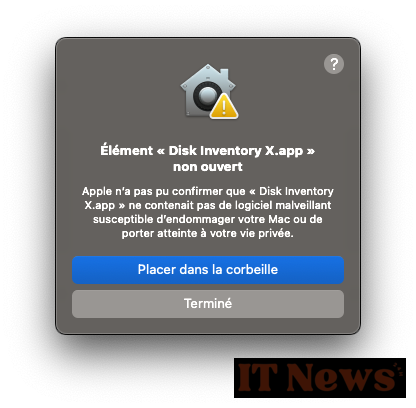
Open Disk Inventory X on your machine. macOS likely blocks the application by default for security reasons. However, the program is safe and does not contain any malicious code. Then click on Done.
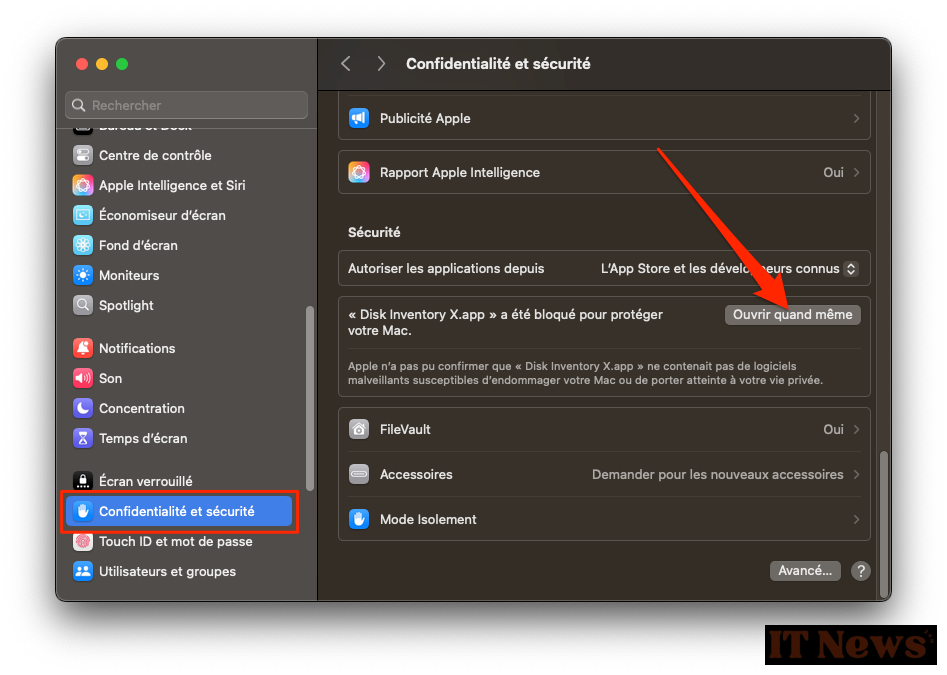
Then open System Settings and go to Privacy and Security. At the bottom of the menu, a line "Disk Inventory X.app" has been blocked to protect your Mac should be displayed. Click the Open Anyway button to allow the application to open on your machine.
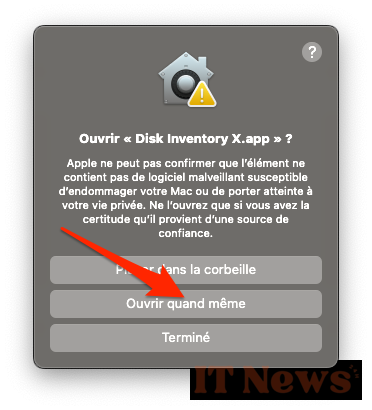
In the pop-up that appears, confirm opening the app by clicking Open Anyway again. You should then be prompted to authenticate to confirm your choice.
3. Start analyzing your disk
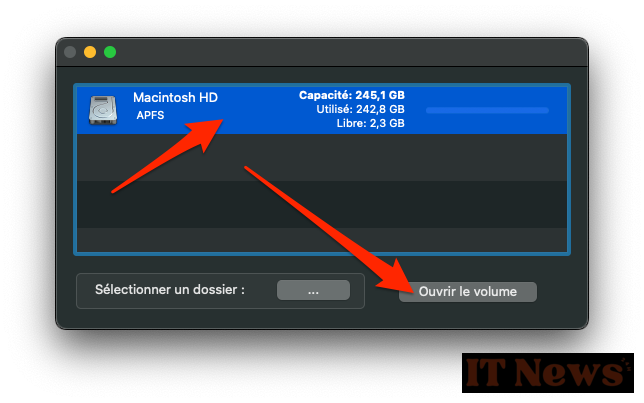
Once Disk Inventory X is open, select the Macintosh HD volume on your Mac, then click the Open Volume button.
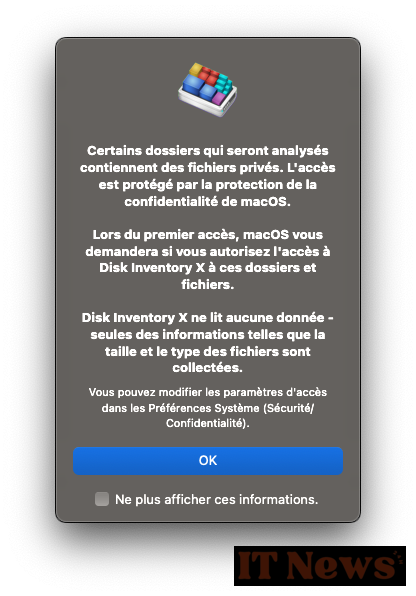
A warning pop-up should then open. This explains that, in order for the application to analyze the contents of your Mac's storage, you must authorize the app to access the relevant folders and files. Rest assured, Disk Inventory doesn't read any of this data and simply indicates the type and size of the items. Click the OK button.
During the analysis of your Mac's storage, you should be prompted to validate various access permissions to the contents of your Mac by Disk Inventory X.
4. Identify large files and folders
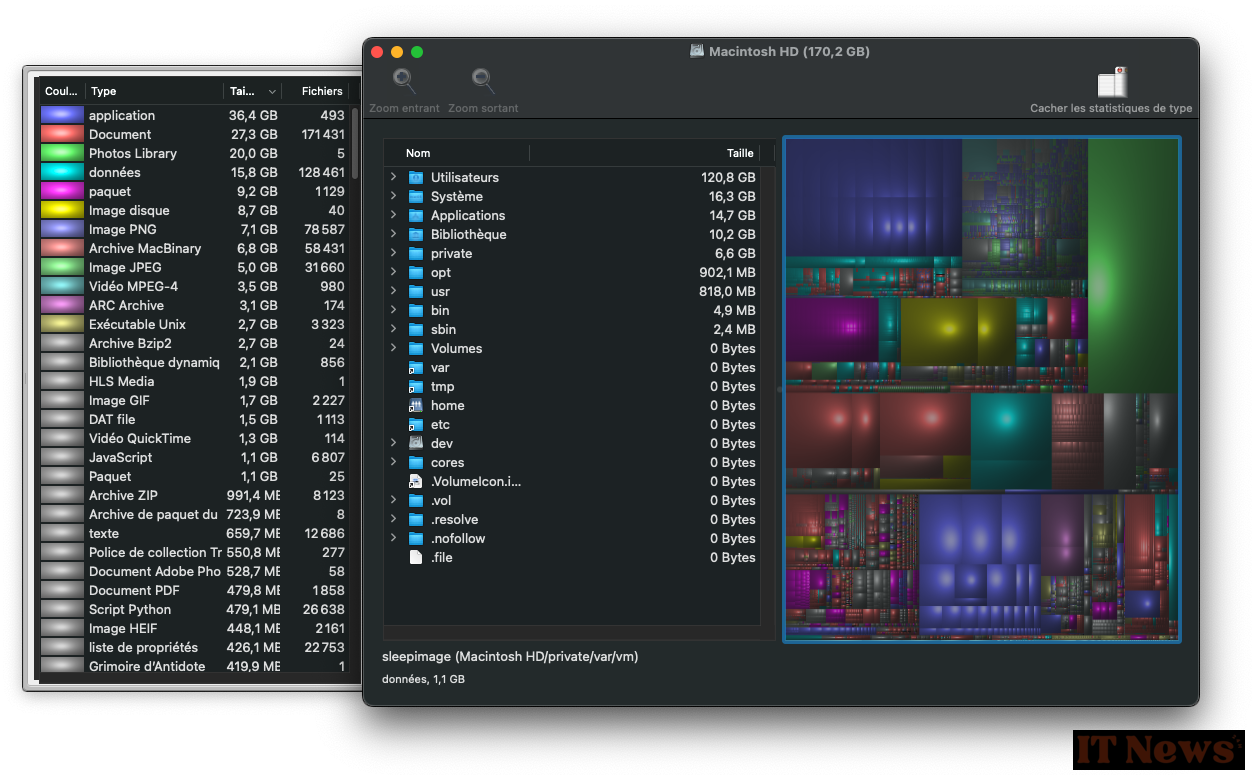
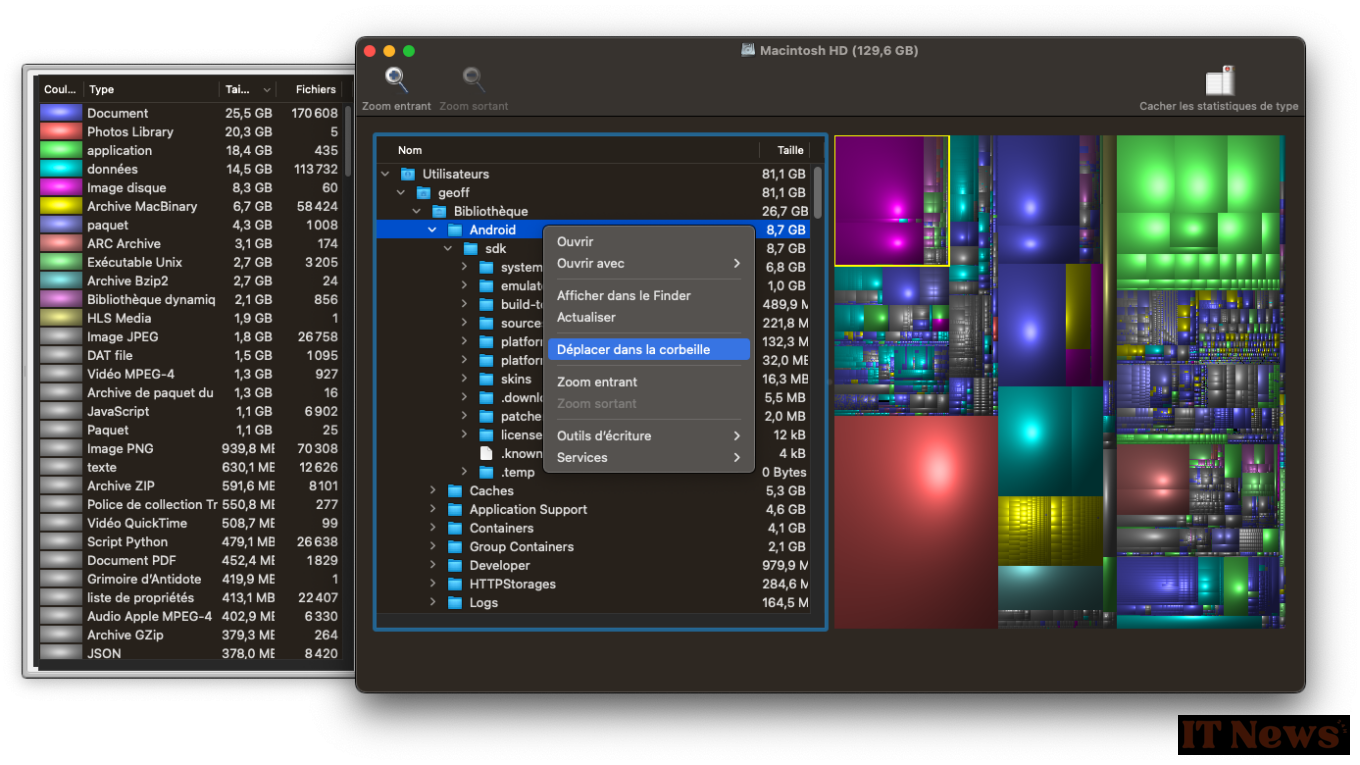
After analyzing all of your machine's storage, Disk Inventory X will display a list of directories, in a tree structure, with the size of each directory occupied on the storage.
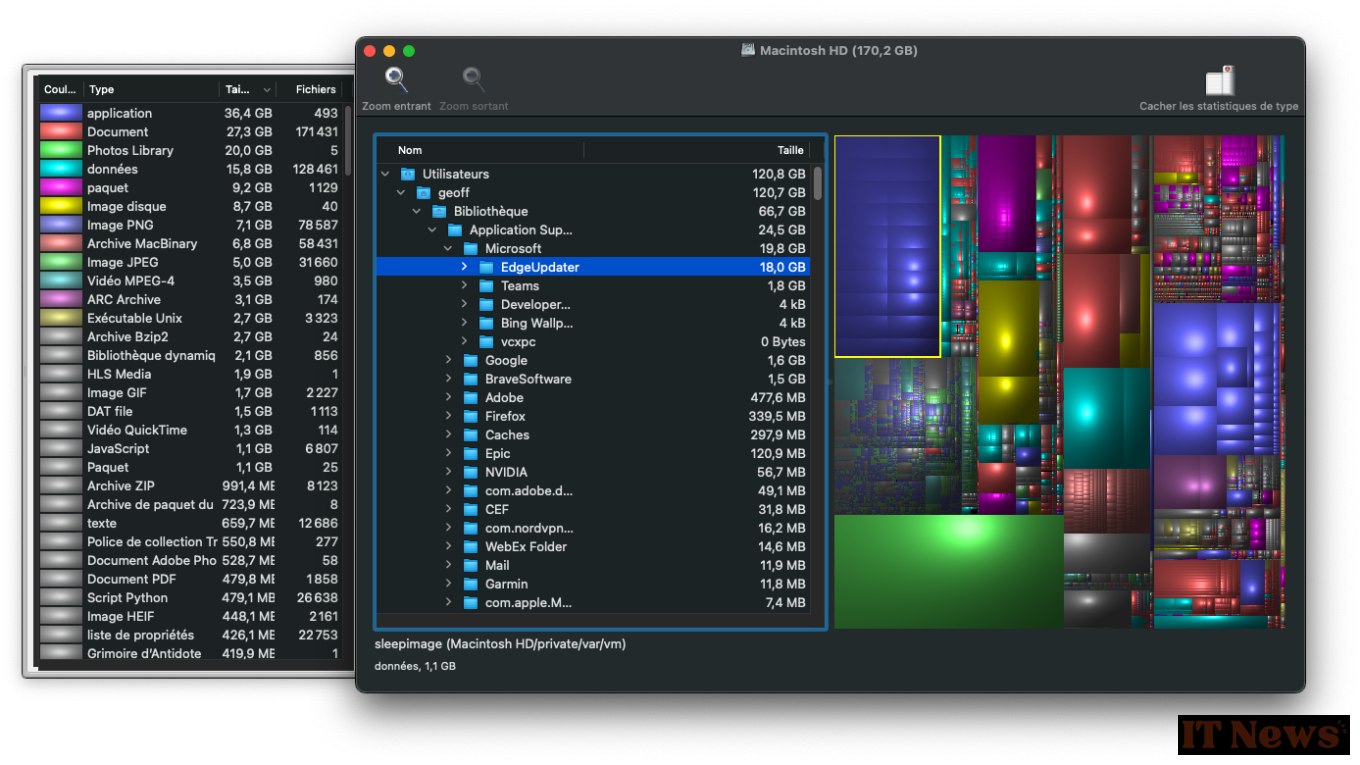
Expand the tree structure of each large directory and identify the problematic elements. Once you've identified what these large files and directories are, make sure they're of no use to you.
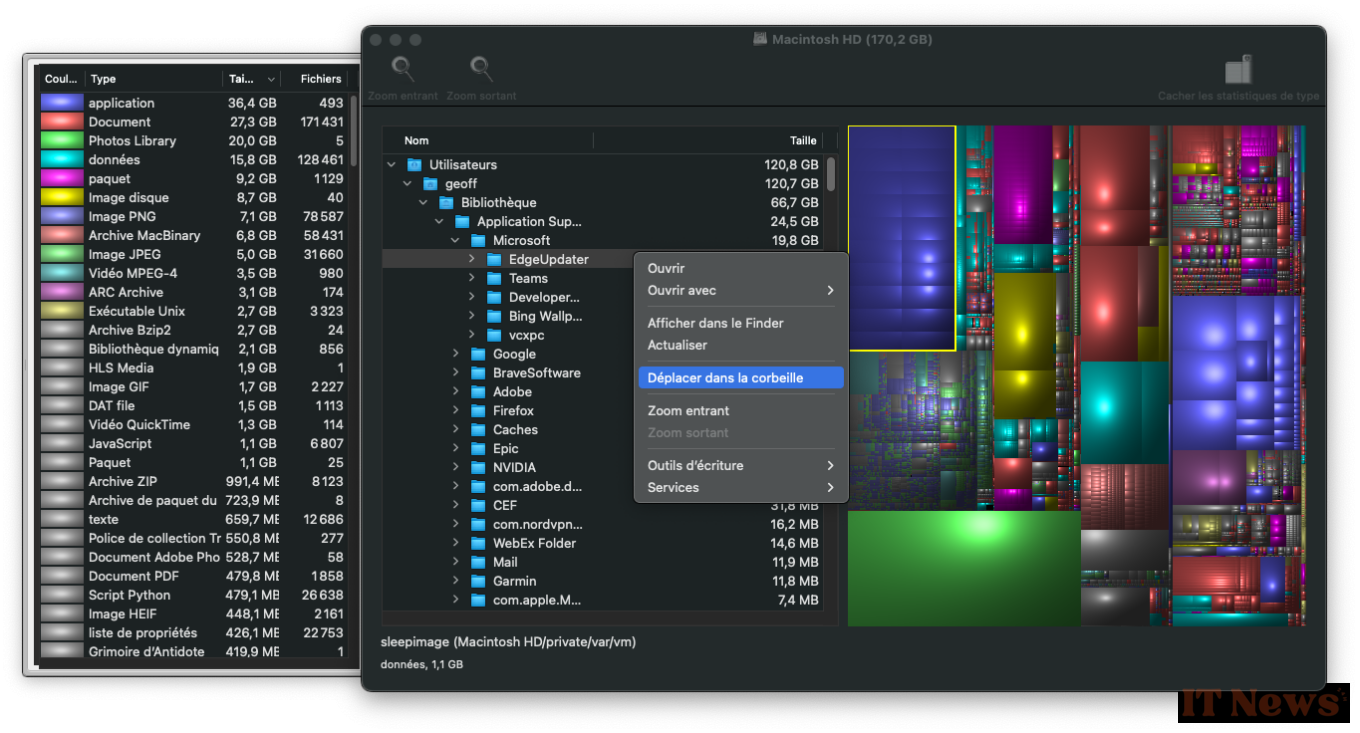
If so, right-click on the problematic item and choose to Move it to the trash. Repeat the operation for each obsolete item that is unnecessarily taking up space on your machine.
Once you've finished cleaning up, don't forget to empty the macOS trash by right-clicking on it to permanently free up all that unnecessarily monopolized storage space. You should have saved several dozen gigabytes of space on your Mac.






0 Comments