

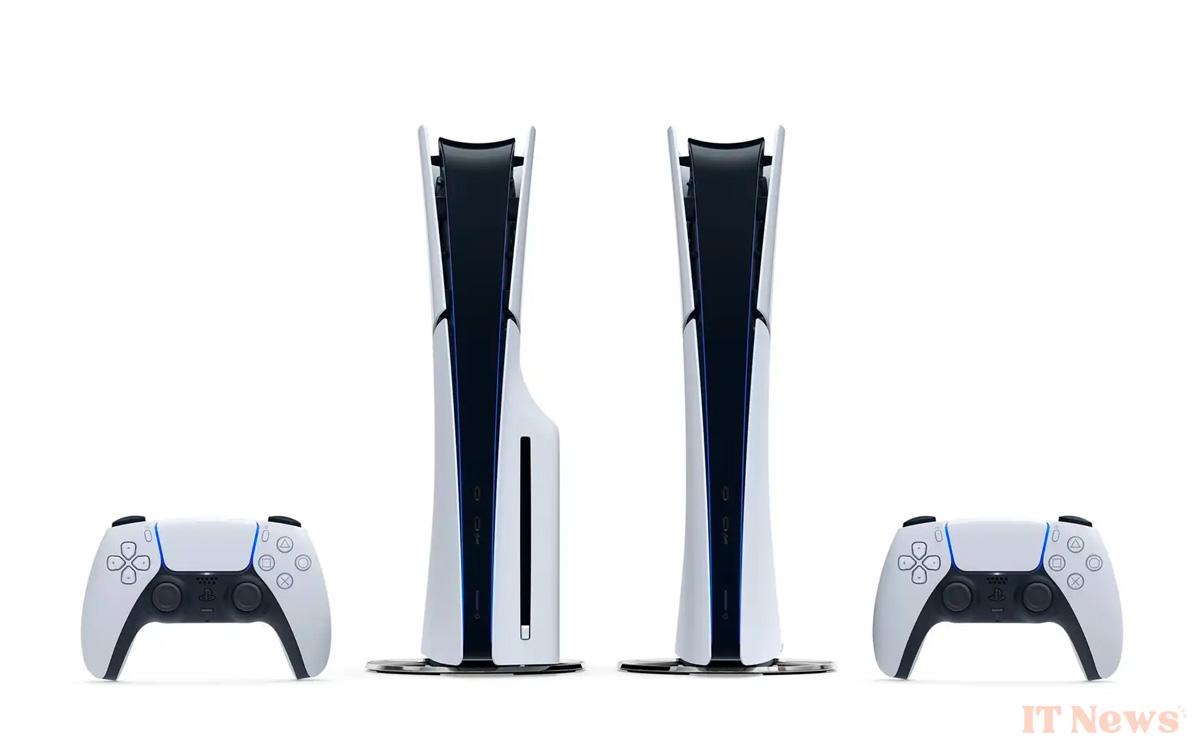
Just like any gaming console, your PS5 doesn't really appreciate dust. Despite Sony's efforts to ensure ventilation with this chimney structure, dirt can accumulate over time inside the machine, as well as in the fan. So before the big summer heat arrives, we explain how to let your console breathe.
While the PS4 or PS4 Pro were known for getting dirty easily and making a noise like a fighter jet when they got hot, Sony has finally decided to solve the problem on the PS5. First of all, the chimney structure adopted on the console allows air to enter and escape more efficiently.
At the same time, the manufacturer has innovated by applying a thermal paste like no other to the console's chip, namely liquid metal. Specifically, this jelly-like substance is used to ensure optimal dissipation of the heat produced by the processor. Thanks to its superior conductivity, it also reduces overheating and improves overall performance. Add to that a large fan, and you get a console that is generally very quiet (39 Db on average) and fairly well protected against overheating.
However, the PS5 is not immune to dust and dirt. Over time, dirt can build up on the air vents on the sides and back of the console, as well as in the fan. And if left unchecked, your console will become noisier and even risk overheating... especially with the upcoming heat waves. So to keep your PS5 in good health, we'll explain how to clean it from top to bottom.

The tools/products you absolutely must have to clean your PS5
Before giving a second youth for your PS5, you will need to equip yourself accordingly. For good reason, we advise you not to play MacGyver, unless you like taking reckless risks with your precious machine.
Don't worry, the investment isn't huge (around twenty euros) and once you have everything you need in your possession, you can reuse the various tools/products needed for future cleaning:
- a can of dry air, such as keyboard duster, for example
- two or three microfibers
- an anti-static brush to dislodge stubborn dust
- suitable screwdrivers (2.5 mm Phillips and secure Torx T8)
- a few cotton swabs (to clean the fan blades if necessary)
Note that some stores specializing in consumer electronics or video games offer complete maintenance kits. You can find them at reasonable prices at Micromania, Fnac, or even at repair specialists iFixit.
How to deep clean your PS5 before the big summer heat
Now that you're equipped, we can get to the heart of the matter, namely cleaning your PS5. Before starting, you'll obviously need to remove any discs from the Blu-Ray drive, turn off your console completely, and unplug all cables (power, HDMI, and Ethernet).
Once done, take the console and set up on a large, flat surface if possible (table, desk, etc.). Also remember to take a sheet or towel to place the machine on to avoid possible scratches. Another little tip, get a small bowl, you can put the fan screws in it.
Step 1: remove the PS5 base
The first step is to remove the PS5 base:
- If your PS5 is vertical, turn it over and wedge it between your legs so that the base is on top
- Then take a coin (20 or 50 cents will do) or a flathead screwdriver to remove the 26.5 mm screw
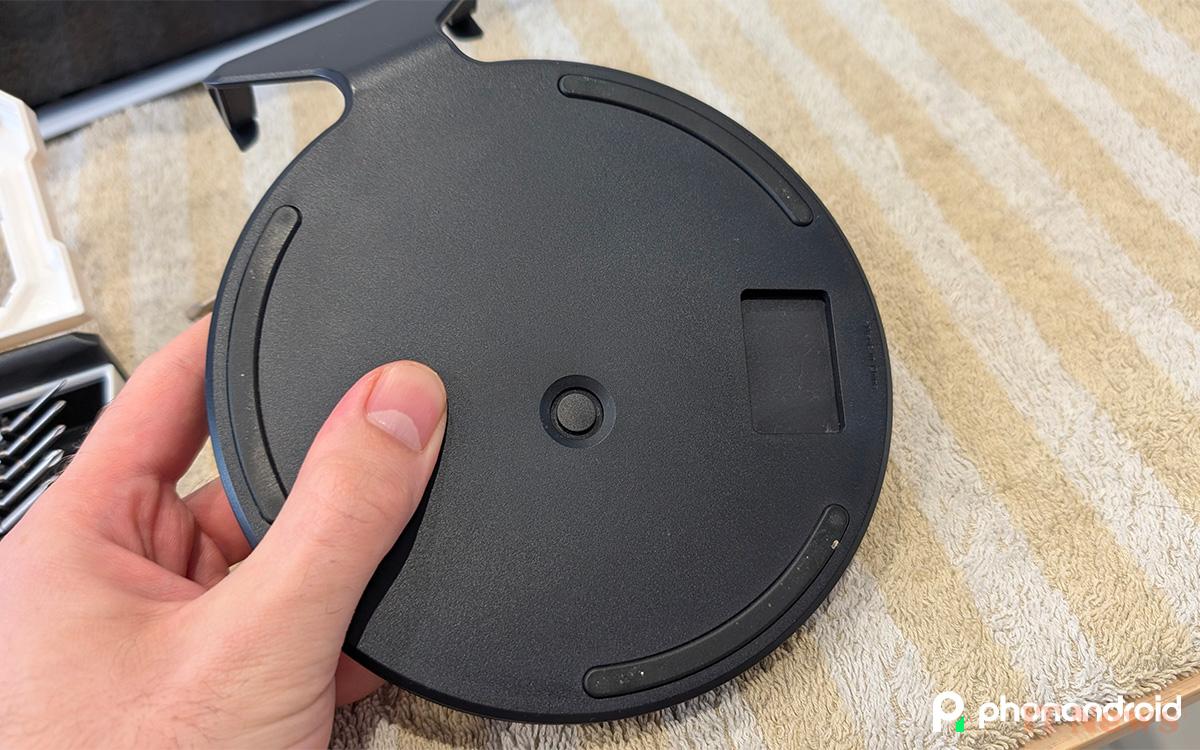
- Lift the base towards you to gently remove it
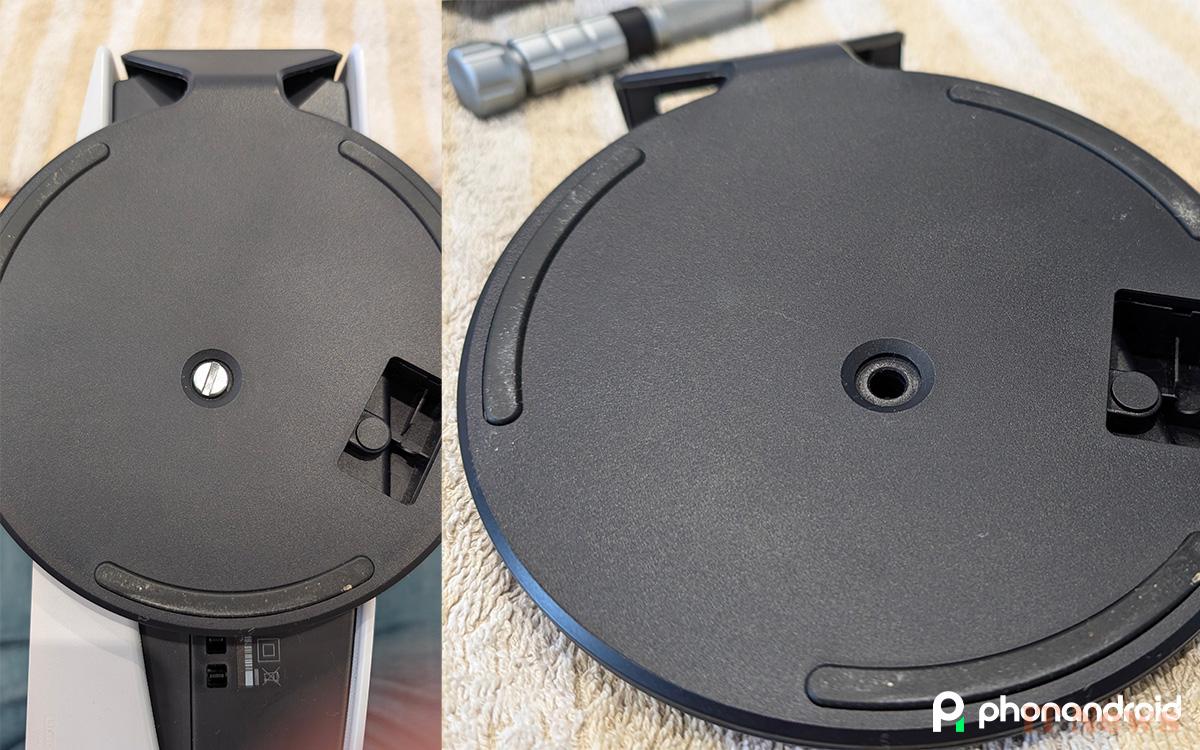
- If your PS5 is horizontal, place it on the edge of the disc drive. You should see the various ports (power, Ethernet, HDMI, etc.) at the top. Lift the base upwards to gently remove it
- Now that the base is in your hands, insert the screw into the small compartment provided for this purpose under the base
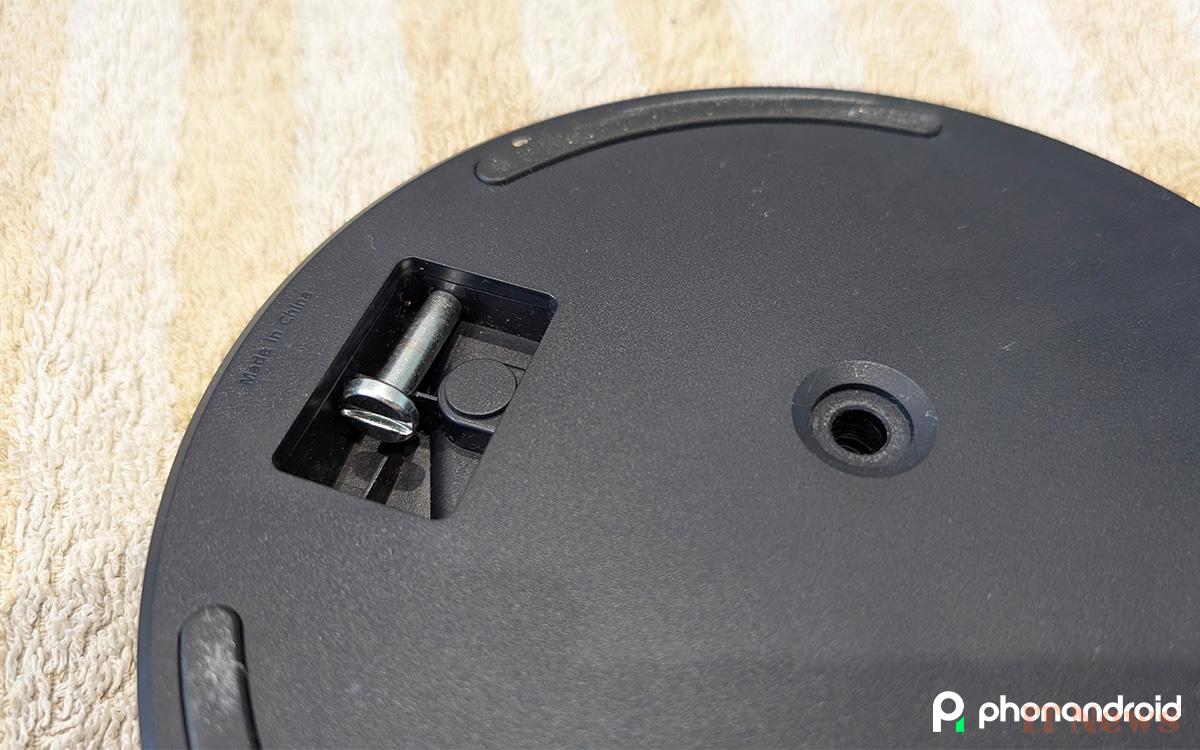
- Then plug the screw hole with the dedicated cover, a simple pressure is enough
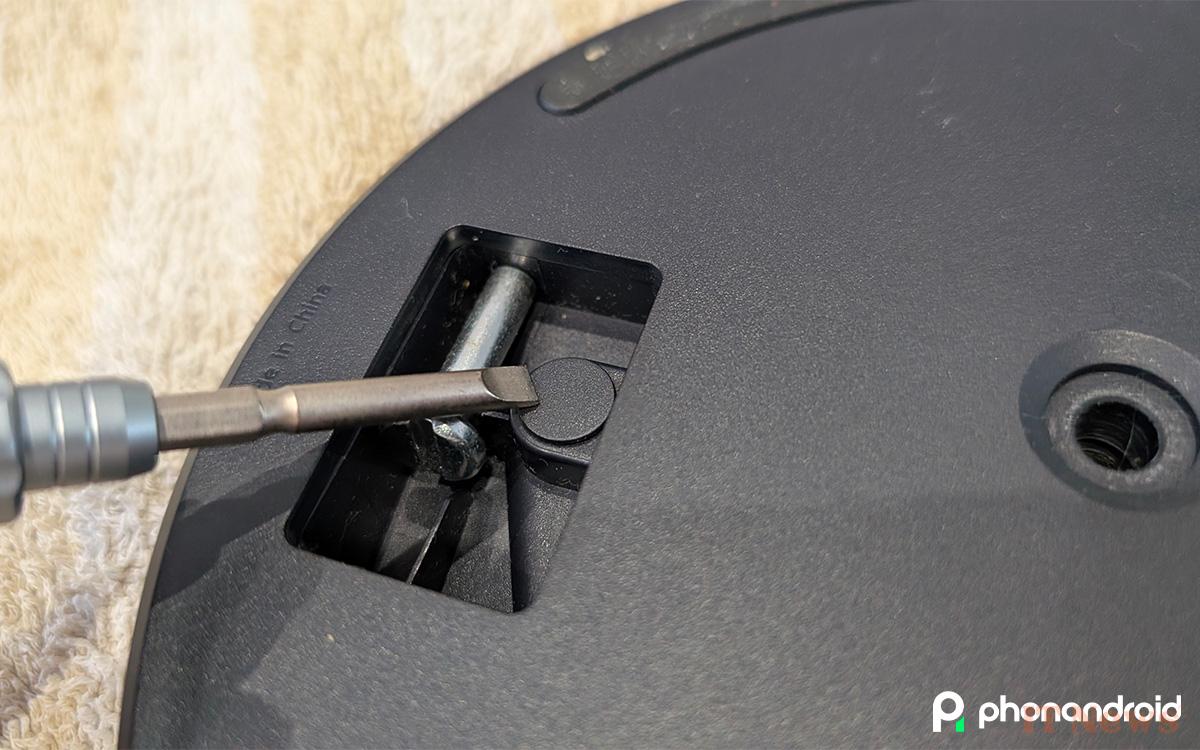
- Finally, to avoid losing the screw, turn the base counterclockwise to seal the compartment of the screws
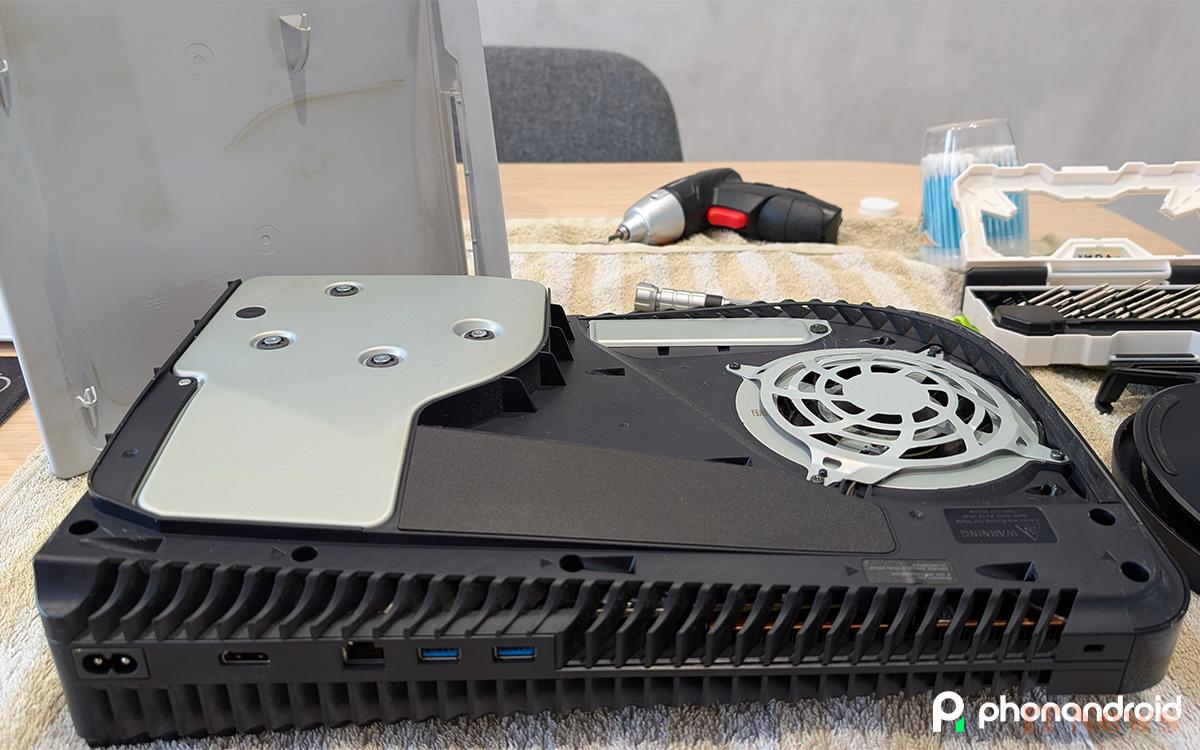
Step 2: Remove the PS5 cover
Once this is done, you can now undress your PS5 by removing the side shell:
- Place the console horizontally, with the part with the ports facing you and on your left
- Start by lifting with some force the lower right corner of the cover to unclip it
- At the same time, slide the cover towards the bottom of the console to gradually unclip all the fasteners
- Unless you have already If you have cleaned your PS5 in the past, you should already notice the presence of dirt and dust, especially on the shell and the ventilation grille. Take the opportunity to give it a quick wipe with a microfiber cloth and a can of compressed air if necessary.
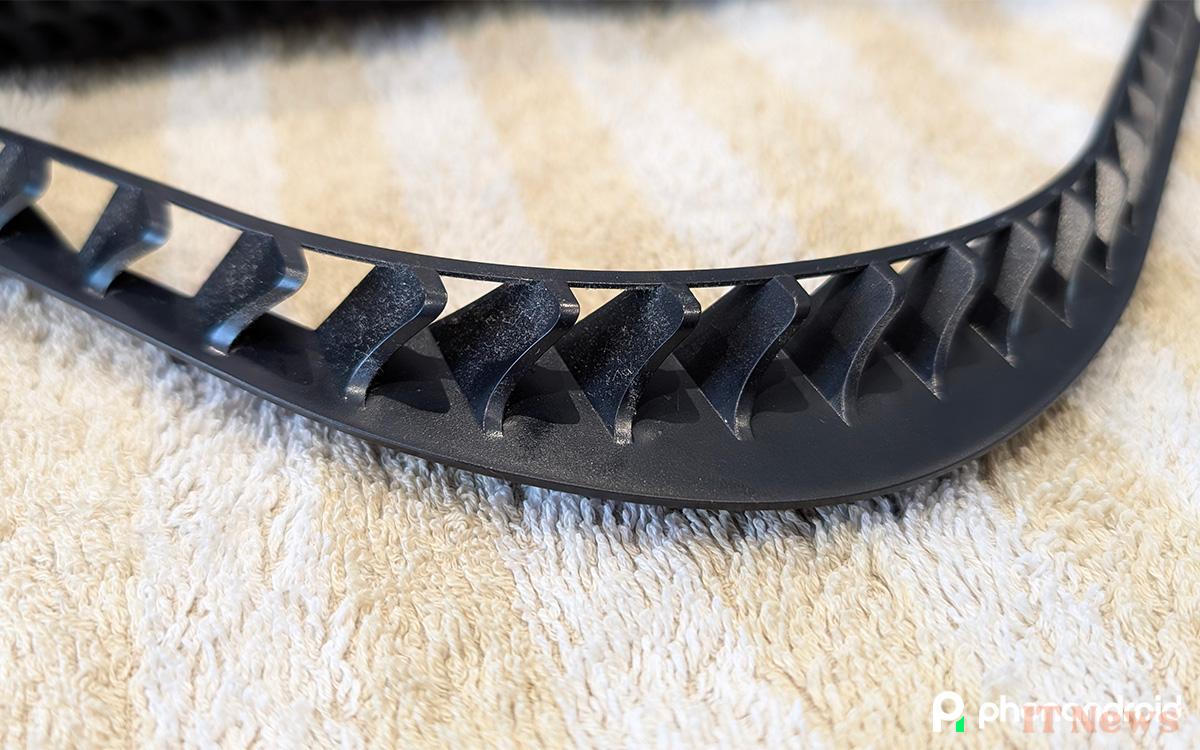
Step 3: detach and remove the ventilation grille
Now, we have one more step before we can access the machine's fan. Indeed, you will have to get rid of the ventilation grille:
- Using a spudger or a small flat screwdriver, lever it by sliding the tool into the hole above the fan
- Carefully lift the grille to unclip the fasteners one by one
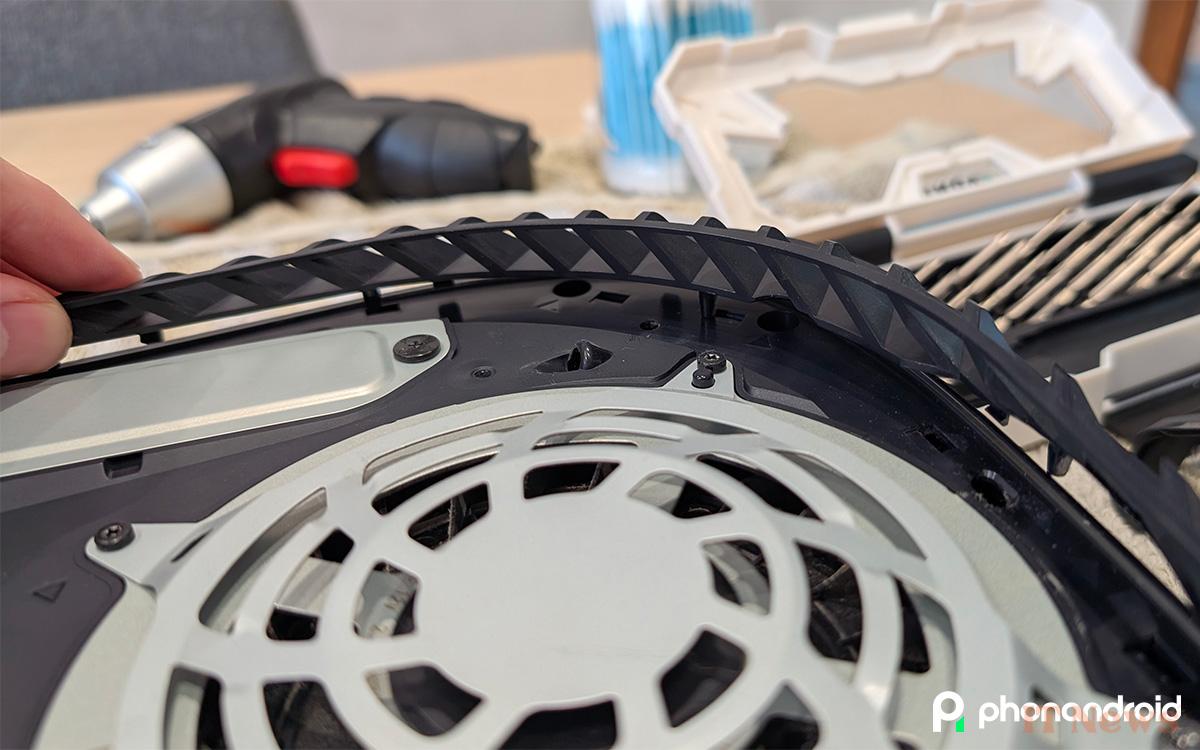
- Remove the case and if necessary, clean the gaps with a microfiber cloth and the compressed air can
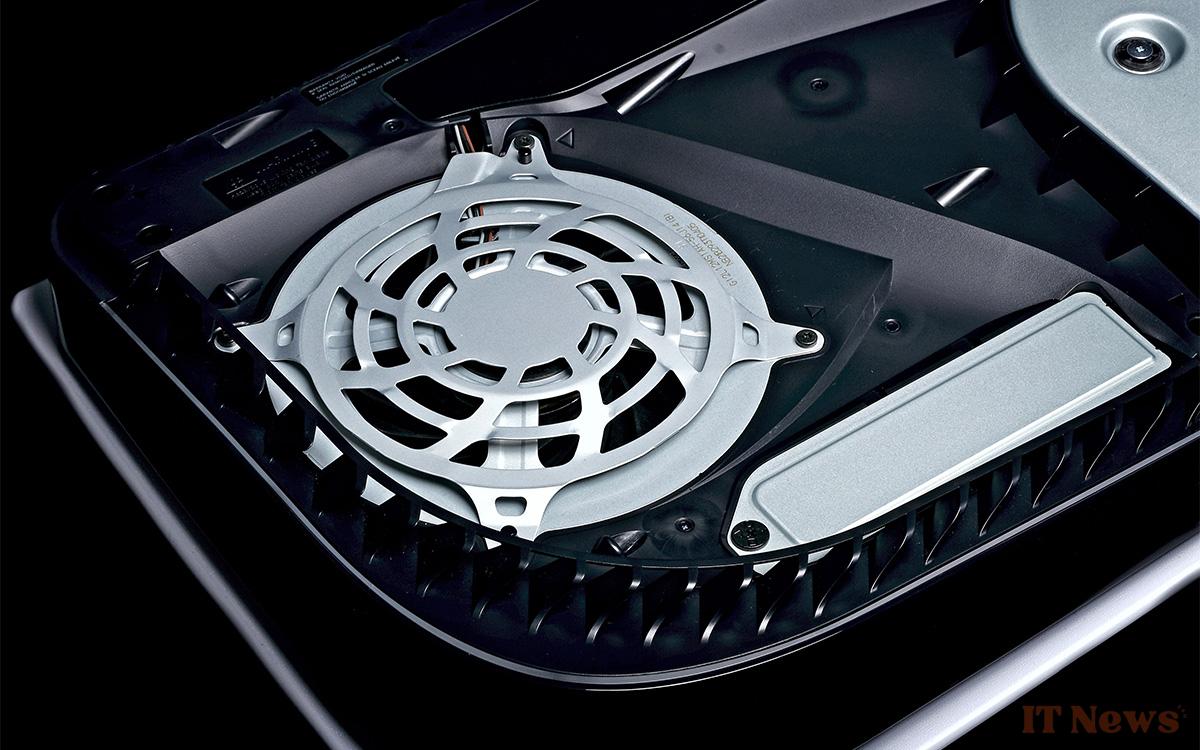
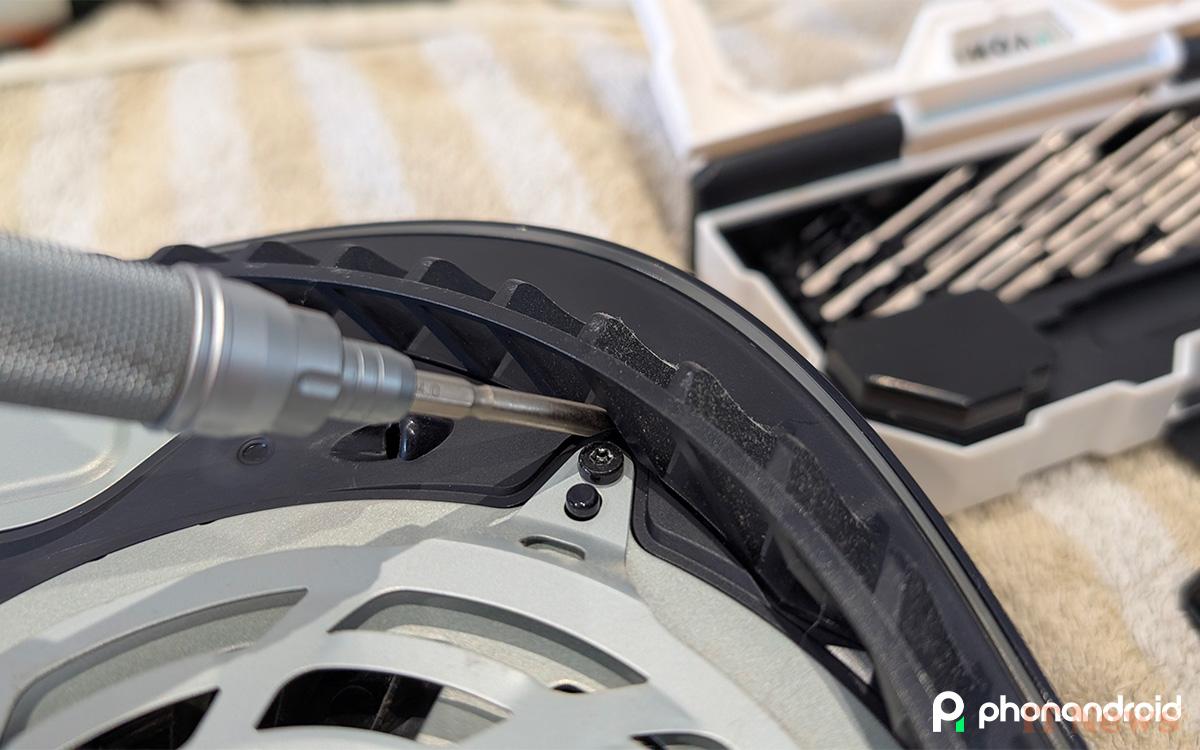
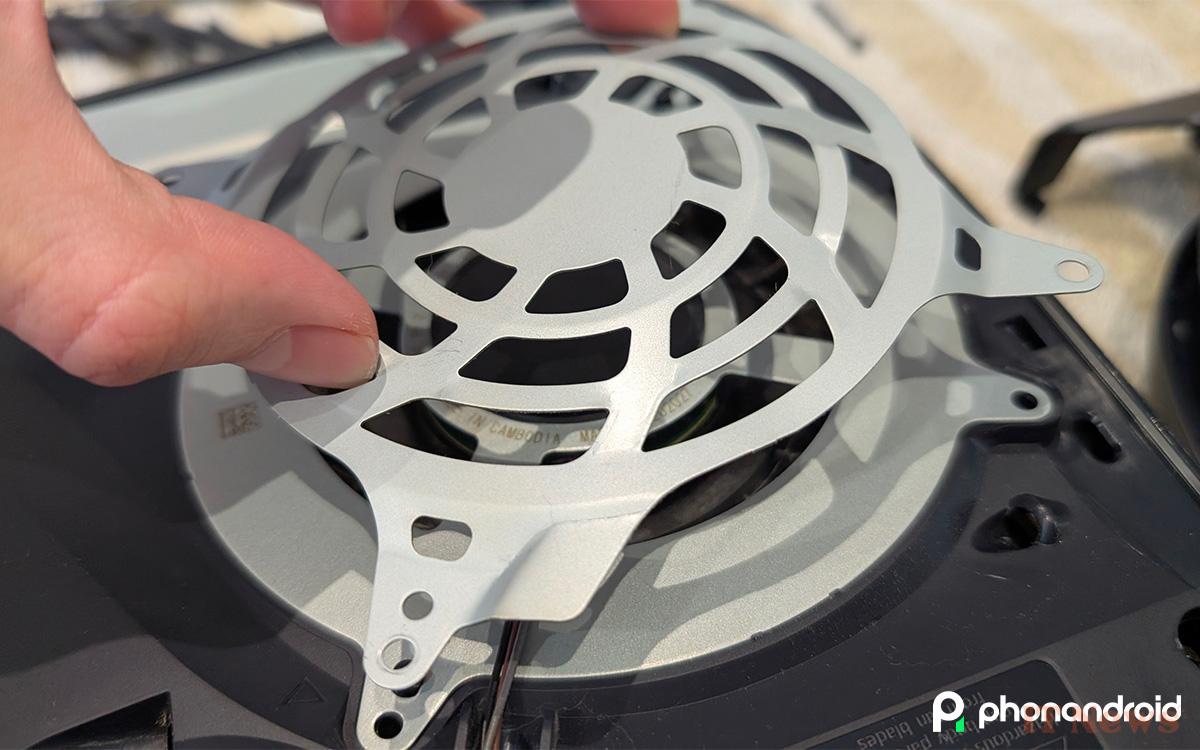
Step 4: Remove the screws from the fan grille
Now we begin the main part of the process by removing the four screws from the fan protection grille:
- To do this, ideally use a Torx TR8 screwdriver or, if necessary, another screwdriver that fits the diameter
- Note that if this is your first time, the screws may be a bit resistant, so take your time to remove them without damaging the head (otherwise you'll have the greatest difficulty in the world putting them back in)
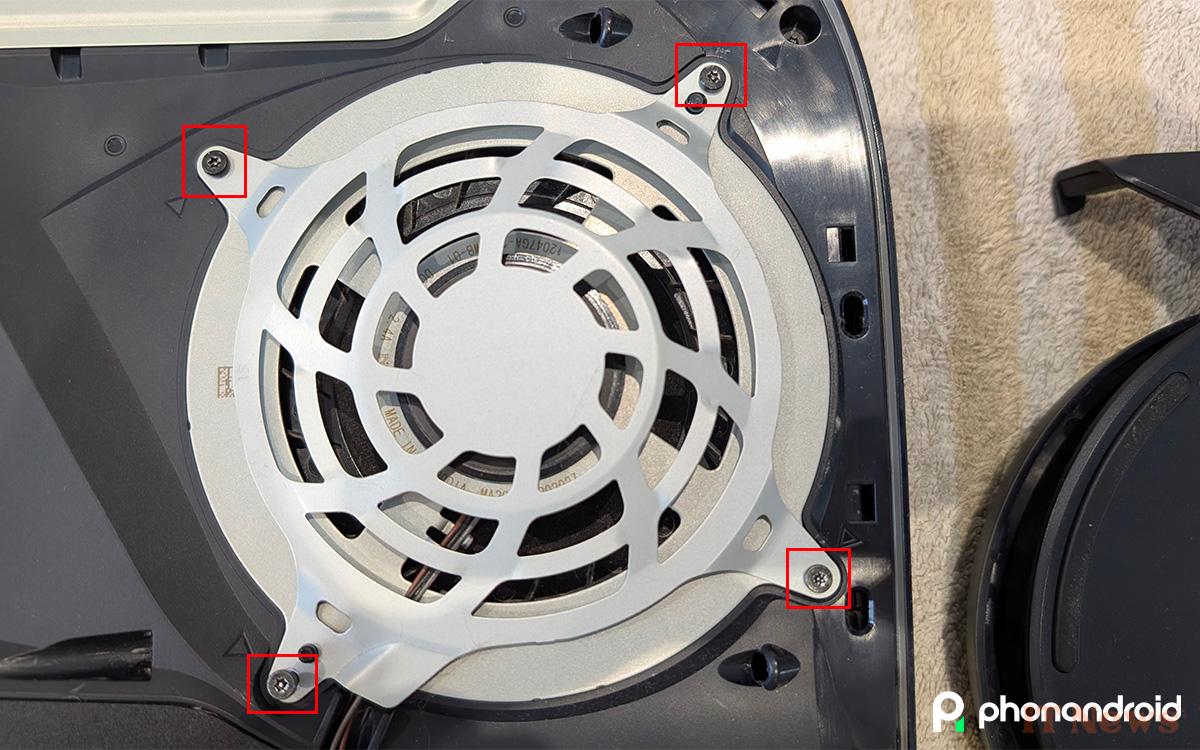
- In total, you will have two 23.3 mm long screws, one 11.4 mm long screw and one 31 mm screw
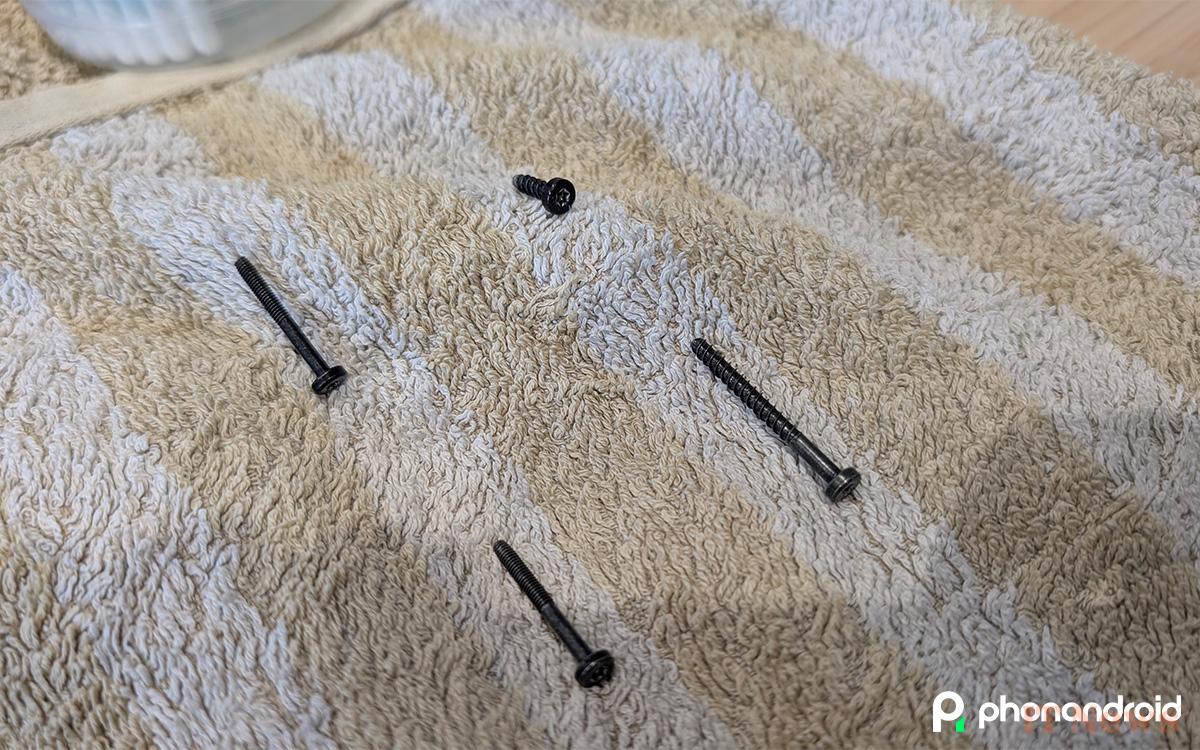
- Memorize the location of each screw, it's ESSENTIAL! Store them in a bowl or small box so you don't lose them
- Now gently lift the grille to remove it
Step 5: Remove the fan wire cover
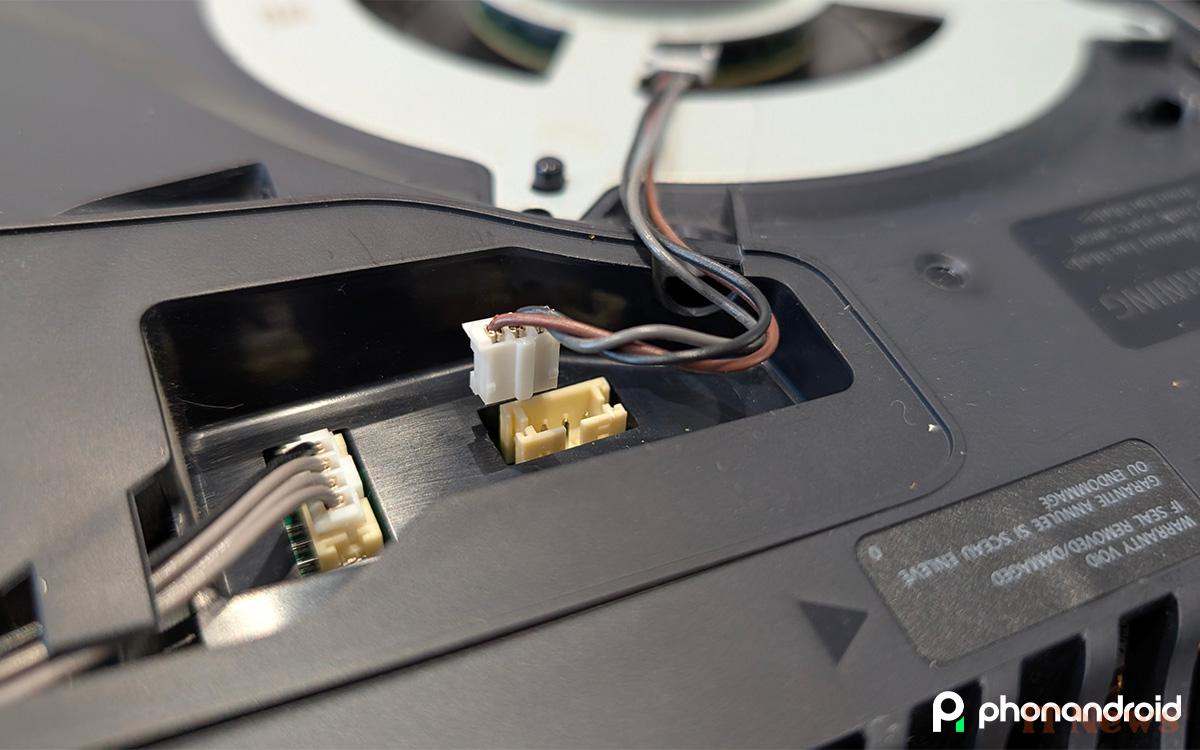
Before you can remove the fan, you will need to properly disconnect it from the motherboard. On the right side of the fan, you will see a matte black cover. This is where the fan connector is located: Carefully insert the flat end of the spudger or a flathead screwdriver under the black cover through the small hole above the fan wires. Be sure to lever up the cover. Do not press on the wires or you may damage them. damage/break
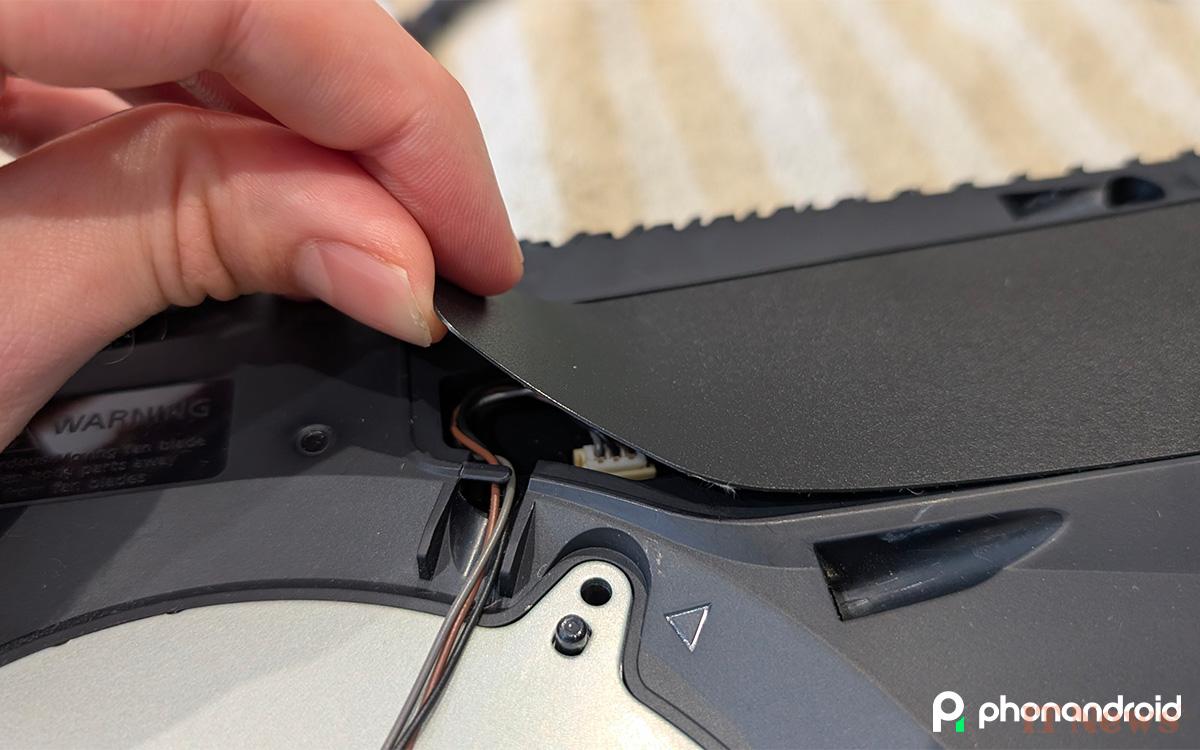
- Peel off the cover enough to grab it with your fingers and remove it completely
Step 6: Disconnect the fan from the motherboard
We now come to the most sensitive step of the process: disconnecting the fan from the motherboard.
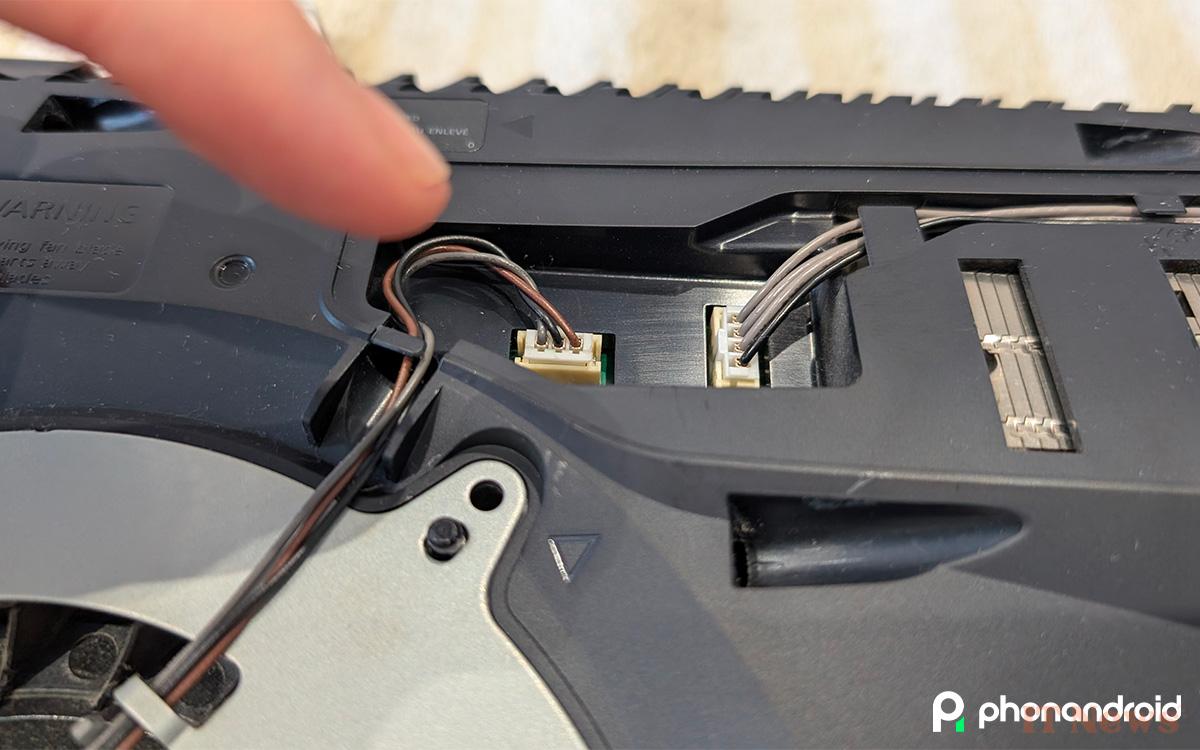
- Preferably with tweezers (or your fingers if necessary), very gently grasp the edges of the connector and gently pull on it to disconnect it from the motherboard
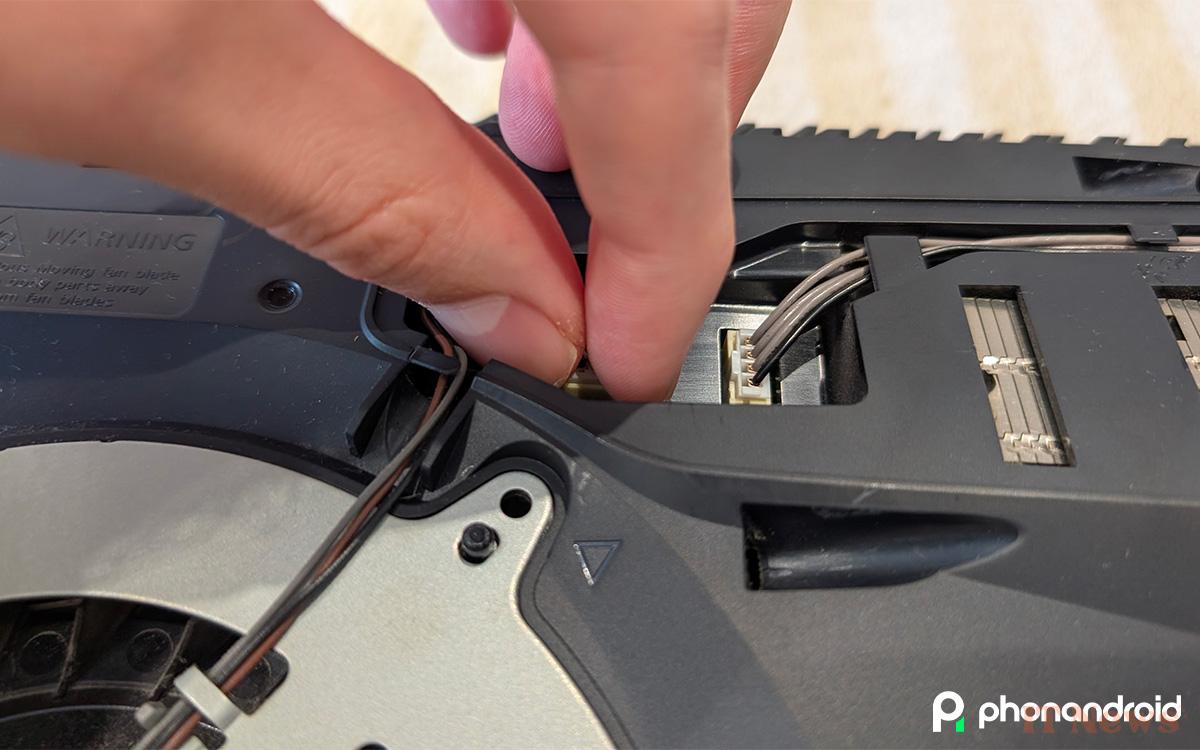
- Be sure to pull from the edges, do not grab the wires under any circumstances as you risk tearing them out
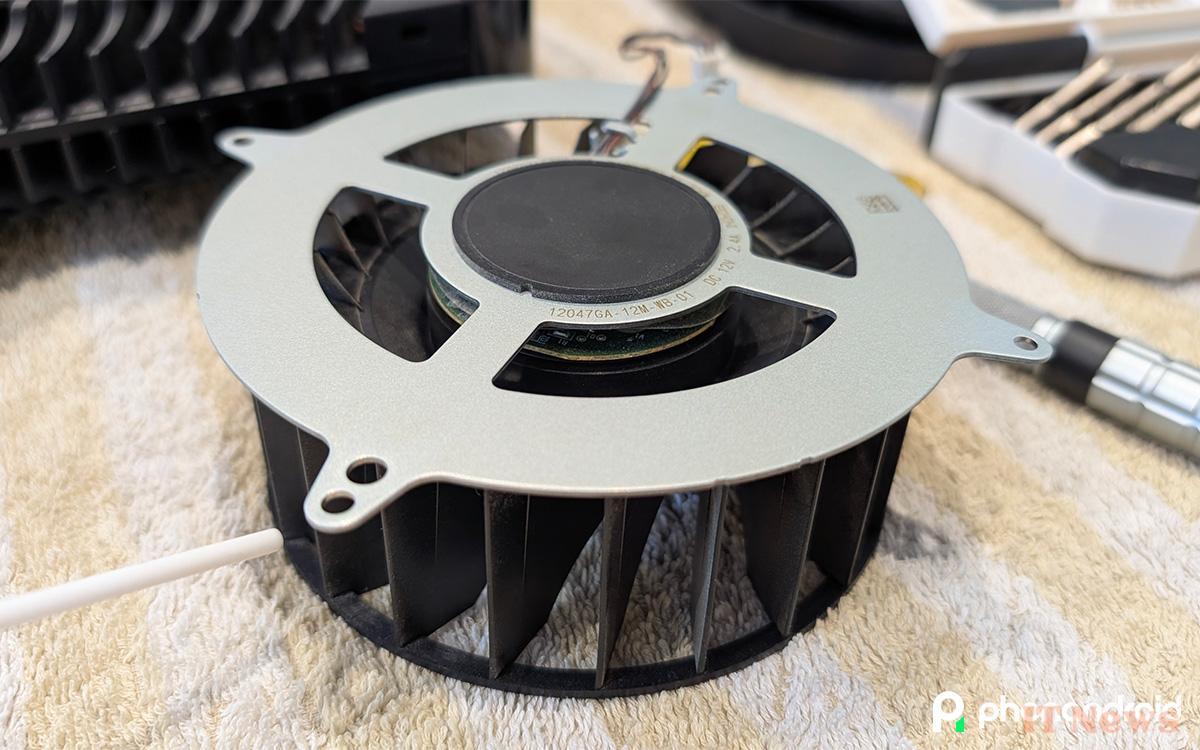
Step 7: Remove and Clean the Fan
Now, all the lights are green to remove the fan from its location:
- Slide your fingers into the gaps to carefully remove the fan from its location
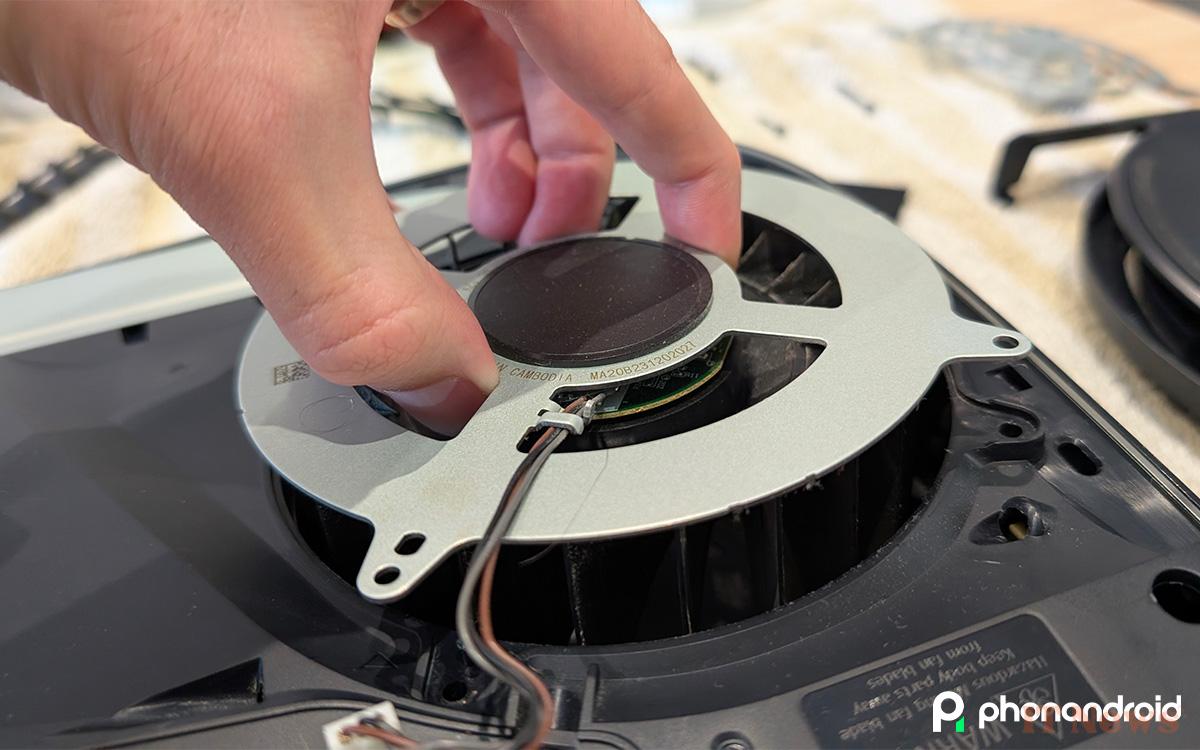
- Now take the opportunity to clean the blades with dust remover and a microfiber
- If some residue persists, you can use very slightly moistened cotton swabs to pass between each blade, but be careful not to leave any cotton marks
- Once the fan is clean, put it back in its place
All you have to do is reassemble your PS5 by following the previous steps in reverse order. A word of advice: remember to put the fan's protective grille back on before tightening the four screws!


0 Comments